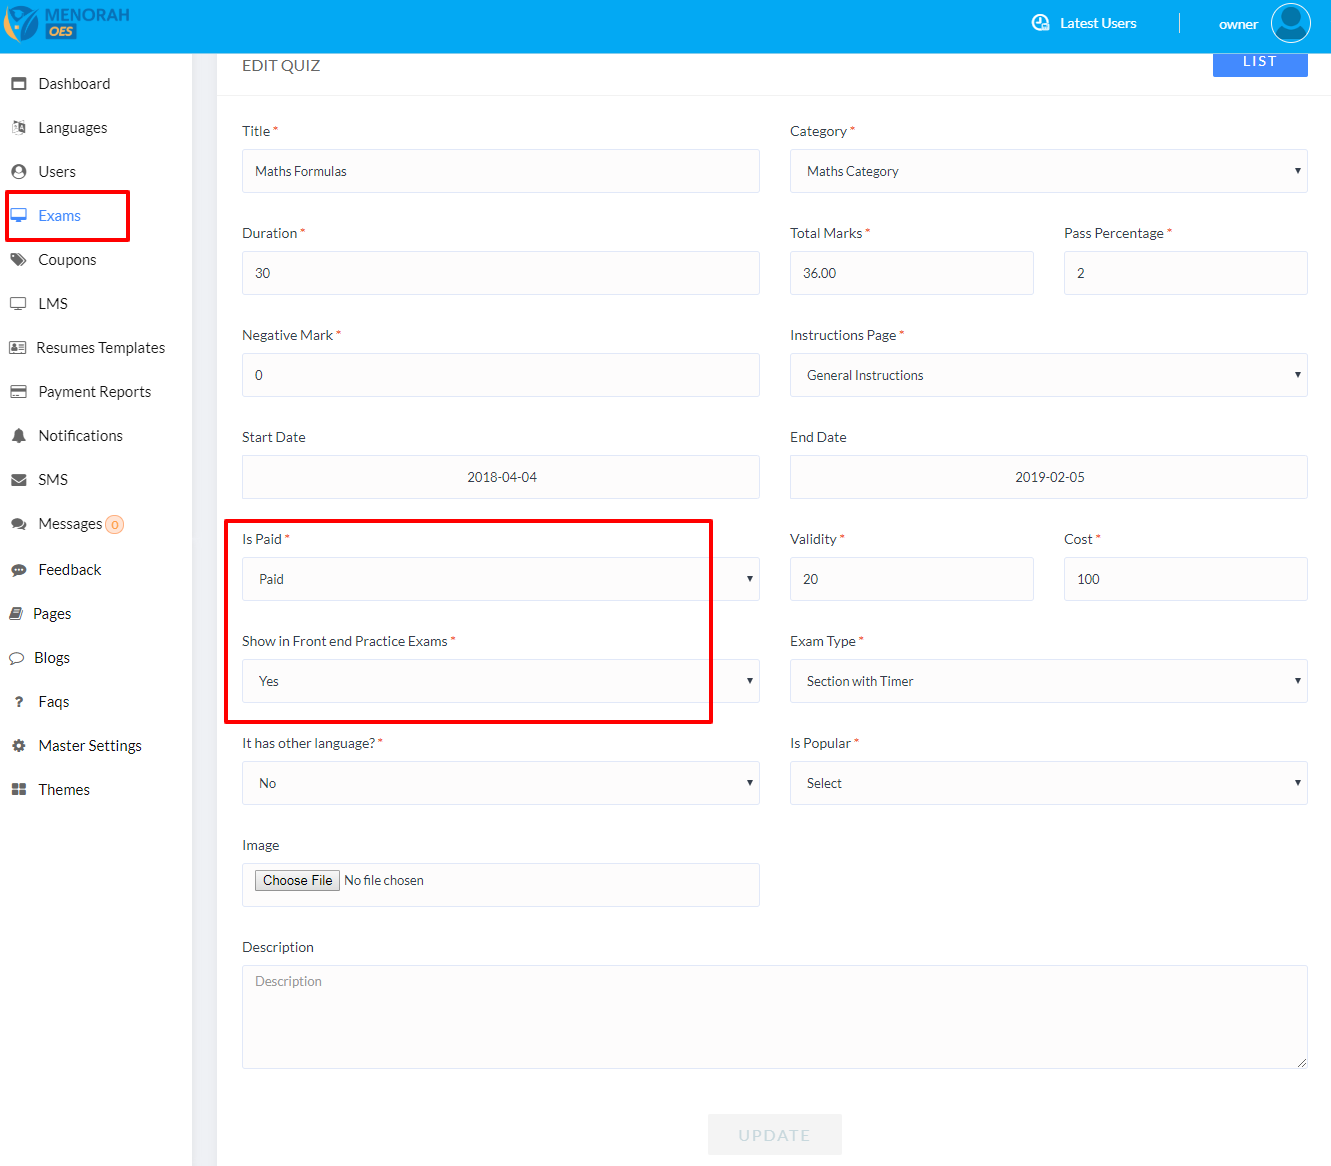
If quiz type is Paid, If user not logged in then it will redirect to login page when user tries to attempt paid exam
If quiz type is Paid, If user logged in then it will follow same procedure as purchase quiz then user can attempt quiz
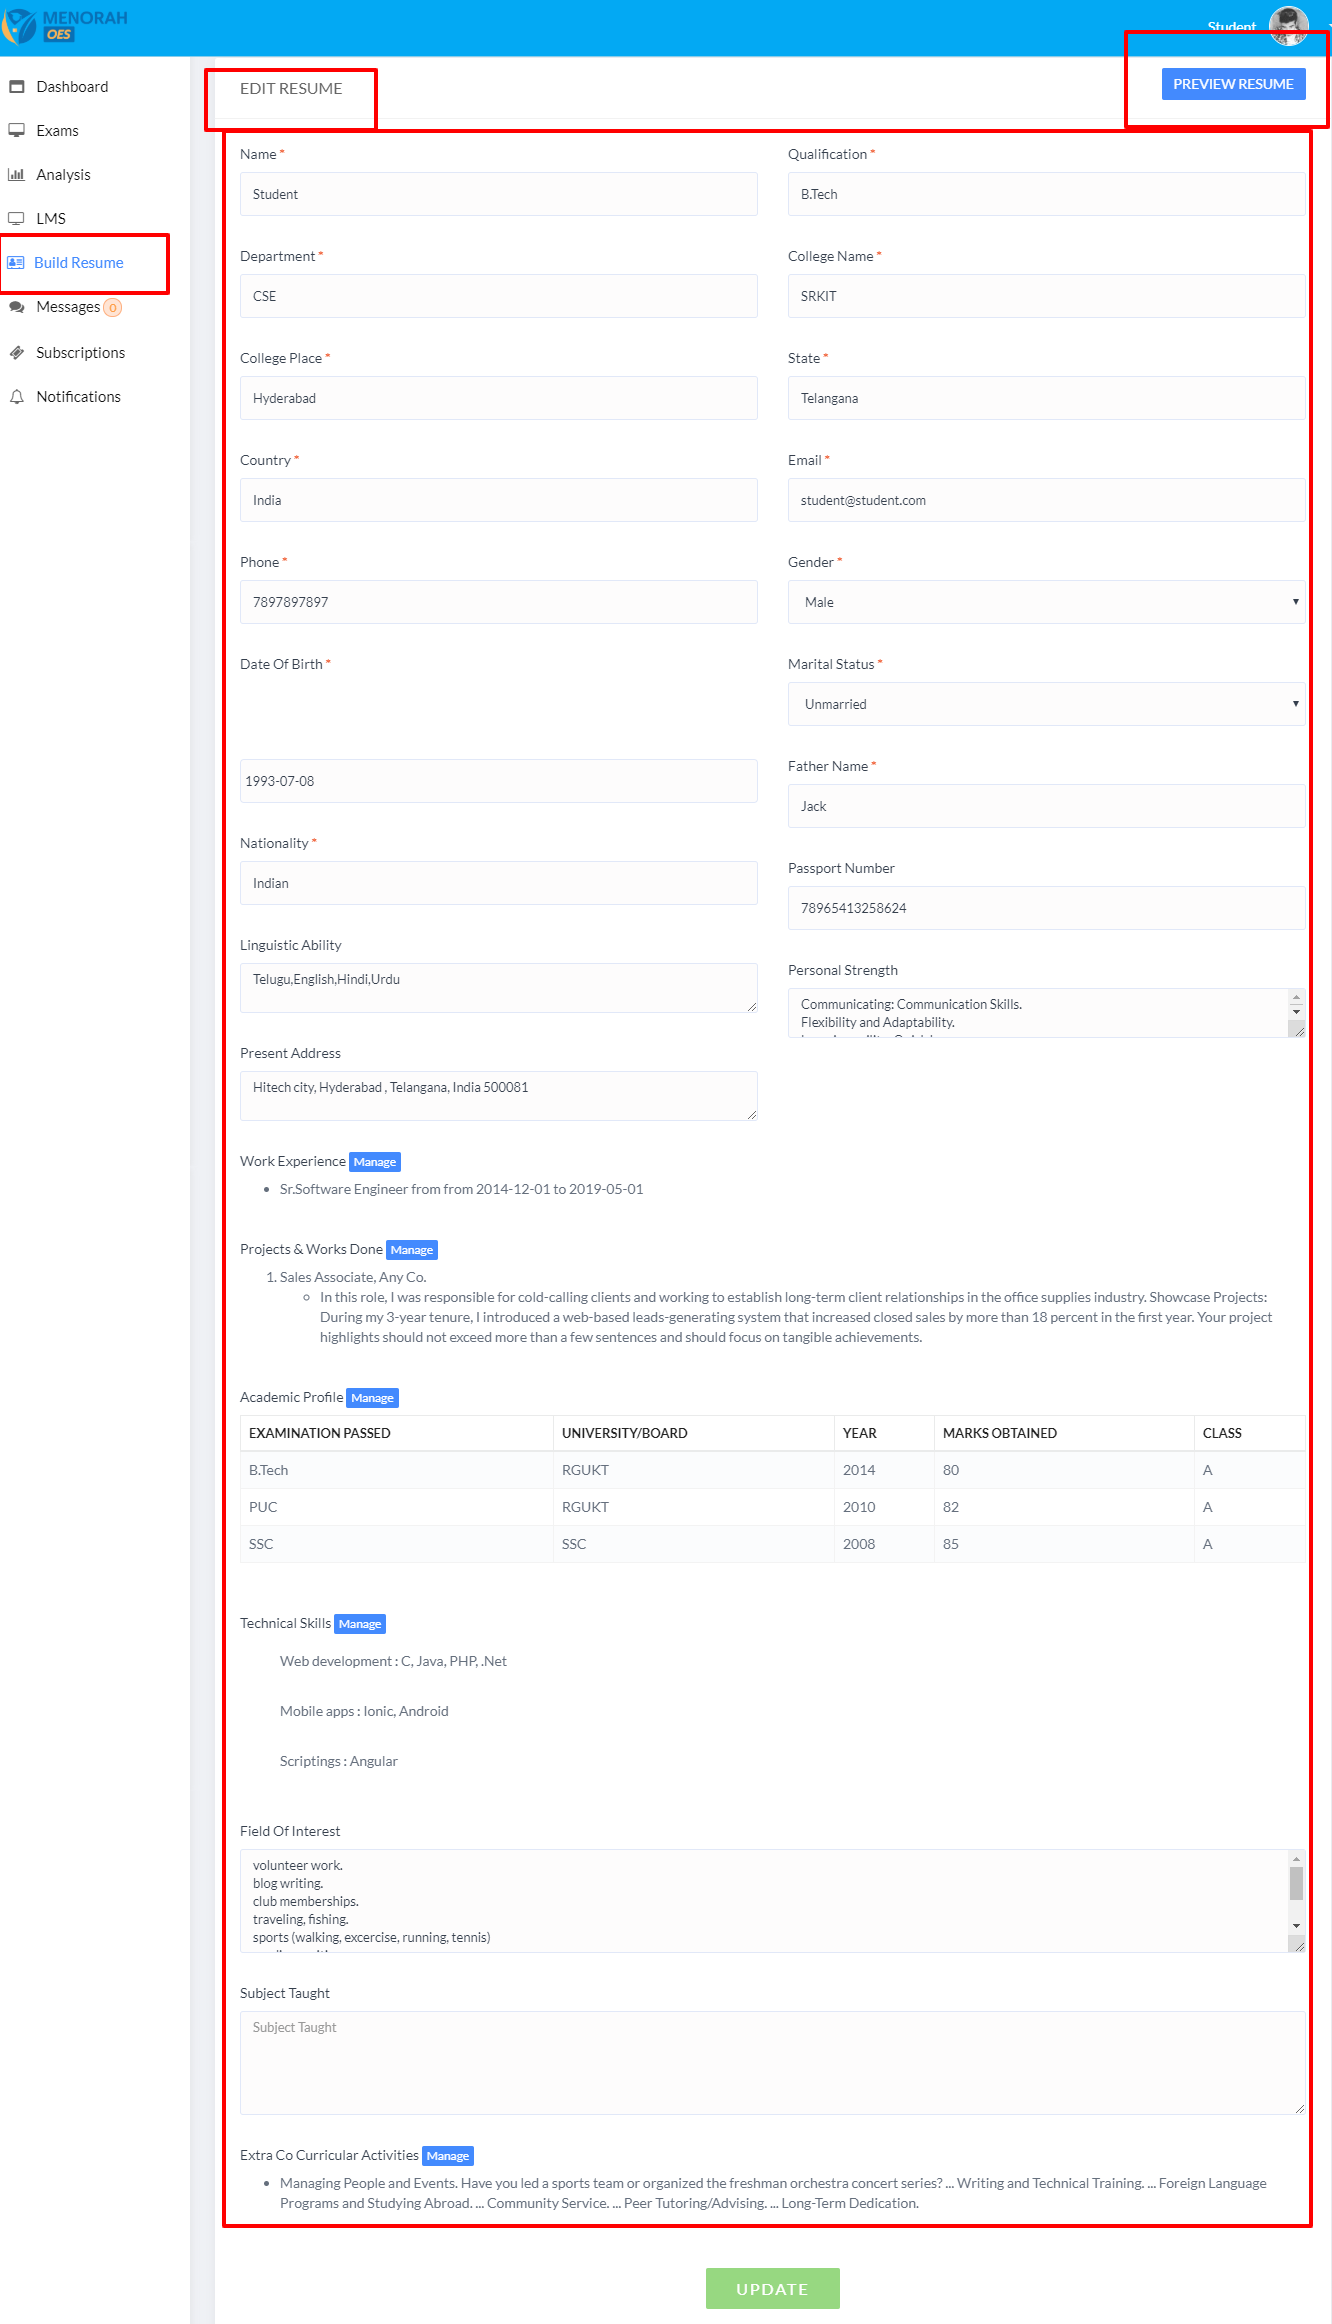
Student can create resumes in his account.
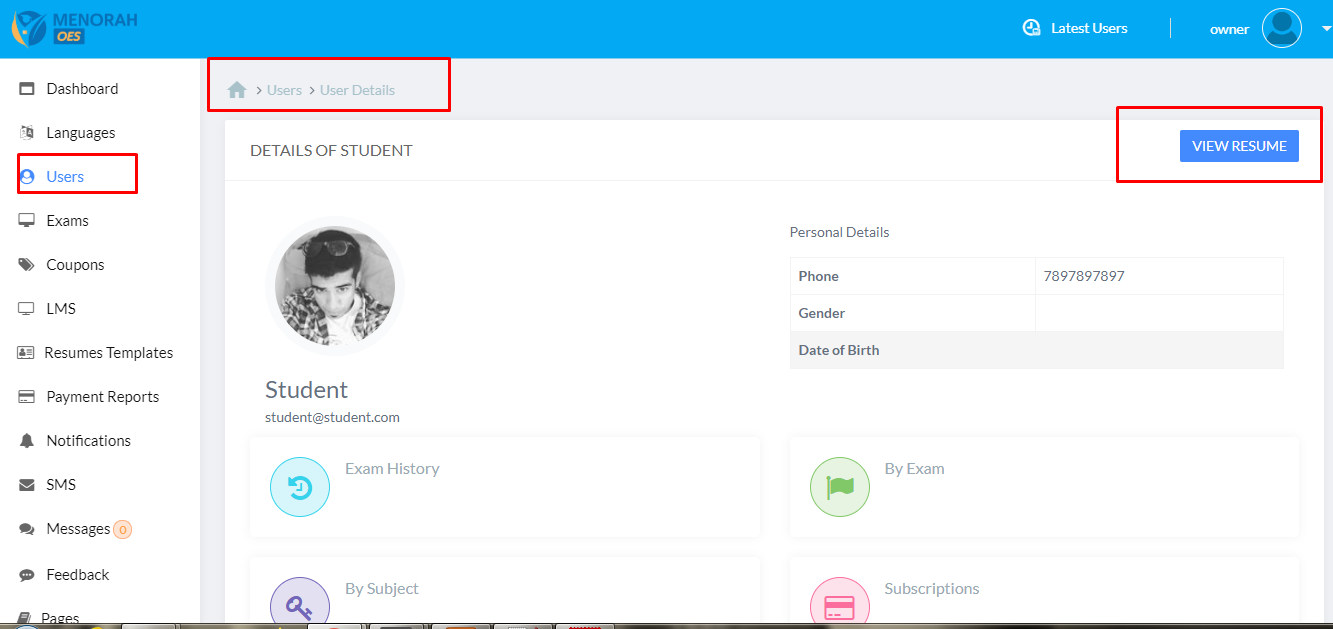
Admin can view resumes of any user from his panel.
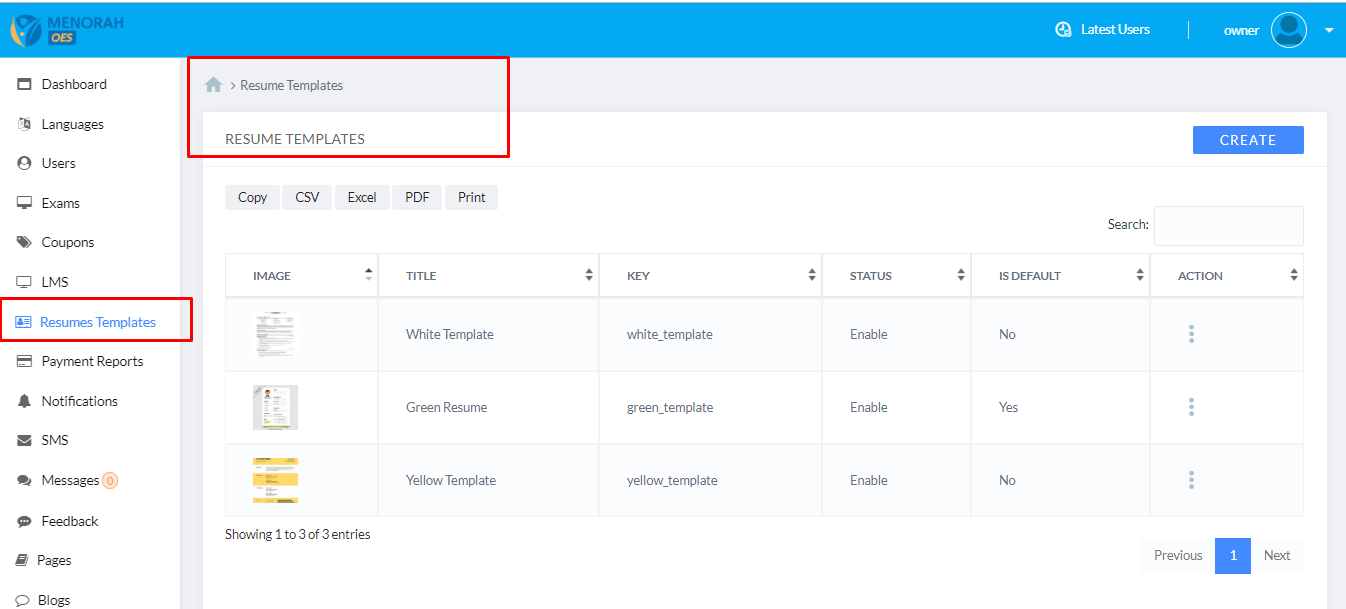
Admin can add,edit,delete resume templates, These are templates which student can utilize after he created his resume.
Admin can go to student account and view resume.
It is a examination system with all option that a modern system needs.
It fulfils all the needs of the user for taking the exam
Please follow to installation steps for Localhost
Step1: Extract the Project and Past it in htdocs folder
Step 2:
localhost/project_folder_name/install
eg: localhost/exam/install
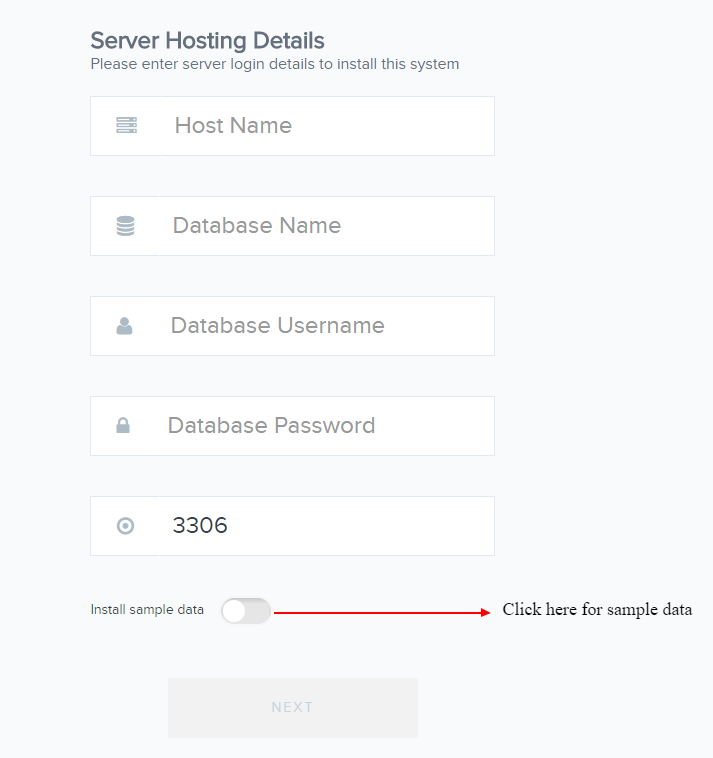
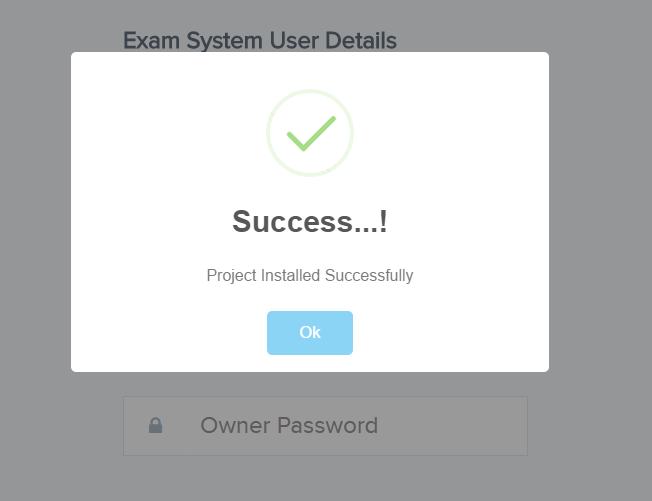
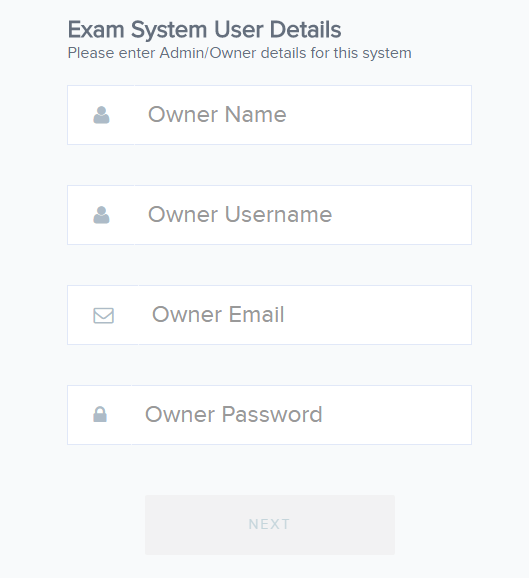
and follow the screenshots
Installation Process :
Create user account for the first time
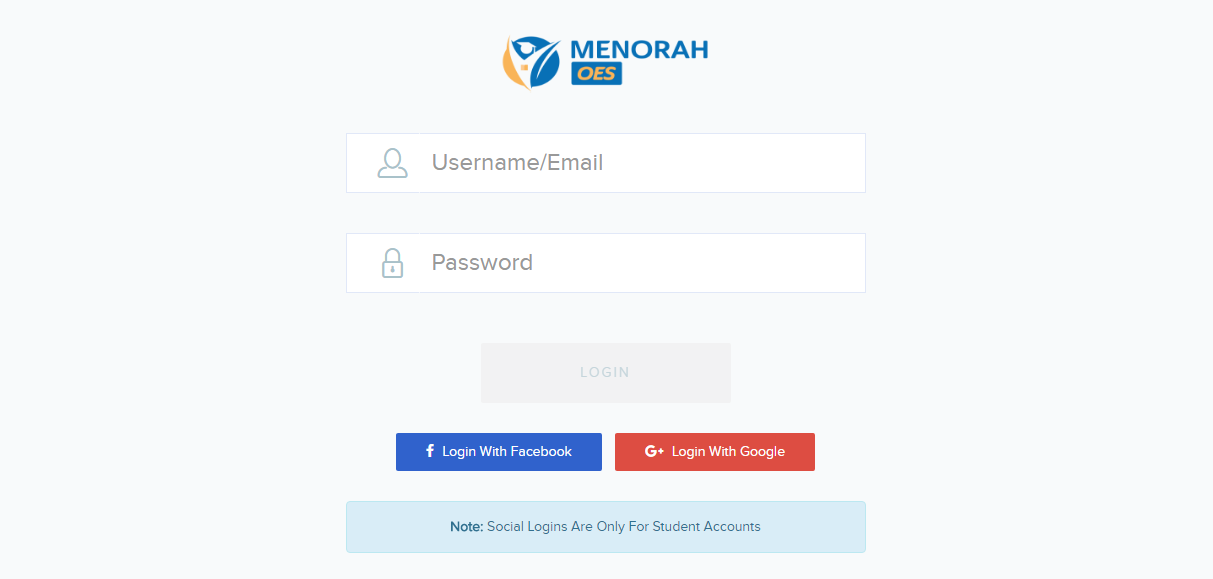
After successfully creation of the user, it will be redirected to login screen
Note: If database already eixsts, please edit the .env file which is at /project-folder/local/.env
Update the following information in .env file
DB_HOST=localhost(default)
DB_PORT=3306(default)
DB_DATABASE=Your database name
DB_USERNAME=Database Username
DB_PASSWORD=Password
- Cpanel Login
- Go to File Manager
- Click on Public_html folder(Check weather project installed or not)
- Upload the Project folder Zip into Public_html folder
- Extract the Zip folder here
- Create the Database using Mysql Wizard
- Create Database
- Note down DB Name,DB Password,DB Username,
Type URL www.yourserver-address/install
and follow Installation Steps
Manuall Installatation:
Note: If you are installing the system manually, please do install the database with data as it has default admin user with credentials owner@owner.com and password
- Go to Phpmyadmin (Check weather Database Created or not..? )
- If Database Created upload the Database file which is available in Project Folder/public/downloads/database/install_dummy_data.sql and click on Go
- Edit the .env file in project folder and update with new Database credentials(Which already created).
Still you’re facing Issues in Configuration Please Contact Us:
Overview:
This document provides instructions on how to properly setup a Facebook application so that users can login/register via Facebook on your site.
Creating a new app
To allow users to login to your site with their Facebook account you need to create a Facebook app. To create a new Facebook app please do the following:
- Go to the Facebook Developers site:https://developers.facebook.com/
- If you are not logged in, login to the site using your Facebook account details
- Once logged in, click on Create App button. Fill out the Display Name, Contact Email and choose a category for your app. Then click the Create App button.
Note: After clicking this button you may be presented with a security check
Select "Set Up" for "Facebook Login"
Select "Web option”
Set your "Site URL"
Skip all others step of the process.
Settings Tab ➔Basic
Settings Tab ➔Advanced
App Restrictions - You can restrict your app to specific age range and countries if your site references alcohol or an adult nature site.
Products Tab
- On the Products tab, click on +Add Product then click Get Started button on Facebook Login
- After you clicked the Get Started button, click on Settings under Facebook Login
Client OAuth Settings
You just need to enter your site's login, register and account's social tab URIs into the Valid OAuth redirects URIs field.
You can just leave the Deauthorize Callback URL blank then click on save changes.
App Review Tab
Once you have done all these steps you can go to the App Review tab to make the app live. The app does not need to be submitted for approval as the app will only be requesting the standard data from users. To make the app live all you need to do is click the switch button from No to Yes:
App Setup Complete
Once you have done all that, the app is now complete. You should now add the App ID and App Secret into the Site Settings→ Social Logins if you have not already done so.
Overview:
This document provides instructions on how to properly setup a Google+ application so that users can login/register via Google on your site.
Enabling API
To allow users to login to your site with their Google+ account you need to create a Google+ project and enable Google+ API. To enable API and create new Google+ project please do the following:
Go to Social APIs - Google+ API
Enable Google + API
Creating new project and adding credentials
Enter the project details in the pop-up that appears and click the “create” button
Go to Credentials sidebar and add credentials OAuth Client ID
Which API are you using - Google+ API
Where you will be calling the API from - Web Browser
Create client ID
Credentials
After the client ID is created you will see some information appear on the page
Copy and paste the Client ID and Client Secret into the Google+ tab on the Settings>Site Settings > Social Login page to connect your site to your App.
After Installing the software, you will be redirected to the login page.
Login to the system with the Owner credentials, then you will be redirected to Owner dashboard
With this module you can control the total site based on the requirement.
These settings are loaded to the site as Lazy Loading to improve the performance of the site i.e., load the settings what it requires instead of loading all settings at a time. We made it to hit the database as less as possible for getting the settings
It supports the settings for the following modules
- Site Settings
- Payment Gateway Settings (PayU and Paypal)
- Email Settings
- Certificate Settings
- SEO Settings
- Module Management Settings
- Email Templates
- Paypal Settings
- Payu Settings
- Exam Settings
Site Settings
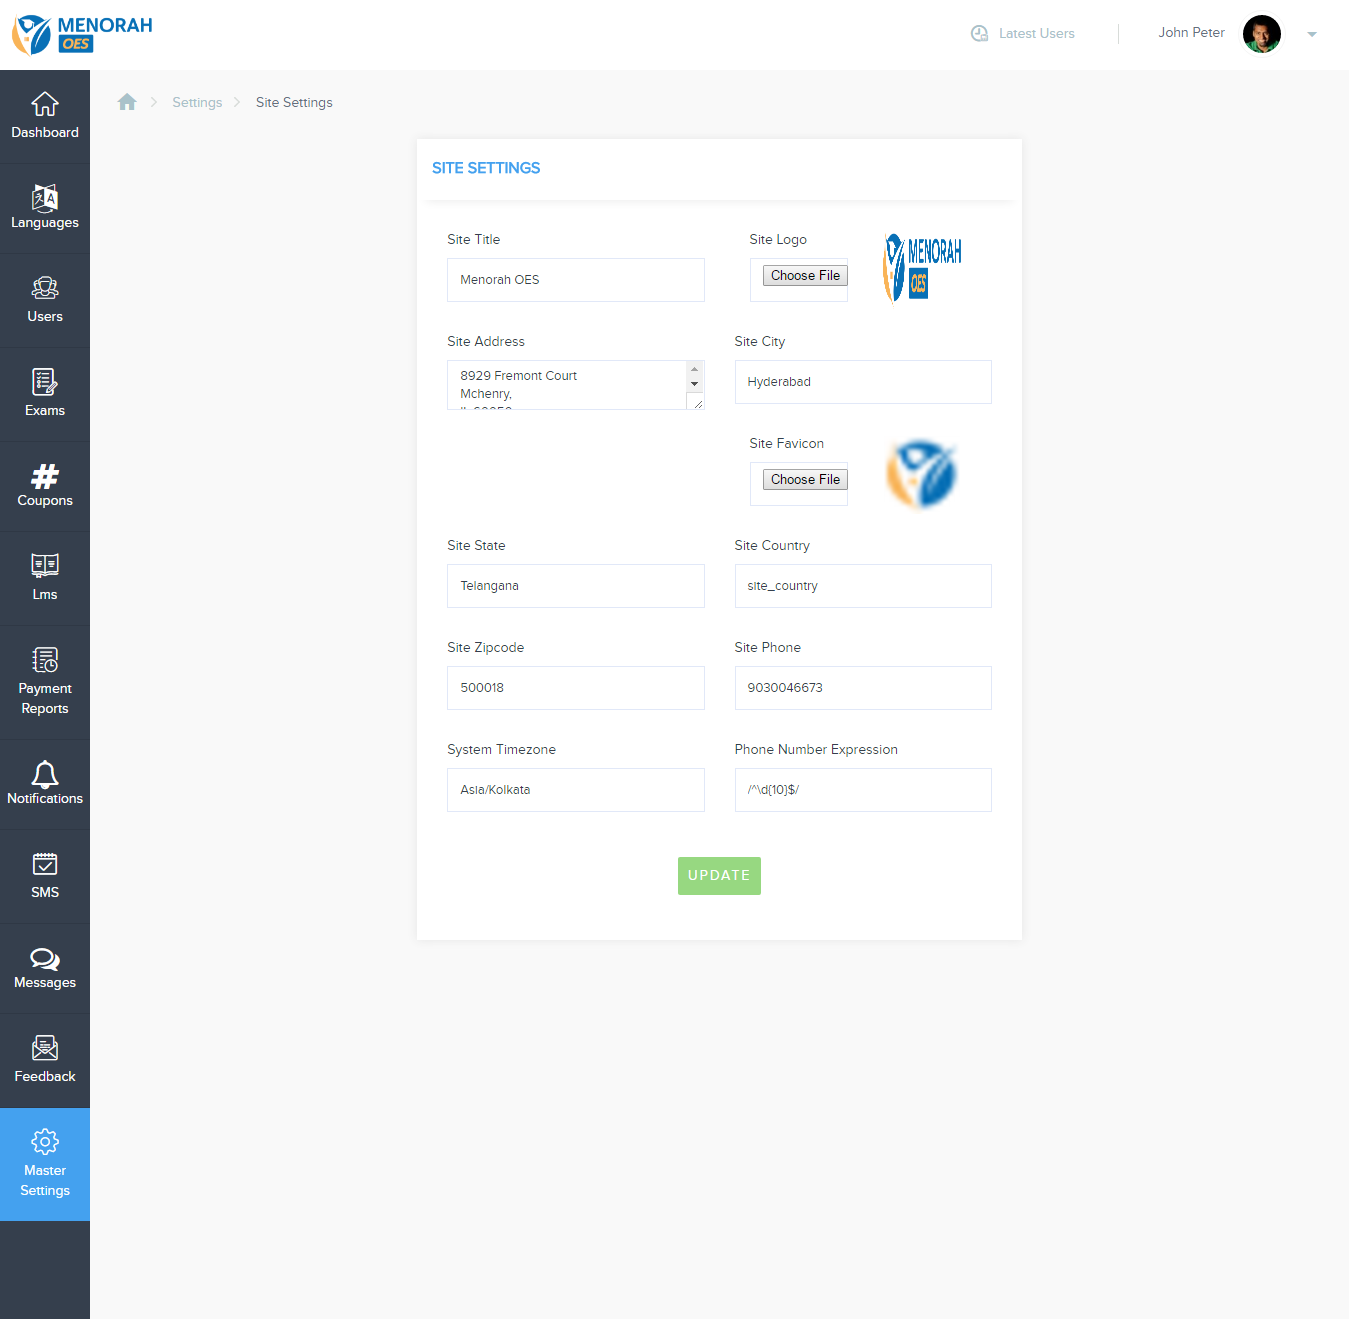
Contains the settings for the site. Please find the description for each field
Site Title: The title of the site
Site Logo: Logo for the site that will be shown
Site Favicon: Favicon for the website
Site Address, City, State, Country, Zipcode and Phone: These details will be displayed at contact us part
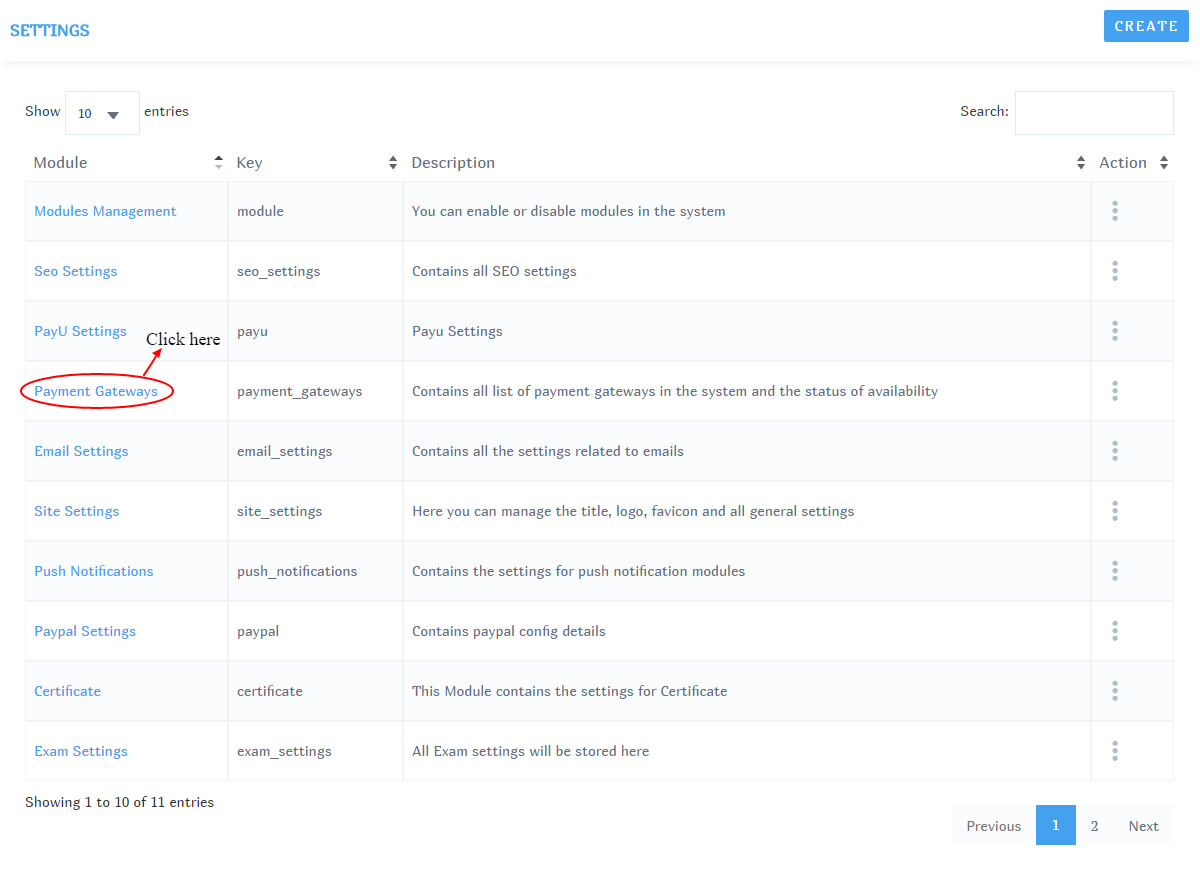
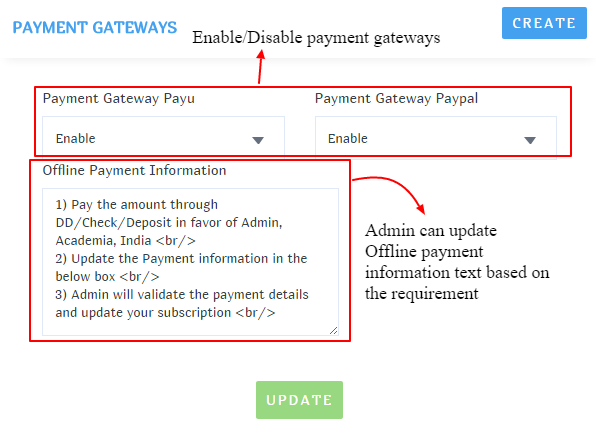
Payment Gateway Settings
Currently it supports two payment gateways PayU and Paypal
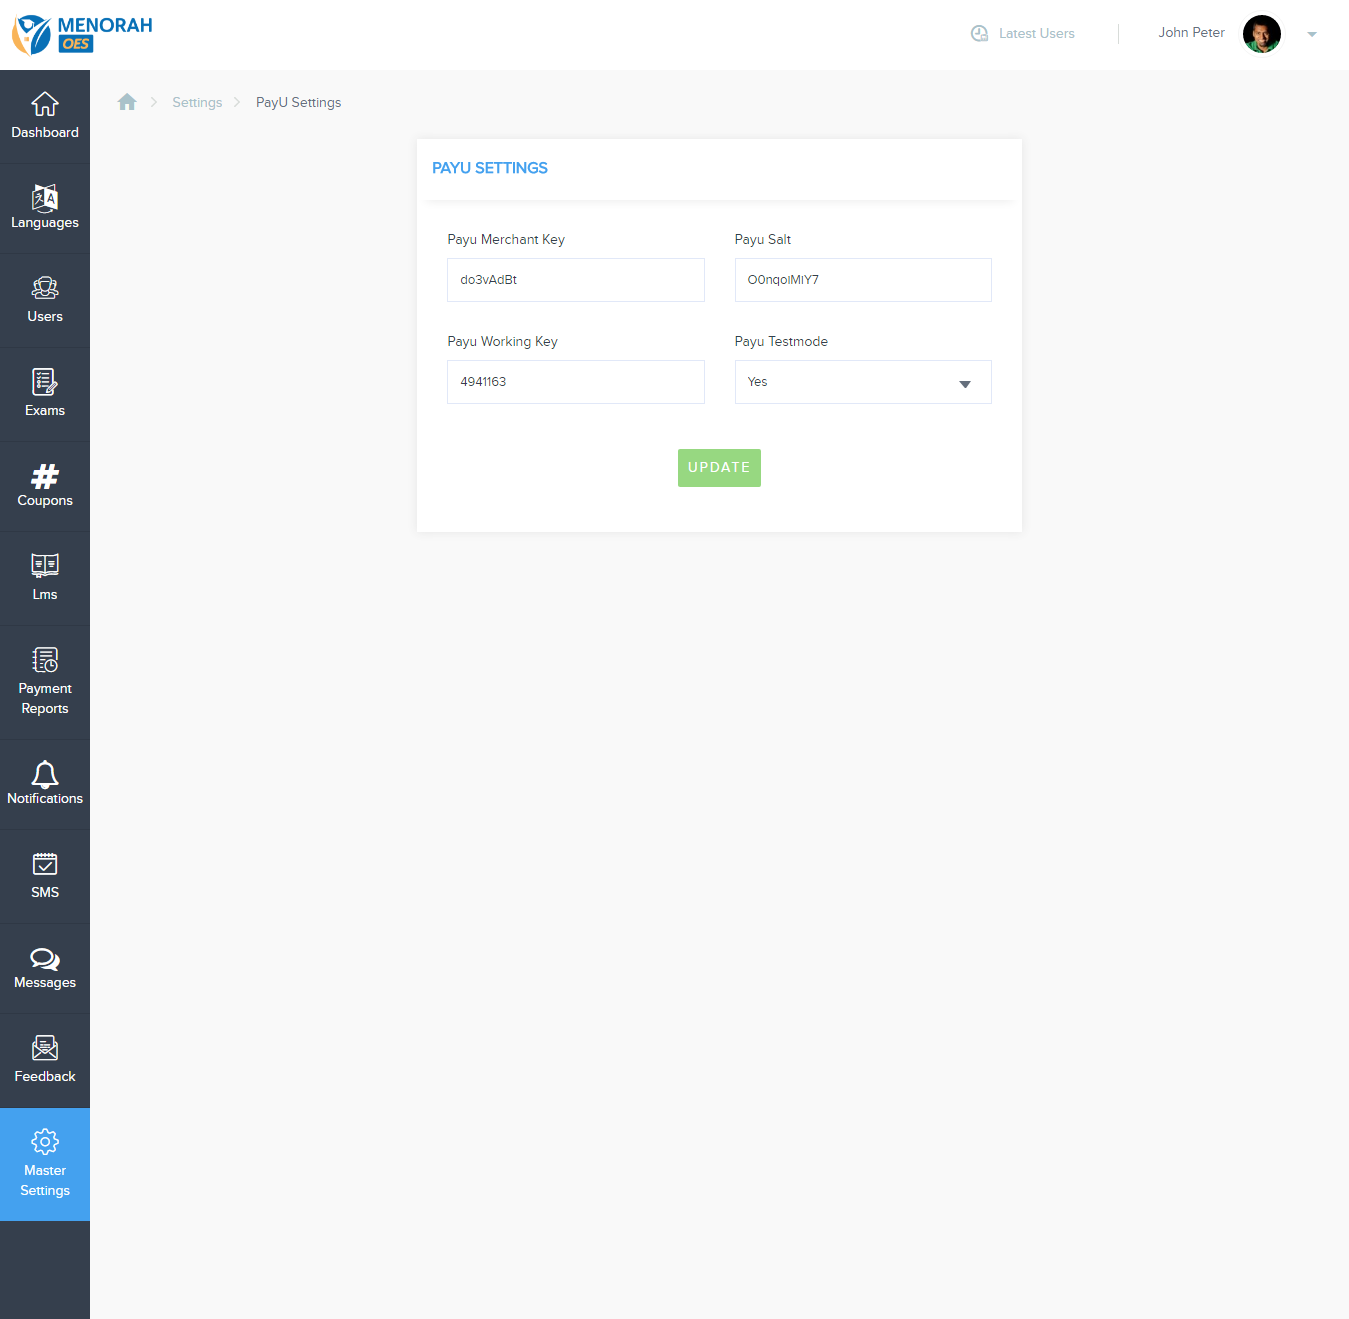
Payu Settings
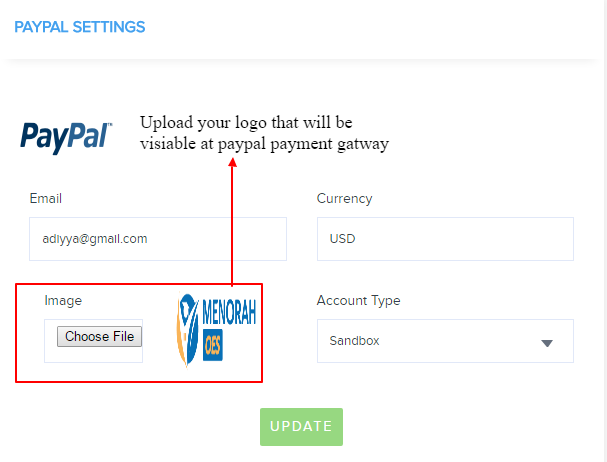
Paypal Settings
Email Settings
This modules provides 8 mail drivers for sending emails. The supported drivers are: SMTP, Mail, Sendmail, Mailgun, Mandrill, SES, Sparkpost, Log
Mail Driver: Select any of the mail drivers from the available list
Mail Host: Update your hosting server
Mail Port: Port number
Mail Username: Admin/user email for sending emails
Mail Password: Email Password
Mail Encryption: default set to null
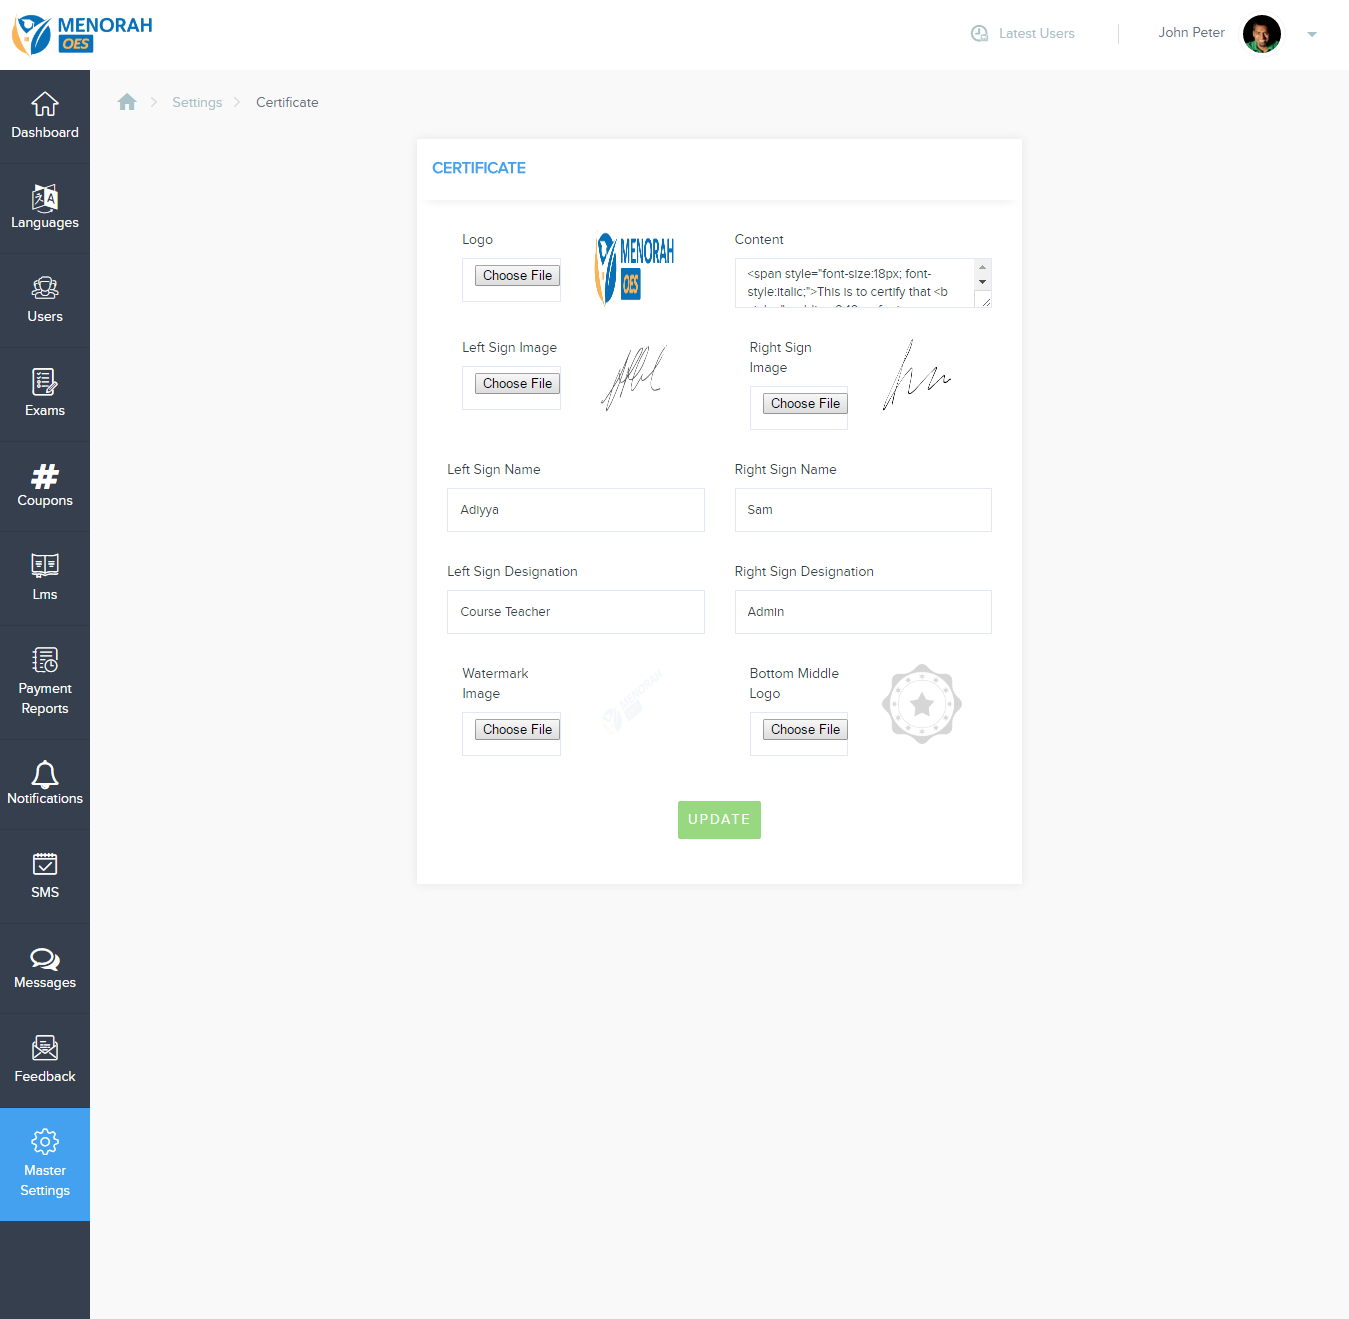
Certificate Settings
With this module you can change the logos and contents of the certificate that need to be generated
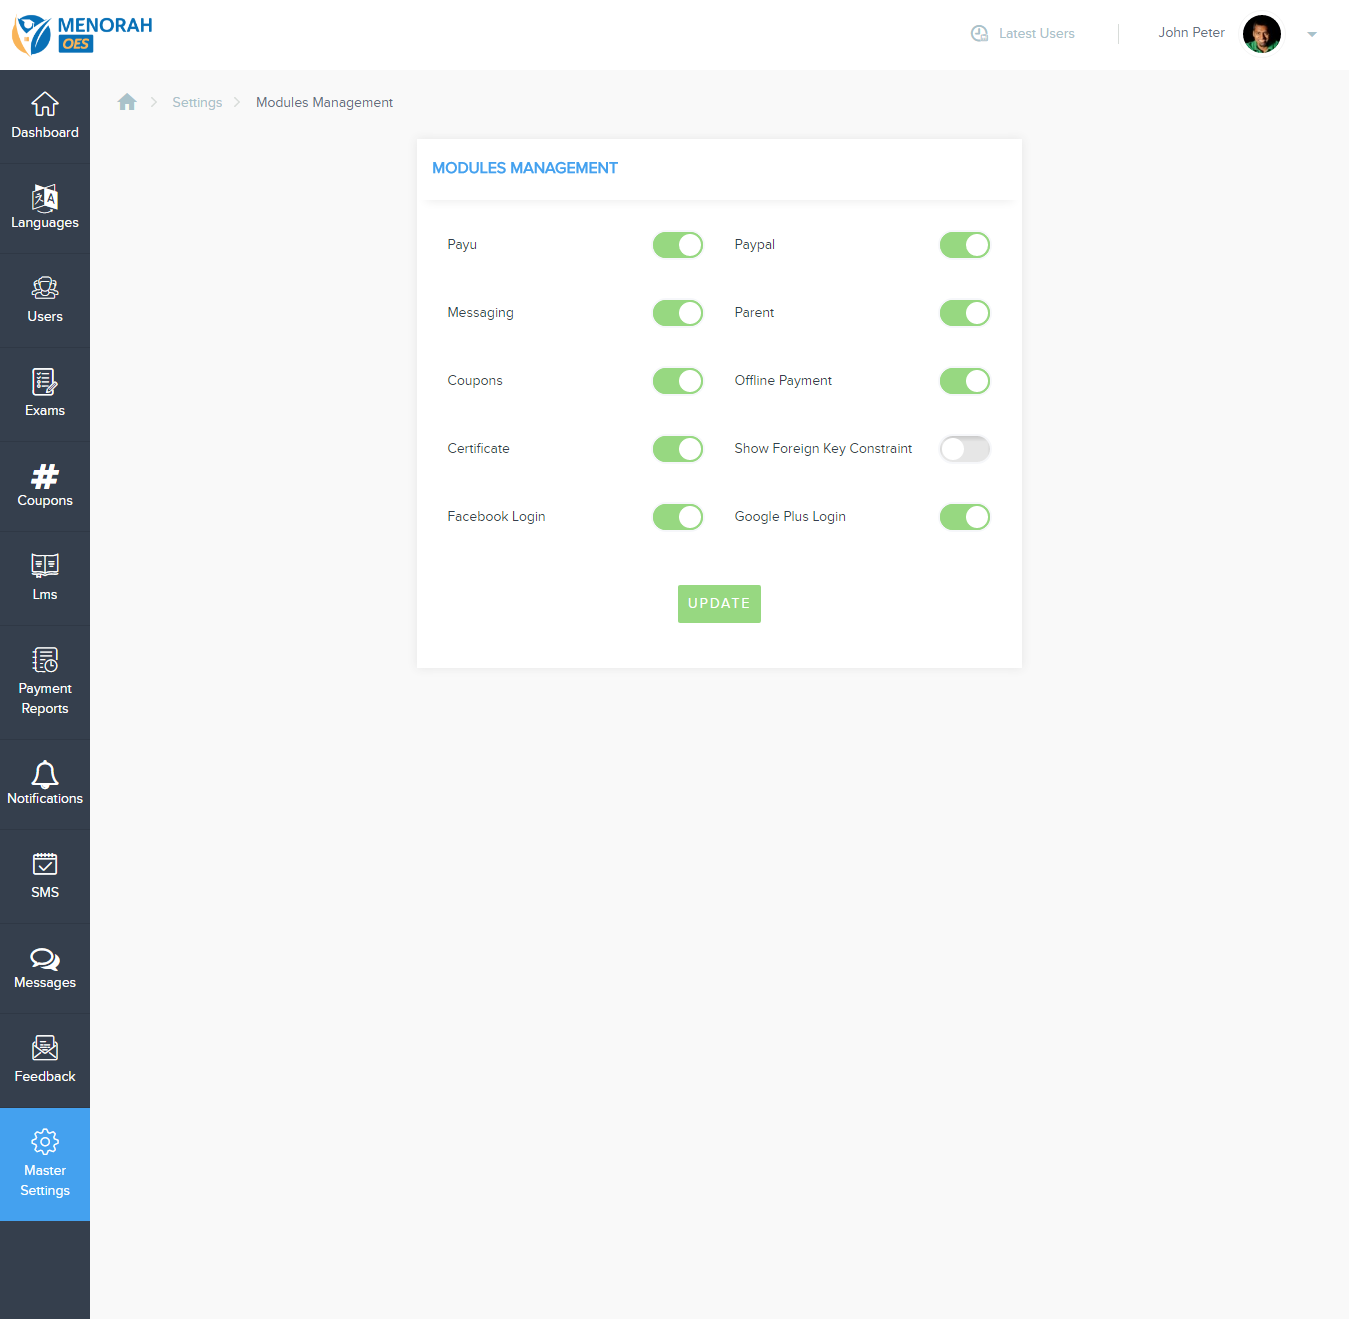
Modules Management
This module gives flexibility to enable or disable any of the modules available in this system.
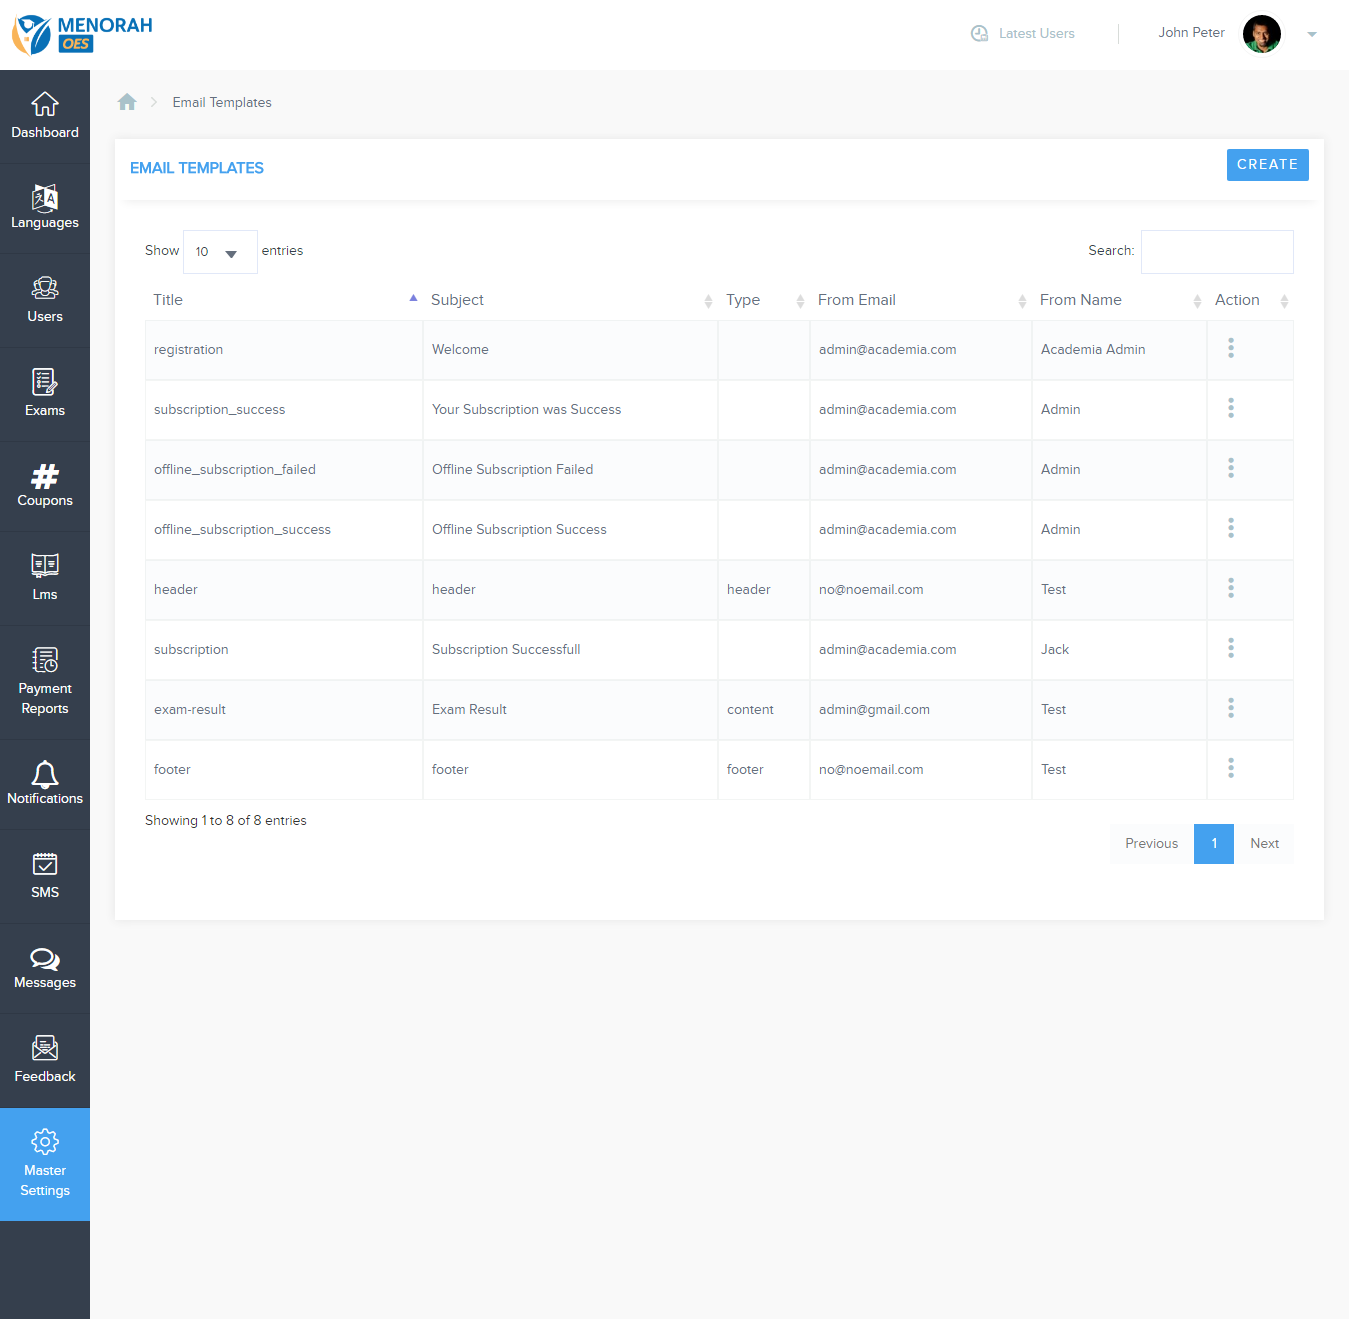
Email Templates
In this module you can edit email templates as per your requirement
We have divided this template into 3 parts
Here the header and footer are common templates for all the email templates. Change at one place and it will be updated in all other templates.
You can edit the Content part as per your requirement in each template.
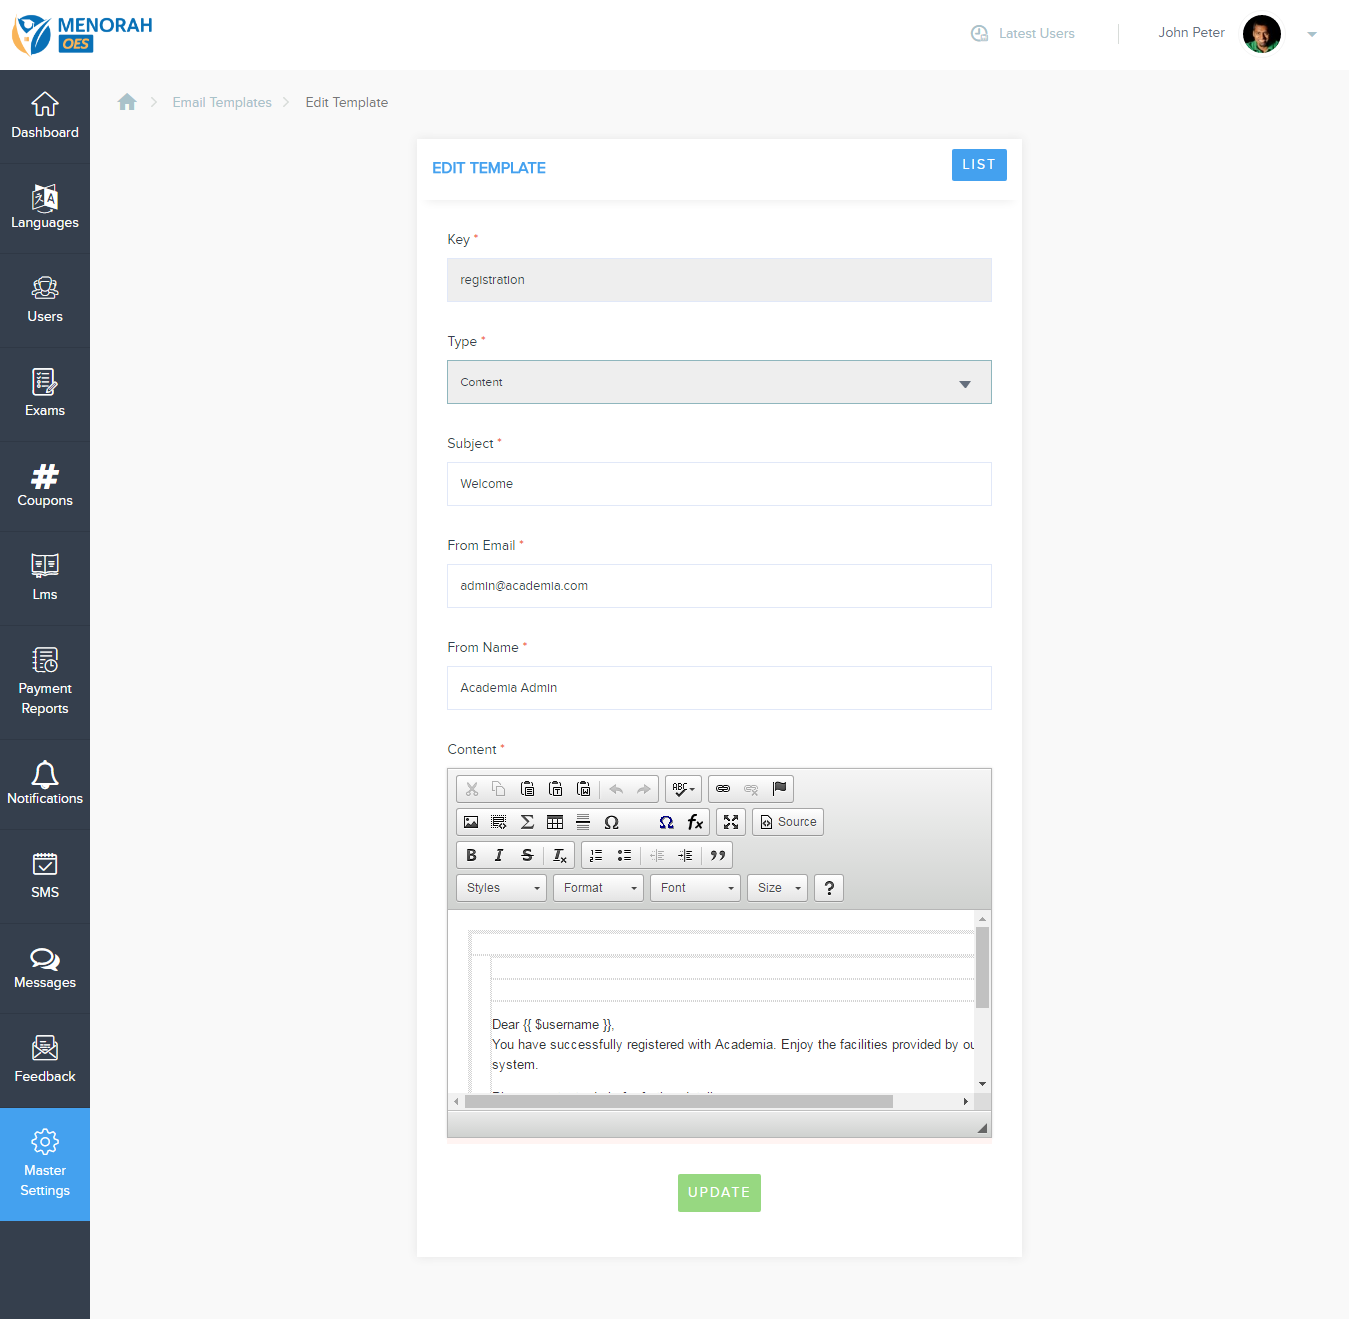
Editing email template
In this you can edit the subject, from email, from name and content of the email as per the requirement
This module helps you to make your site multilingual
Here we provided flexibility for user to change the site language as per the requirement
In this, you can create, edit or delete the languages
At any point of time you can set any one language as the default language.
Features
- Language strings created by it self
By creating any new language, no need to update the strings. Our algorithm will generates the language strings from you and google API. For this you have to traverse the total site for the first time, so that our algorithm will fetch the strings from Google API and saves to database. From the next visit it will fetch the language strings from database
- Lazy loading
- Option for edit strings
With this option, if the strings generated by Google are not meaningful as per the language specification then you can edit the strings manually as per your requirement
Note: The Updated Language Strings are Effected only when user re-set the default language
- Set the default language
Create Edit Language
Enter the language name as per your choice
Enter the language code as per the Google language codes provided
(https://cloud.google.com/translate/v2/translate-reference#supported_languages)
Setting default language
Update Strings
With this module, you can control all the users of the site
Features
- Multiple users types
- It supports total of 4 types of users i.e.,
- Owner: This user will have all options enabled in the site
- Admin: This user will have all options except delete option for the records
- User: This is a normal user who will have normal option enabled for taking the quiz and viewing the reports
- Parent: This user is having few option, i.e, to add the children/user, view the performance reports and to buy the packages for the user
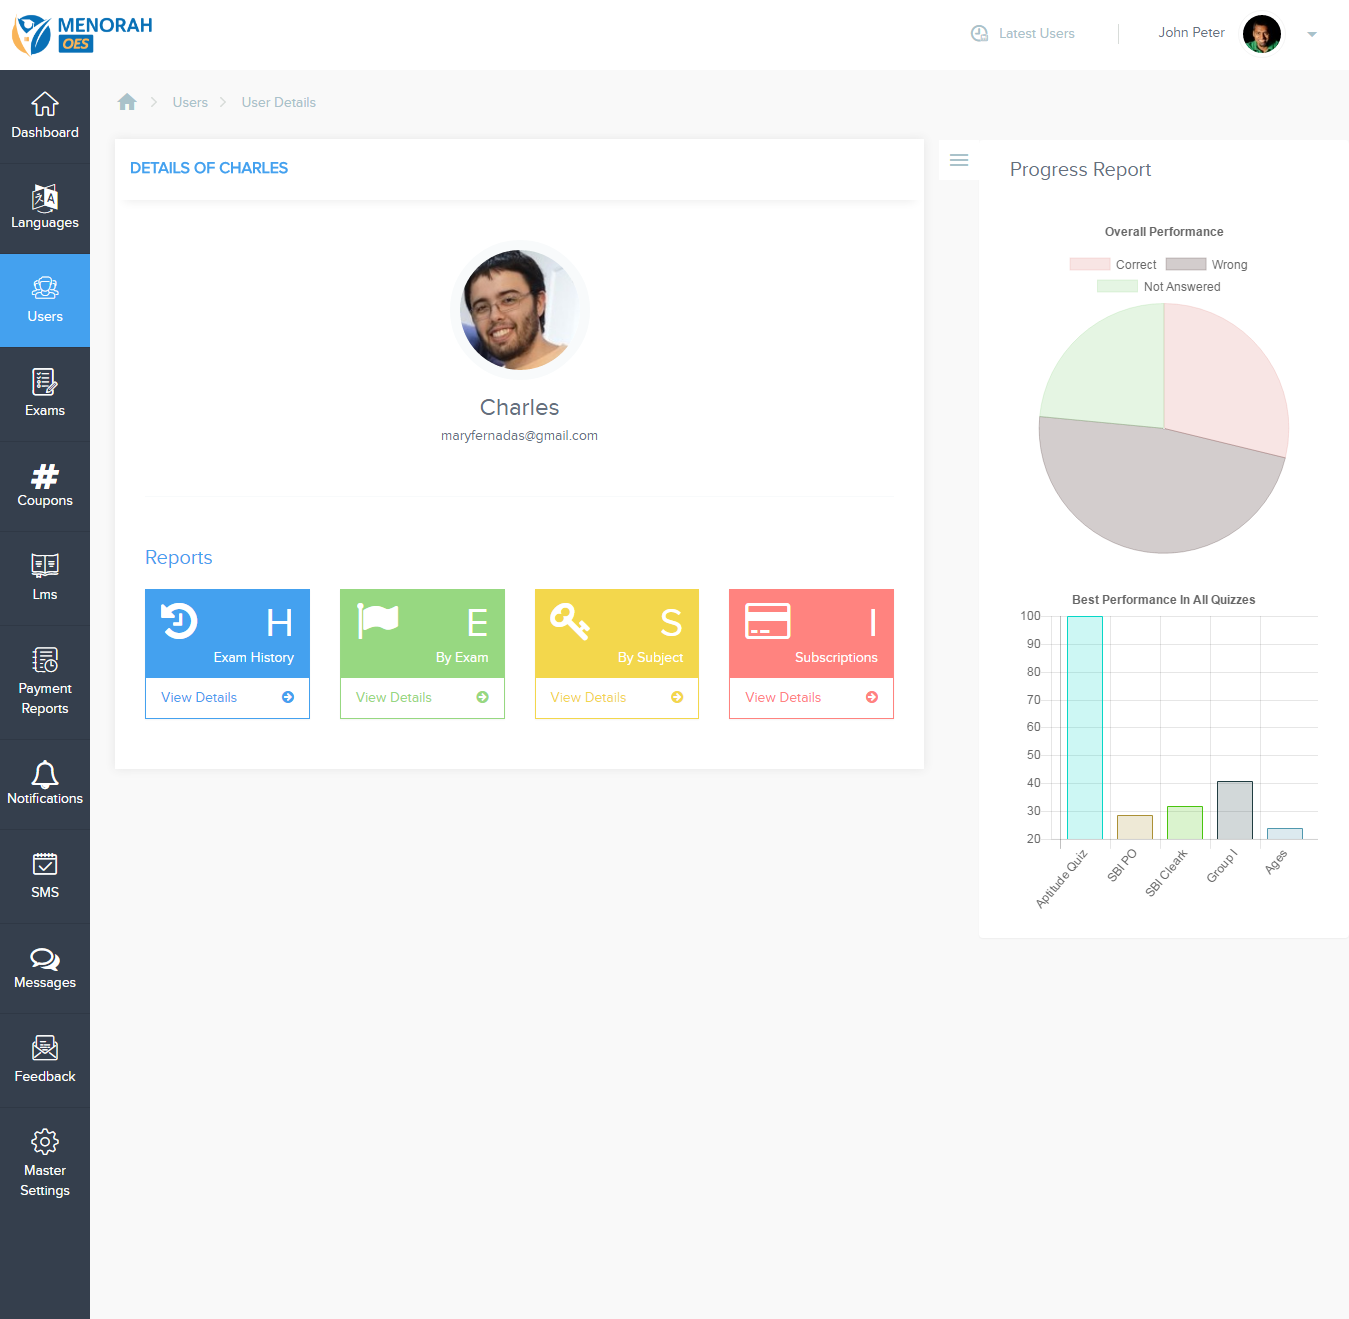
- View detailed reports of user
- With this option, you can view the total user reports
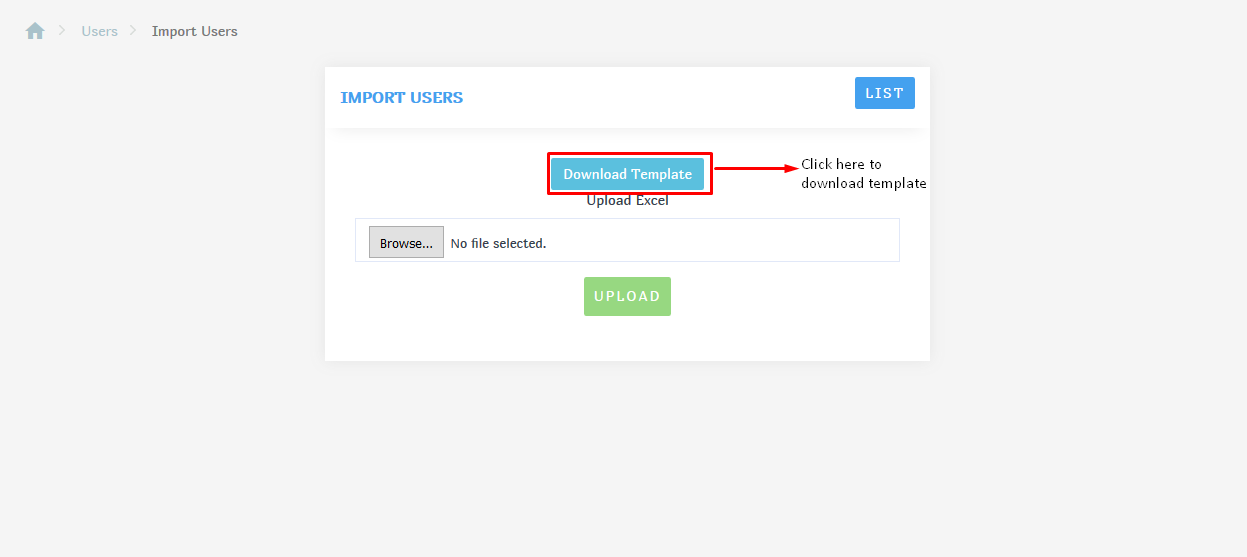
- Import users by Excel
The difference between Owner and Admin is, Owner can delete any record but admin cannot delete.
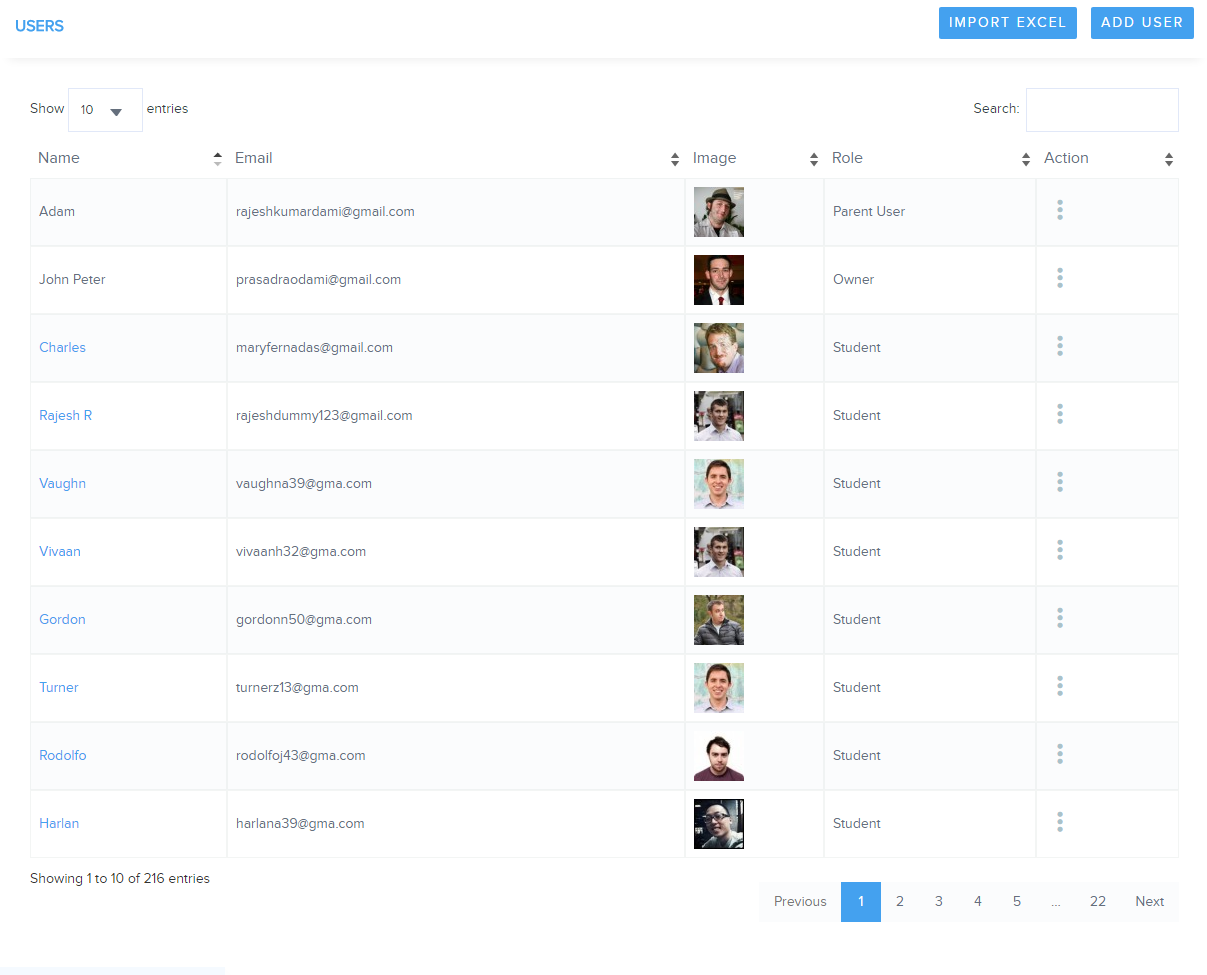
List Users
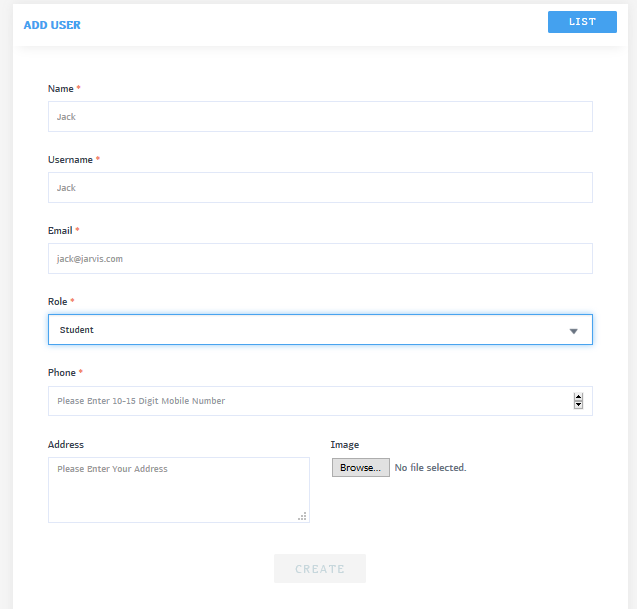
Add User
View User
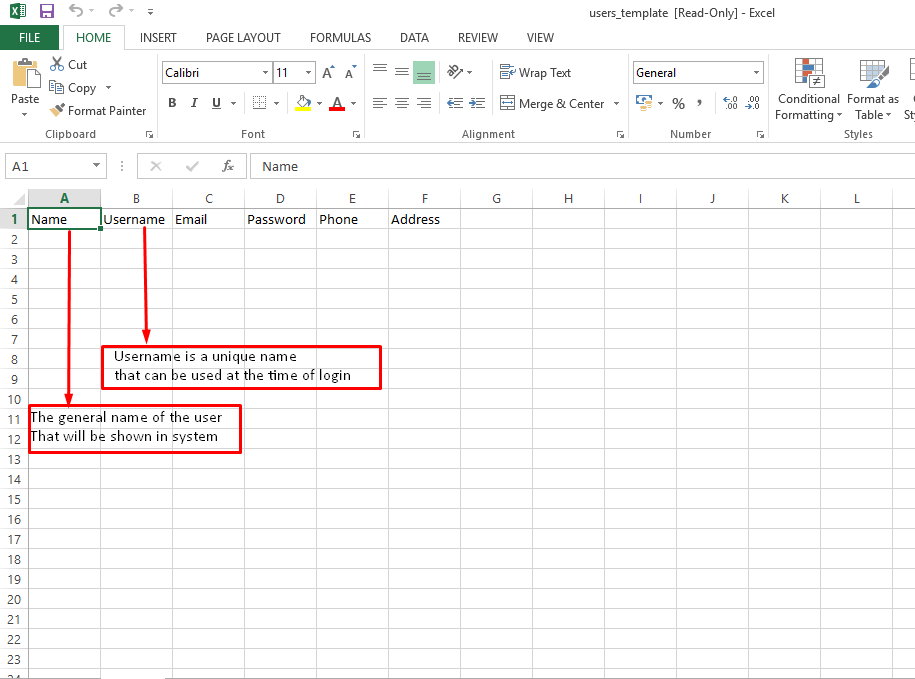
Import Users
Update the template
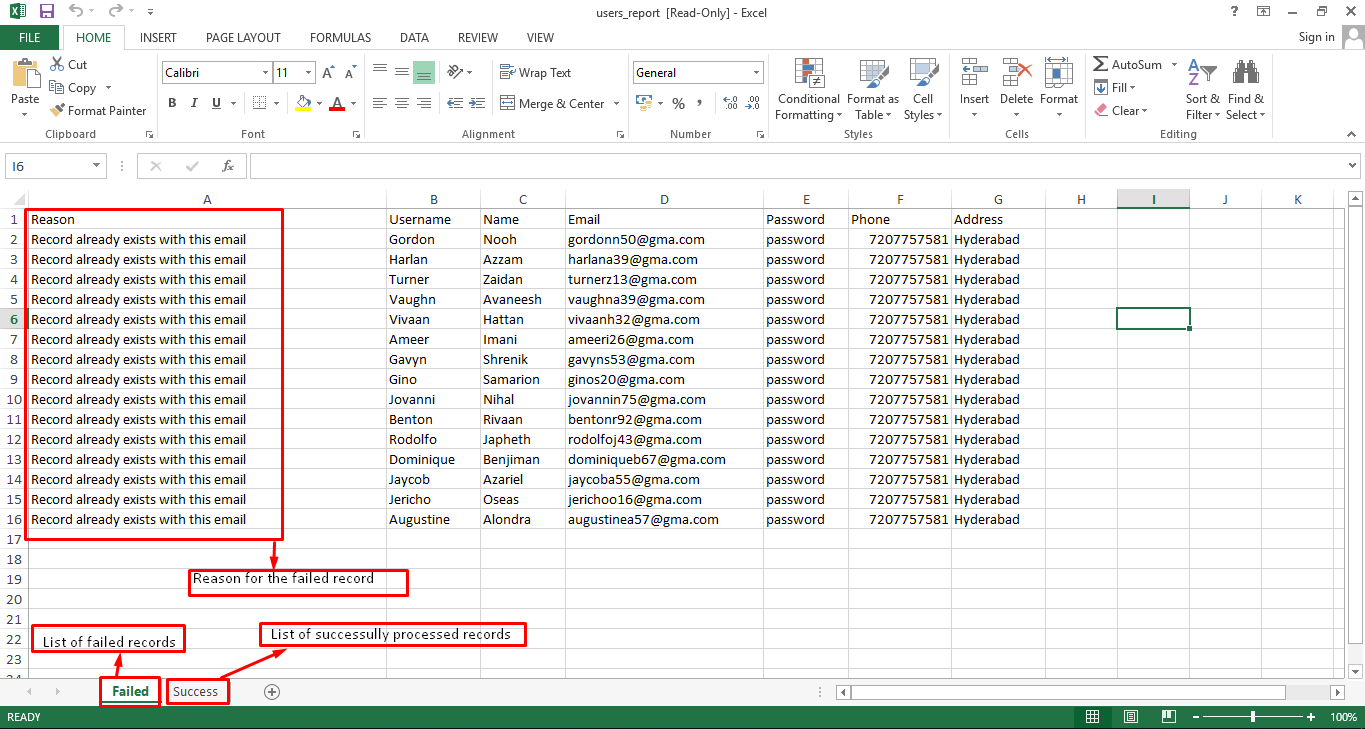
View the report
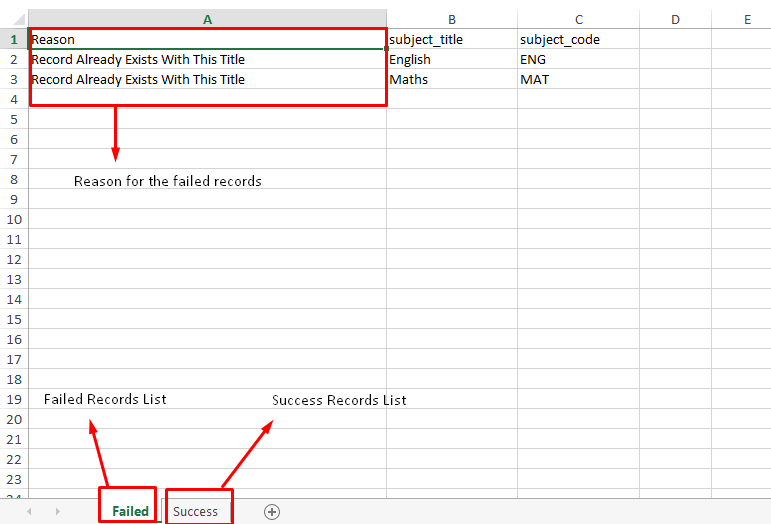
In this you will be updated with clear messages for the updated and failed records
Features
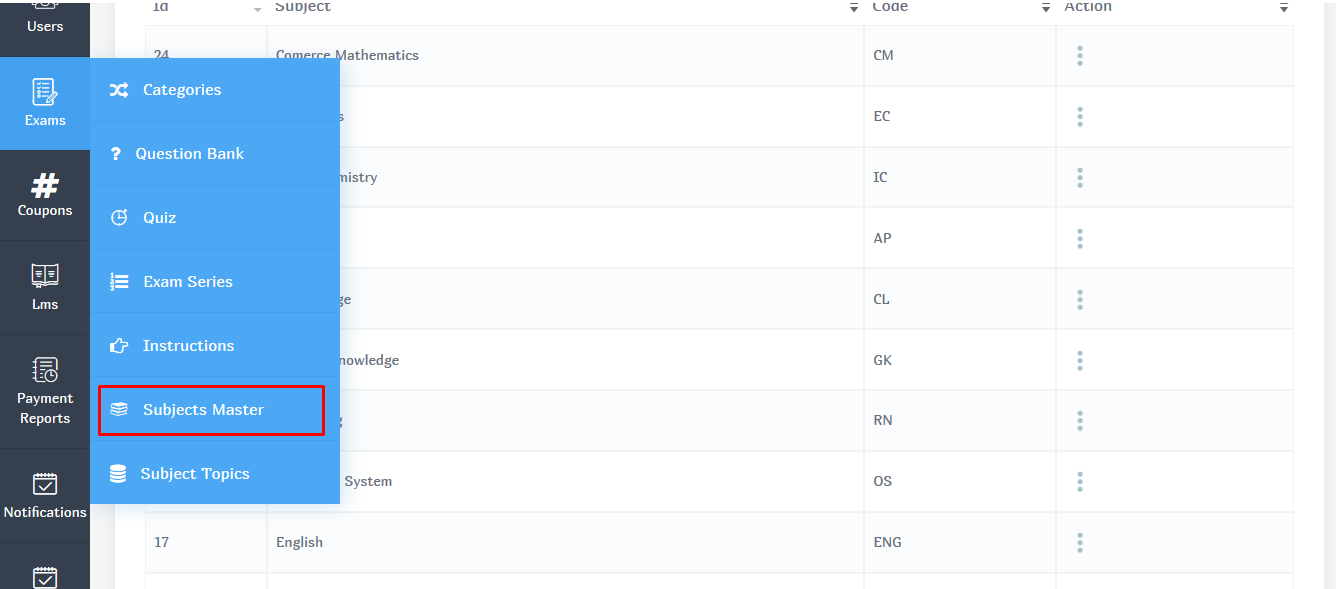
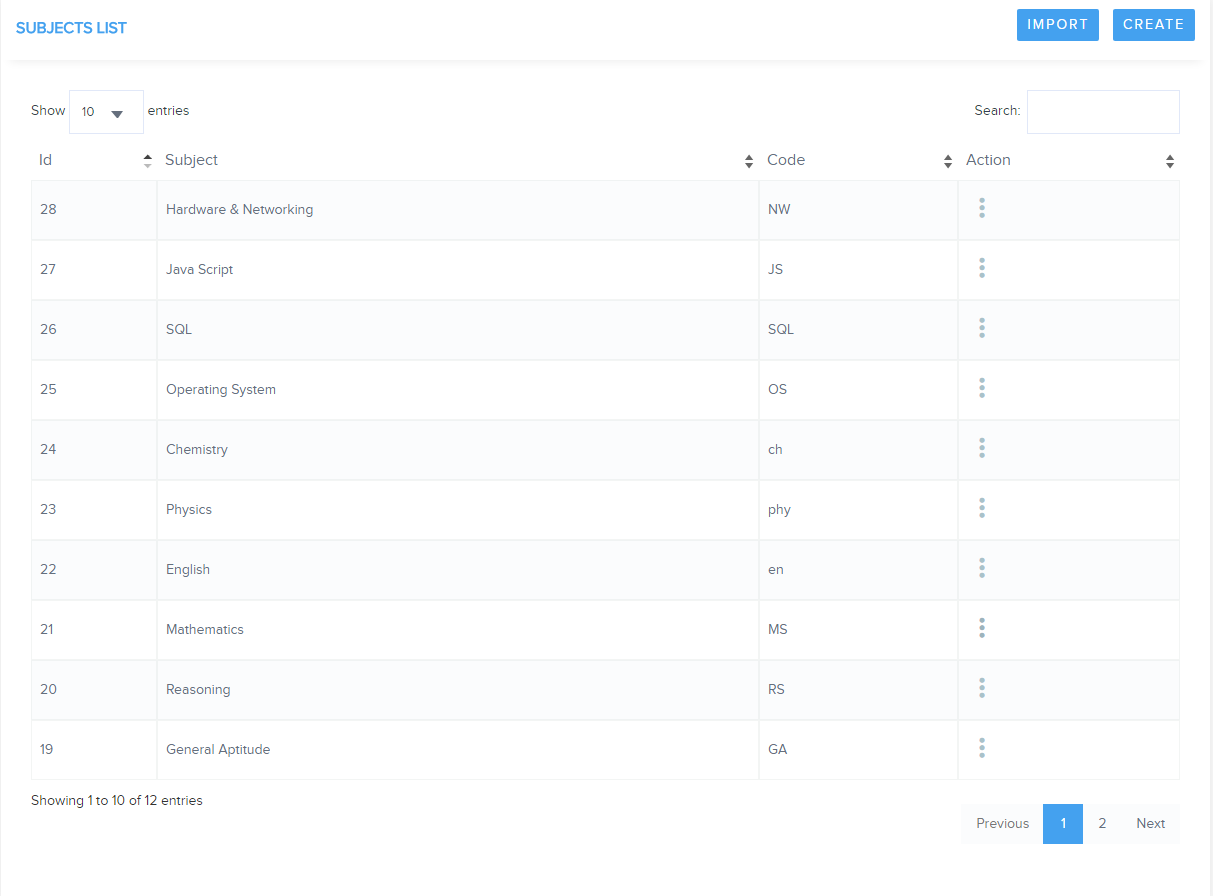
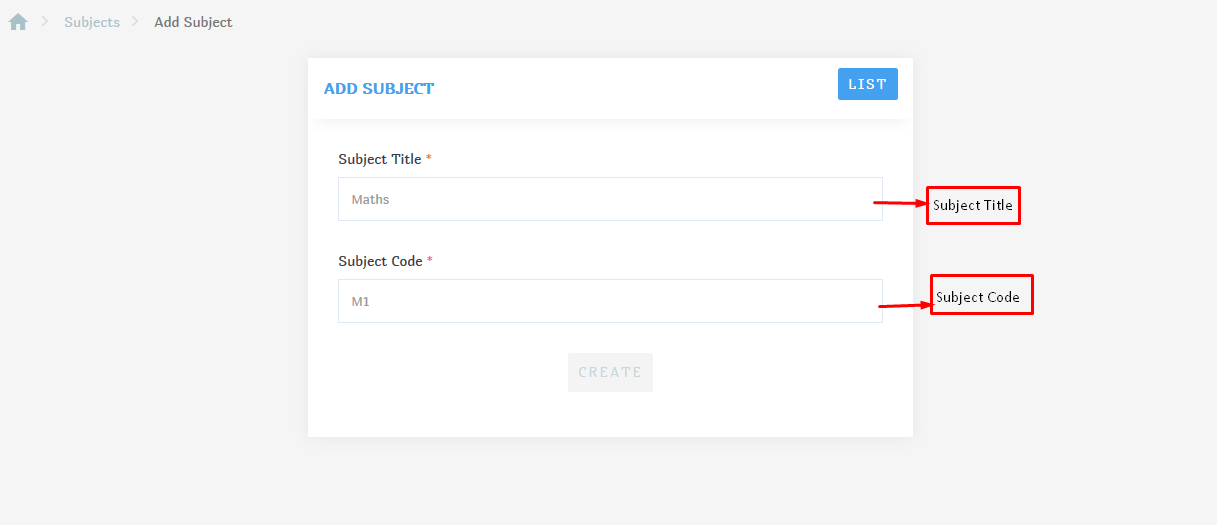
- Maintain the list of subjects along with subject code
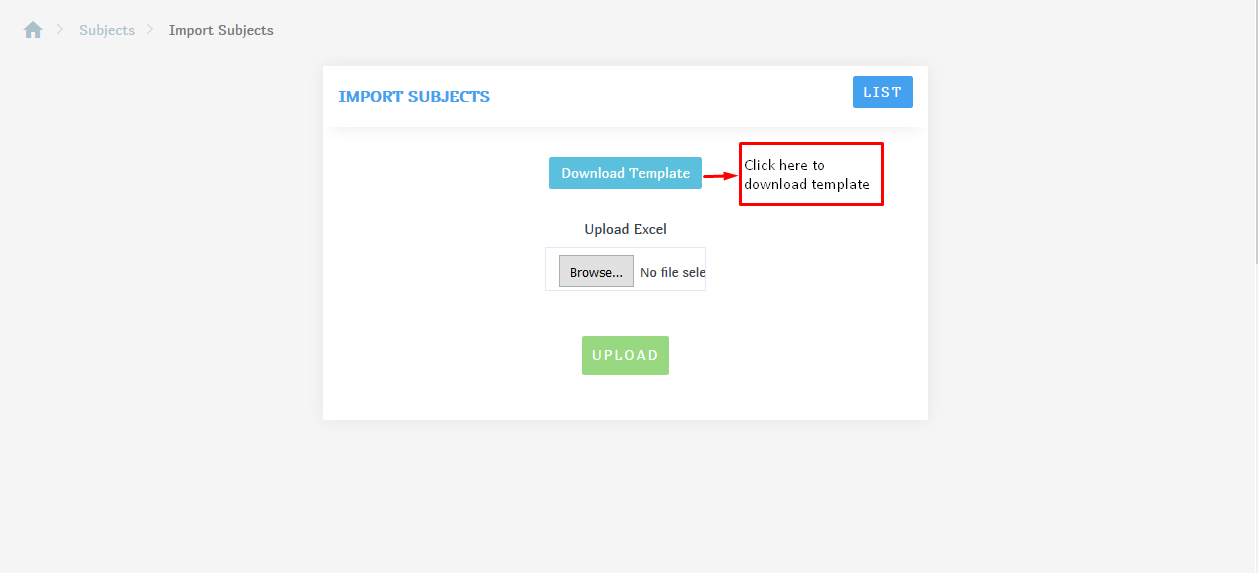
- Import subjects with excel
- Detailed reports will be Downloaded after excel upload
Access Subjects Module
List Subjects
Add Subject
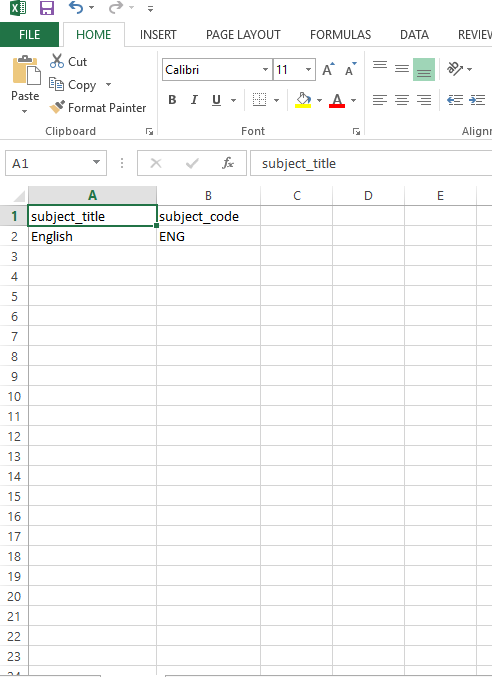
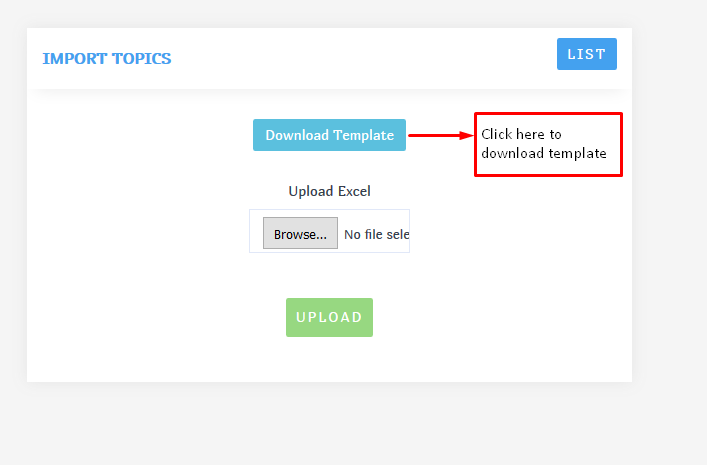
Steps for upload subjects by excel
1) Download Template
2) Update Template and upload
3) View report
Features
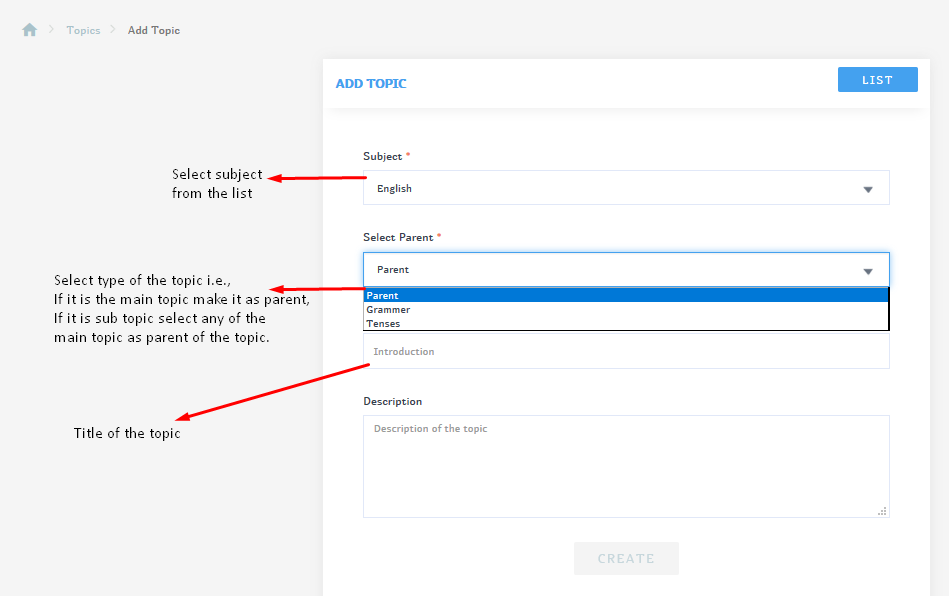
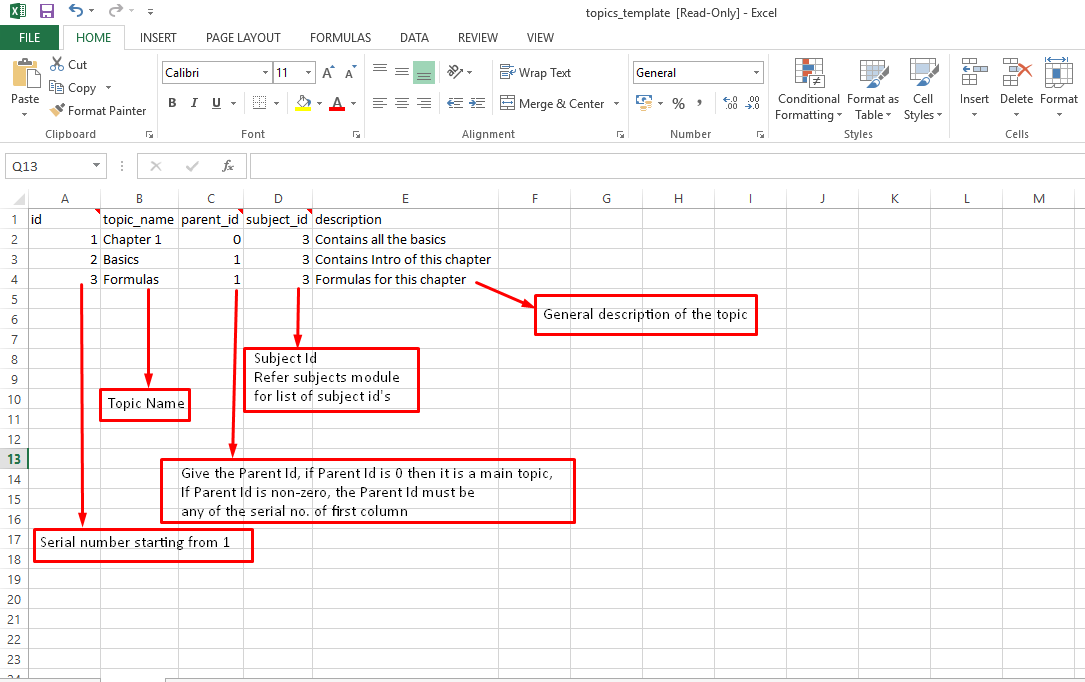
- Main and sub topics relation
- Topics can be created as Main and sub topics, e.g., any subject may have different subjects or units, those are considered as parent topics.
- In each chapter we may have sub topics, those are considered as child topics
- Excel upload
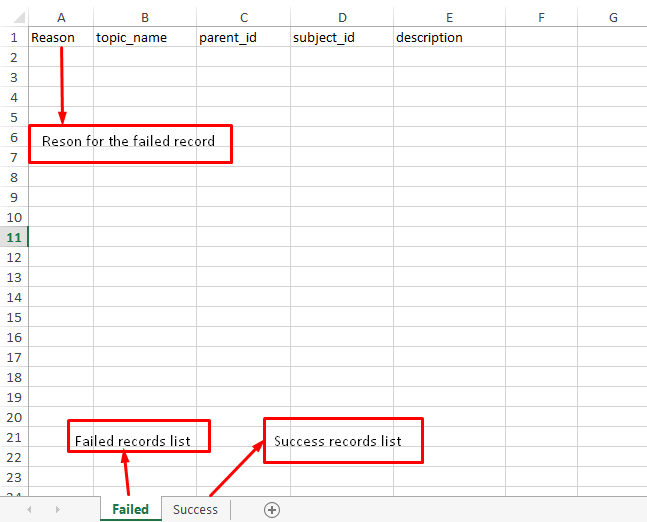
- Detailed reports will be Downloaded after the excel upload
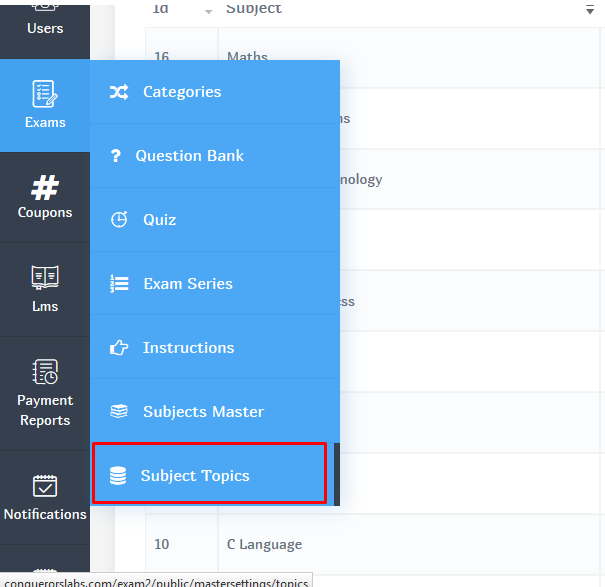
Access Topics Module
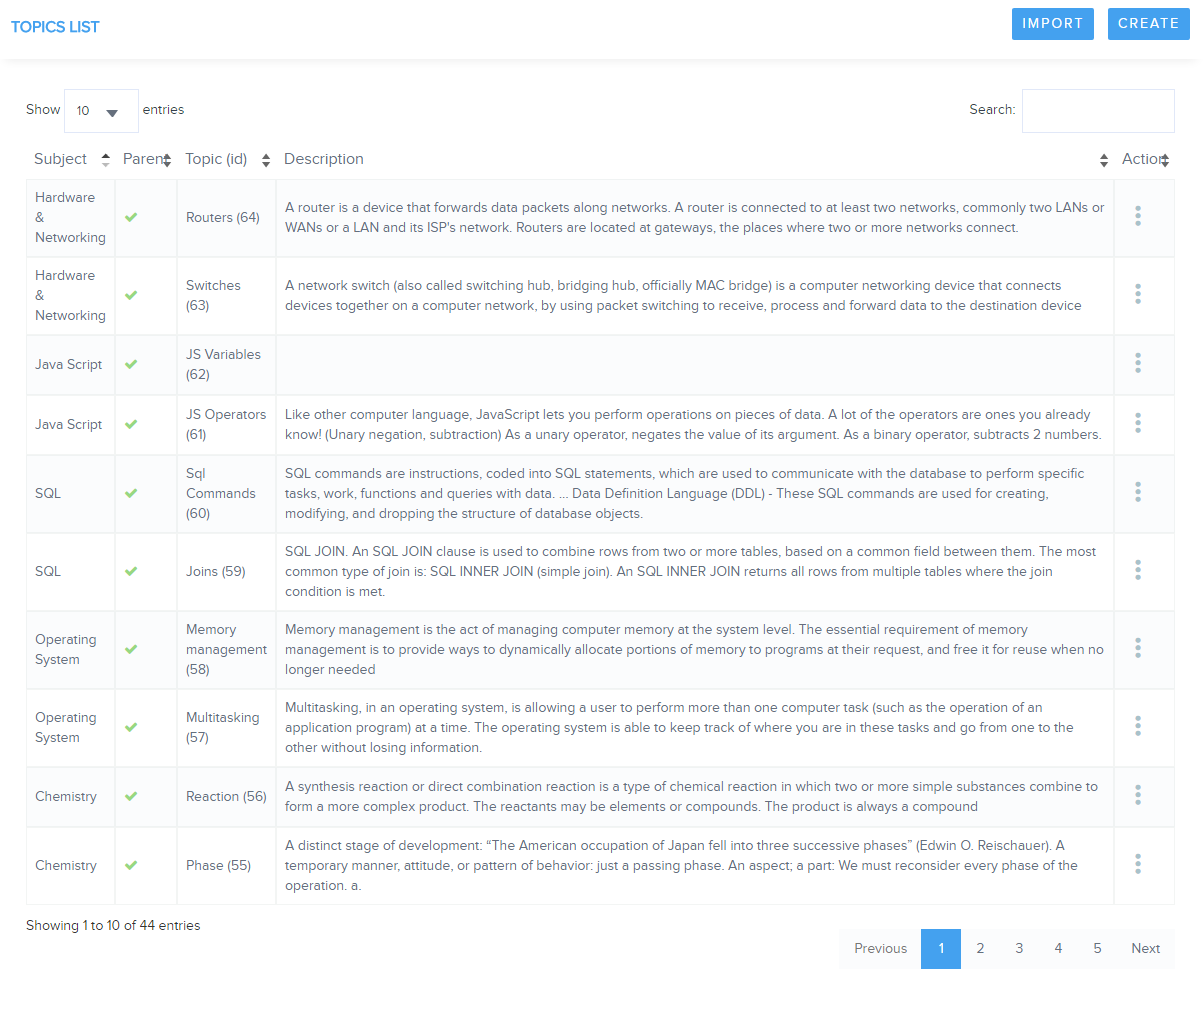
List topics
Create topic
Update data
View report
Features
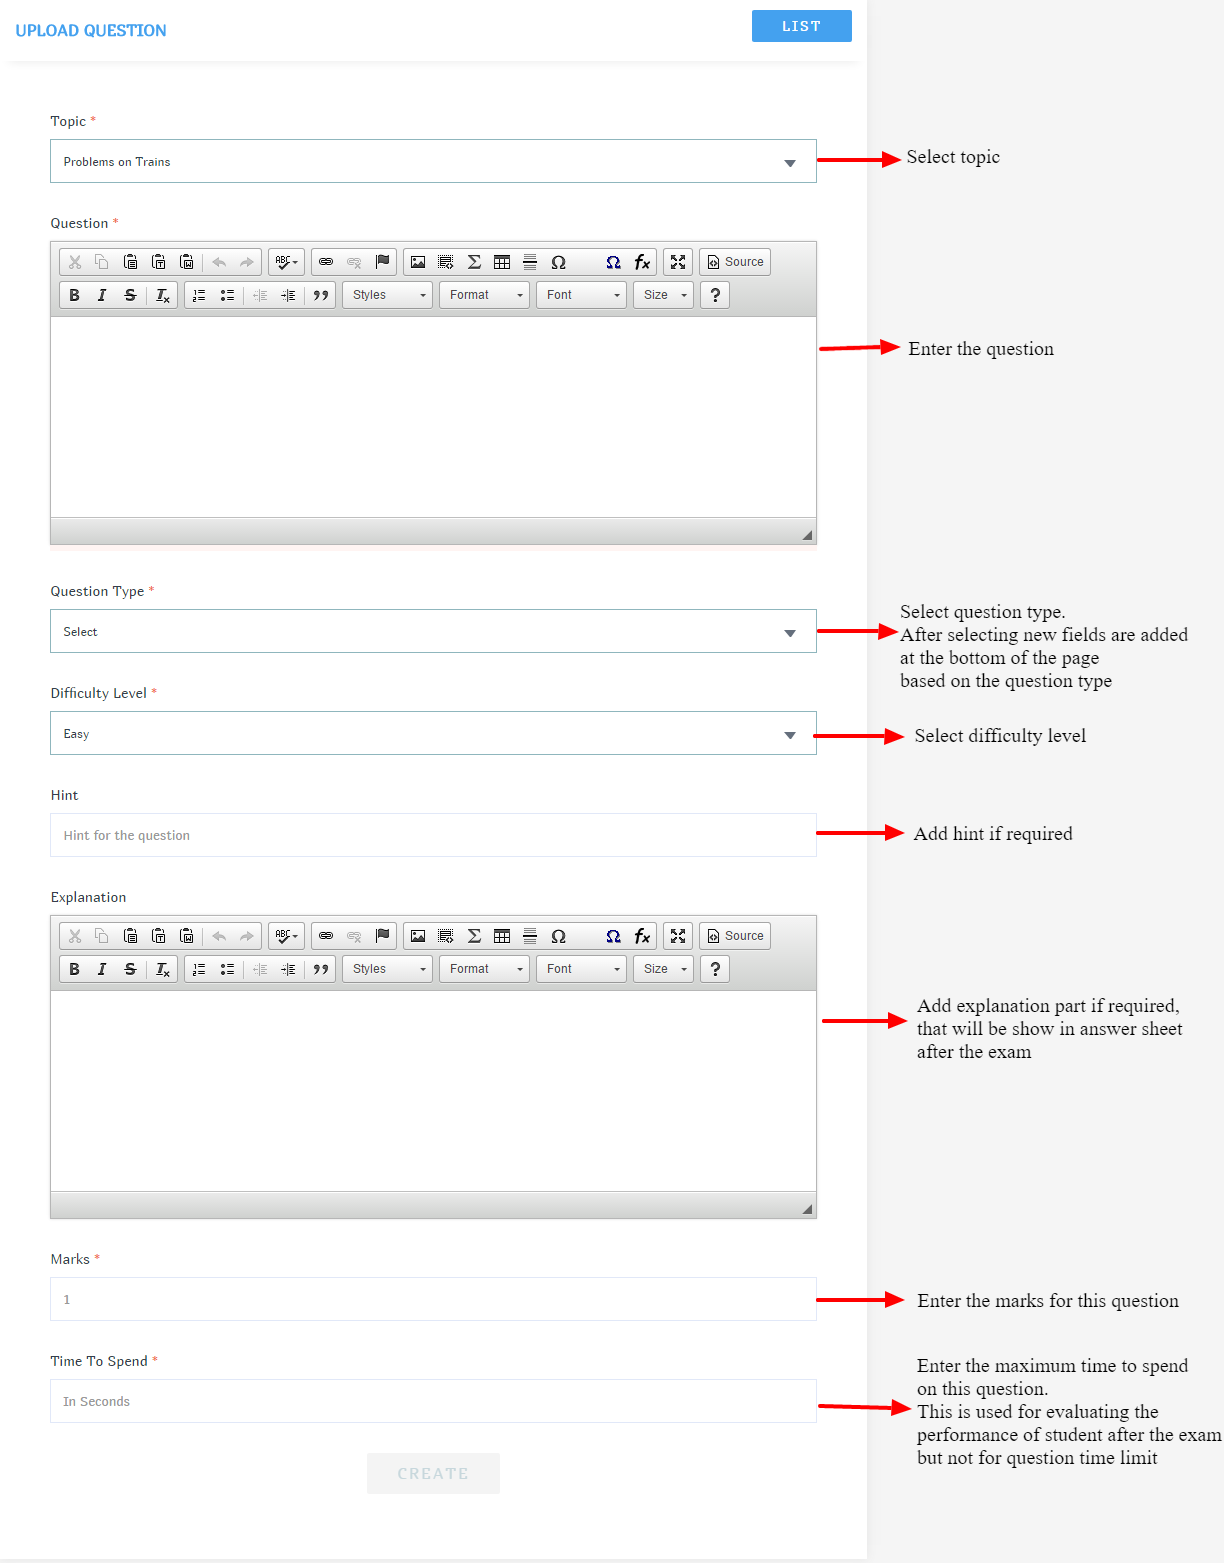
- As the name specifies for this module, you can create any no. of questions for each subject and topic without any limit, Later these can be added to quizzes as per your requirement
- Later these questions can be added to specific quiz as per your requirement
- Total 7 types of questions are supported, with this almost any type of requirement is covered
-
- Single answer questions / Radio box questions
- Multi answer questions / Check box questions
- Fill in the blanks questions / Text box questions
- Match the following questions
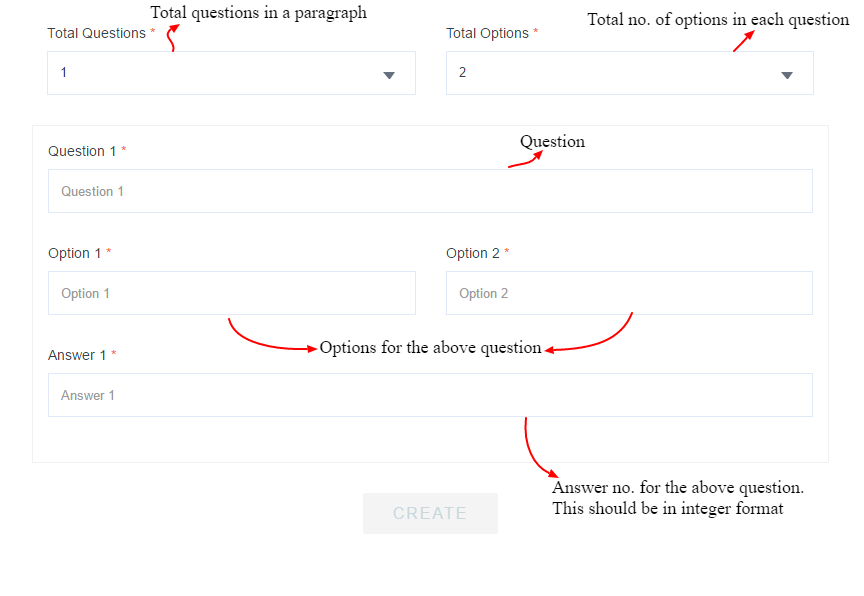
- Paragraph questions
- Video question
- Audio questions
- This module is having an option to set a benchmark for answer time for each question so that the performance of the student can be evaluated
- 3 types of difficulty levels are given
- Hint and explanation fildes are given for each question
- Questions upload with excel
- Detailed report will be Downloaded after excel questions upload
Uploading a question
Question Types
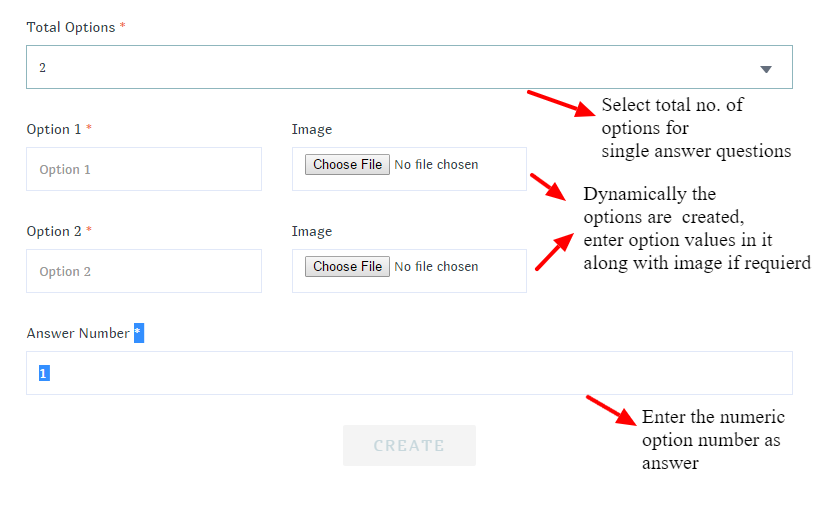
Uploading Single Answer Questions
To upload the single answer question
- Select question type as Single Answer
- Extra fields are added to the bottom of the page
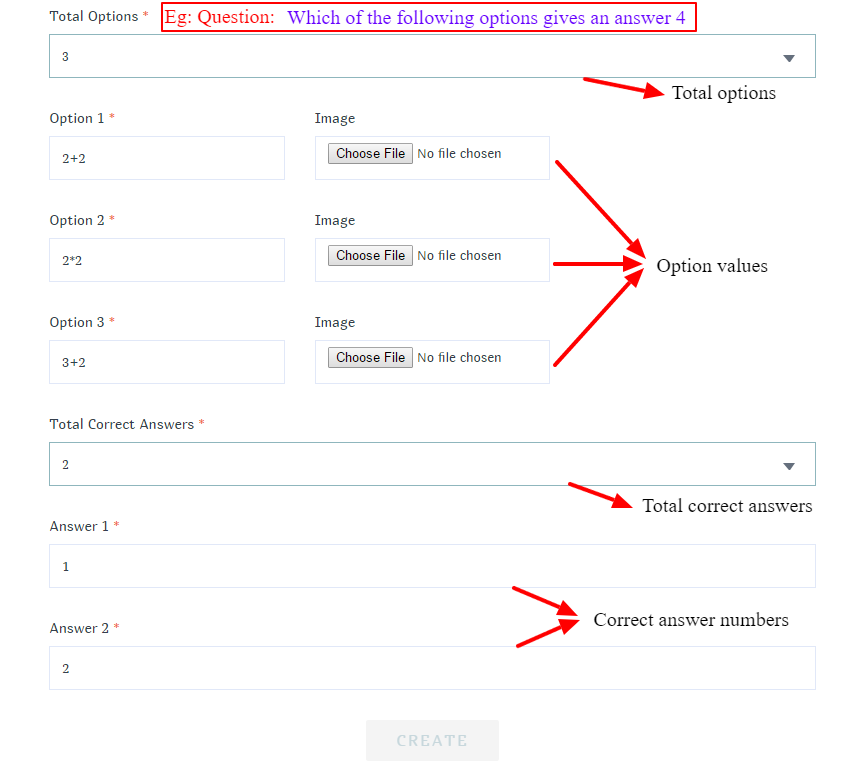
Uploading Multi Answer Questions
- Select question type as Multi Answer
- Extra fields are added to the bottom of the page
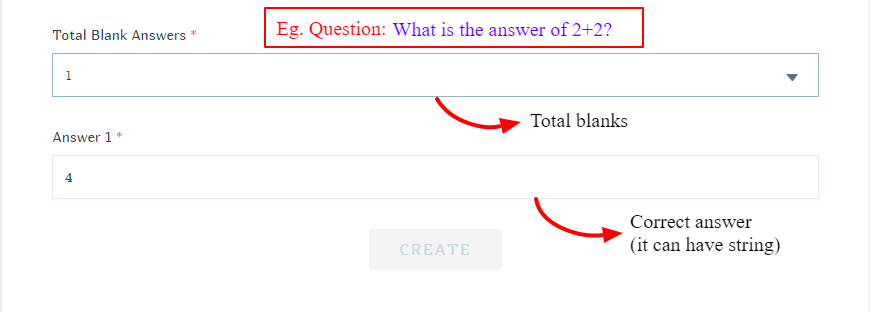
Uploading Fill in the blank Questions
- Select question type as Fill in the blanks
- Extra fields are added to the bottom of the page
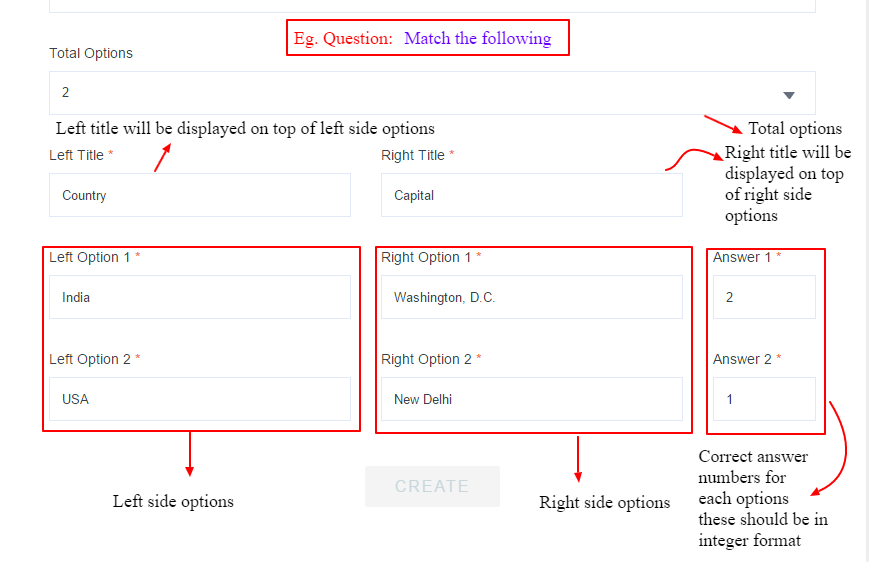
Uploading Match the following Questions
- Select question type as Match the following
- Extra fields are added to the bottom of the page
Uploading Paragraph Questions
- Select question type as Paragraph
- Extra fields are added to the bottom of the page
Uploading Audio/Video Questions
- Select question type as Audio/Video
- Extra fields are added to the bottom of the page
Uploading questions by excel
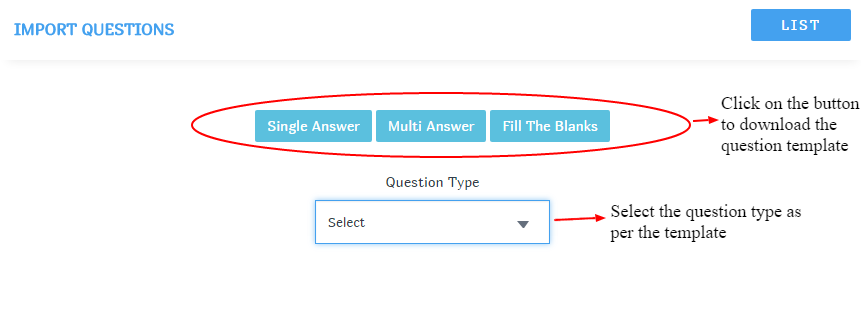
- Download the excel template
- Fill the template as per the instructions given below
- Upload the template file
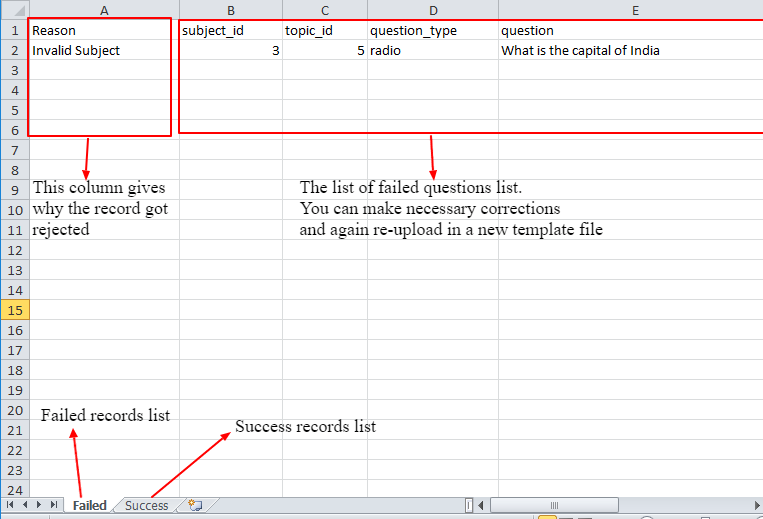
- View the result of successful records and failed records with reason of fail
Details of single answer template
Details of Multi answer template
Details of Fill in the blanks template
Details of report after uploading the template
Note: Maximum of 3000 questions per excel file is suggested
Features
- Separate instructions set can be maintained for each quiz
- Easy to create and use
Access Instructions module
List Instructions
Add/Edit Instruction
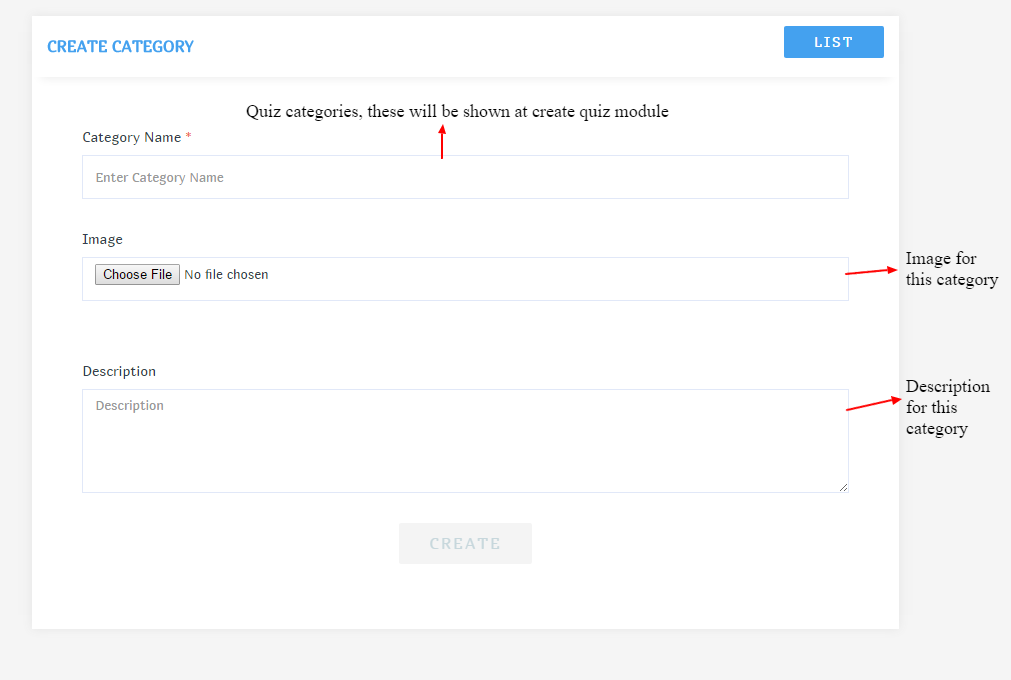
These are used to group similar type of quizzes under one name
Features
- Easy to create, edit and delete
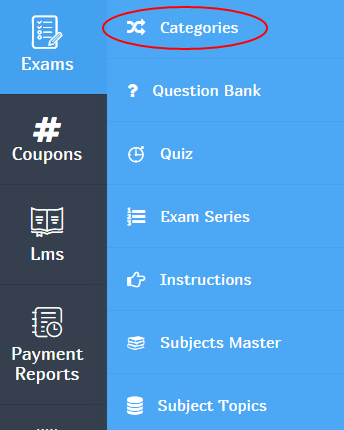
- The same categories are used while Quiz and Exam Series
Access quiz category module
Add/Edit quiz category
Features
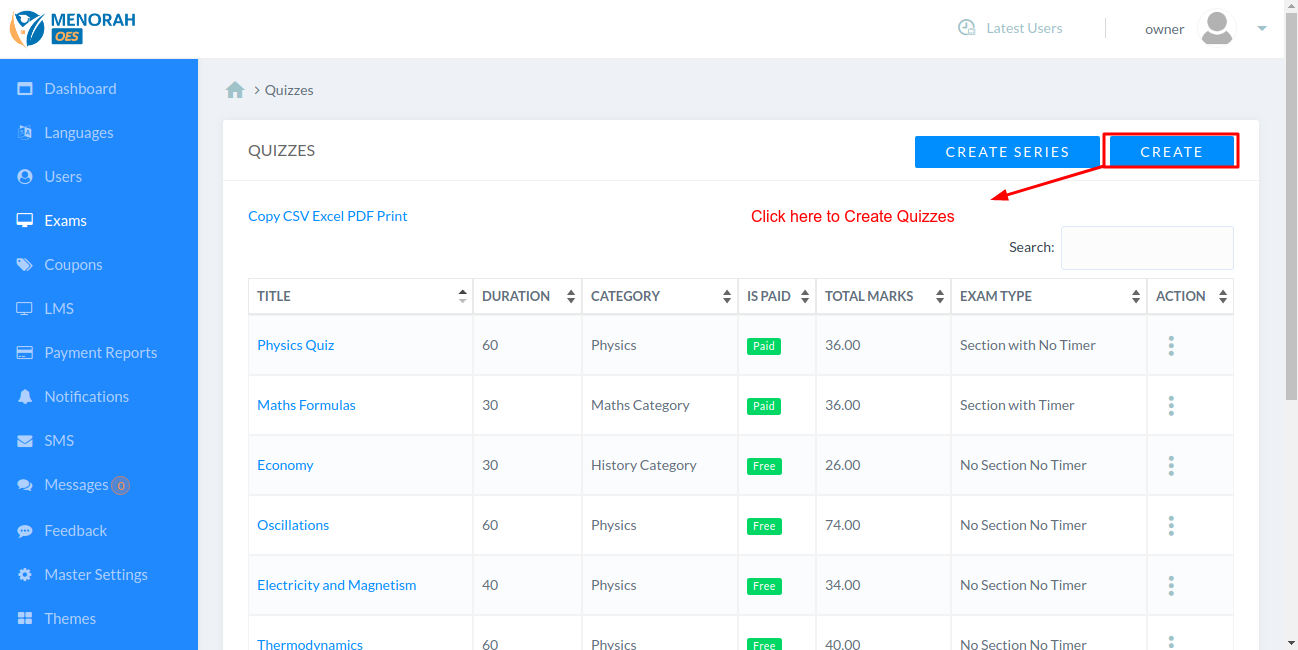
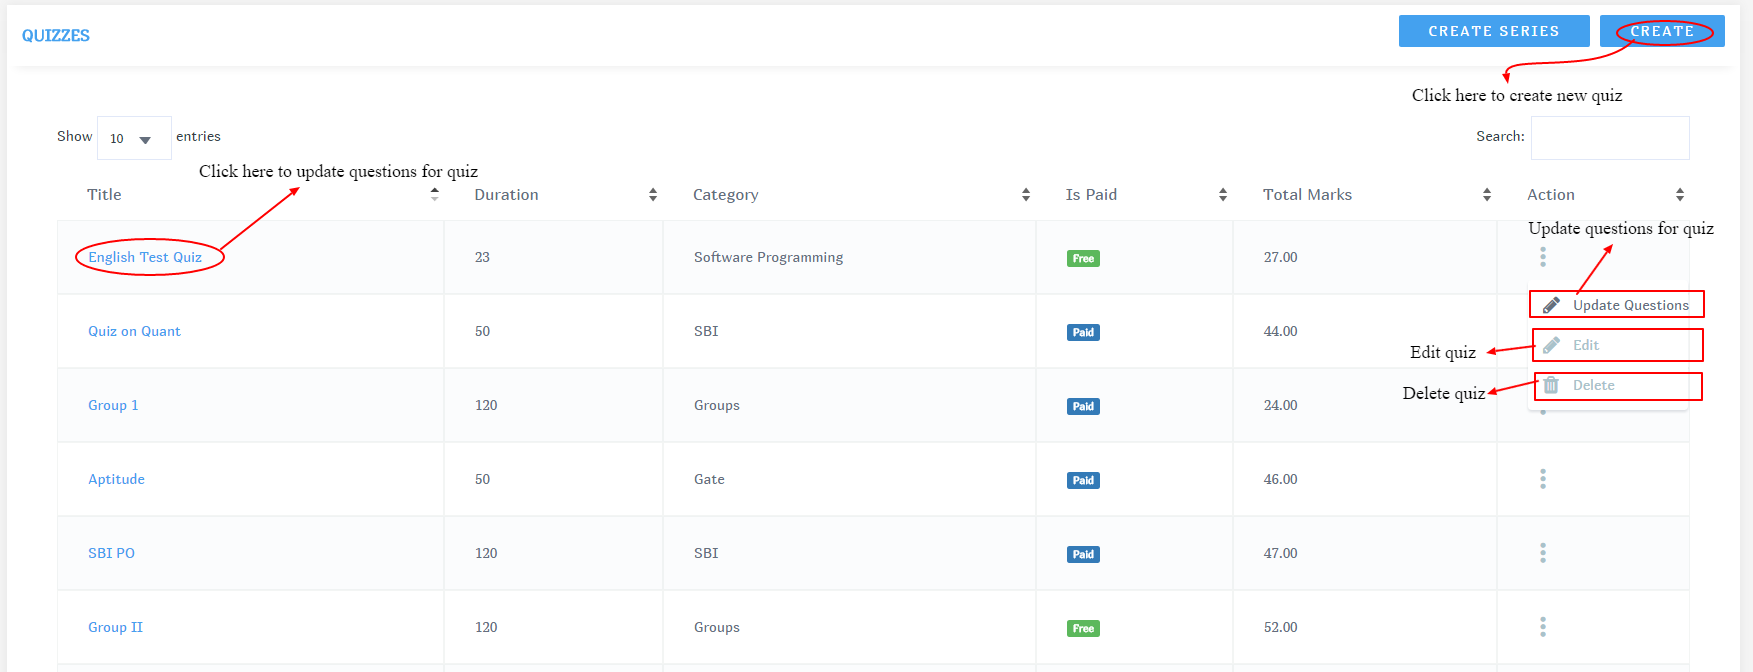
- First create quiz and later update questions in it
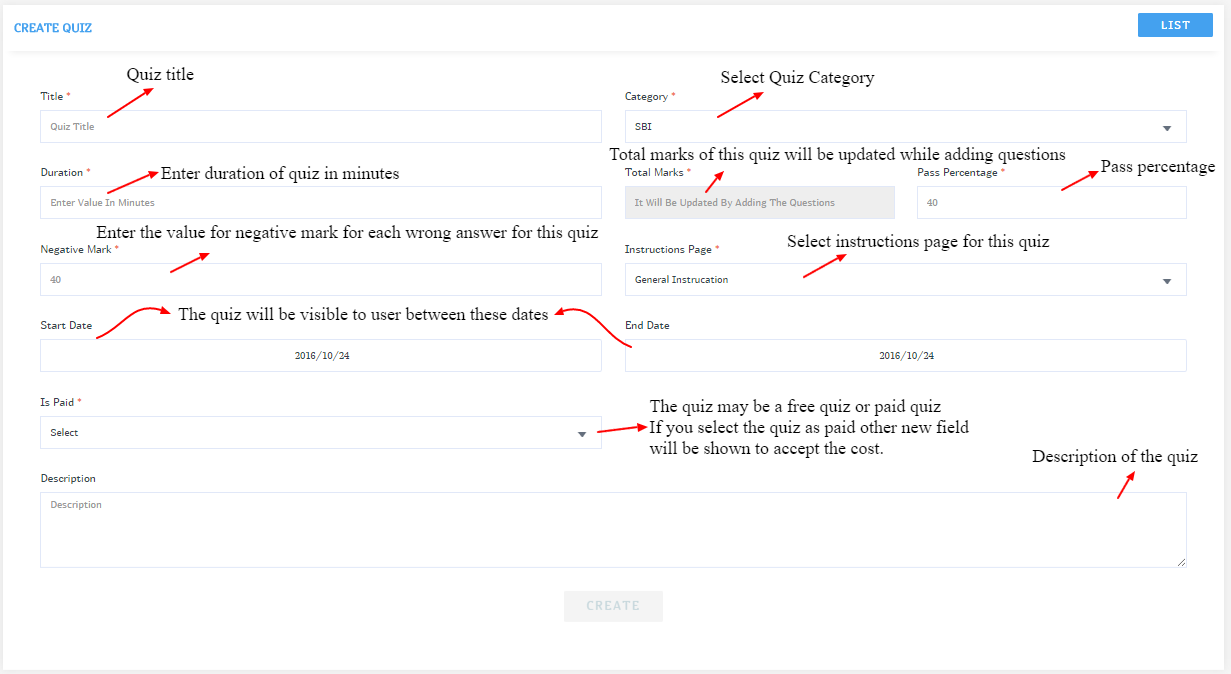
- Total marks of a quiz is based on the questions added to it
- Pass marks are decided by pass percentage given in quiz
- Quiz will be displayed to user based on the given start and end dates
- The quiz may be paid or free
- The paid quizzes will have the cost and validity period
- User friendly interface to update or delete the questions
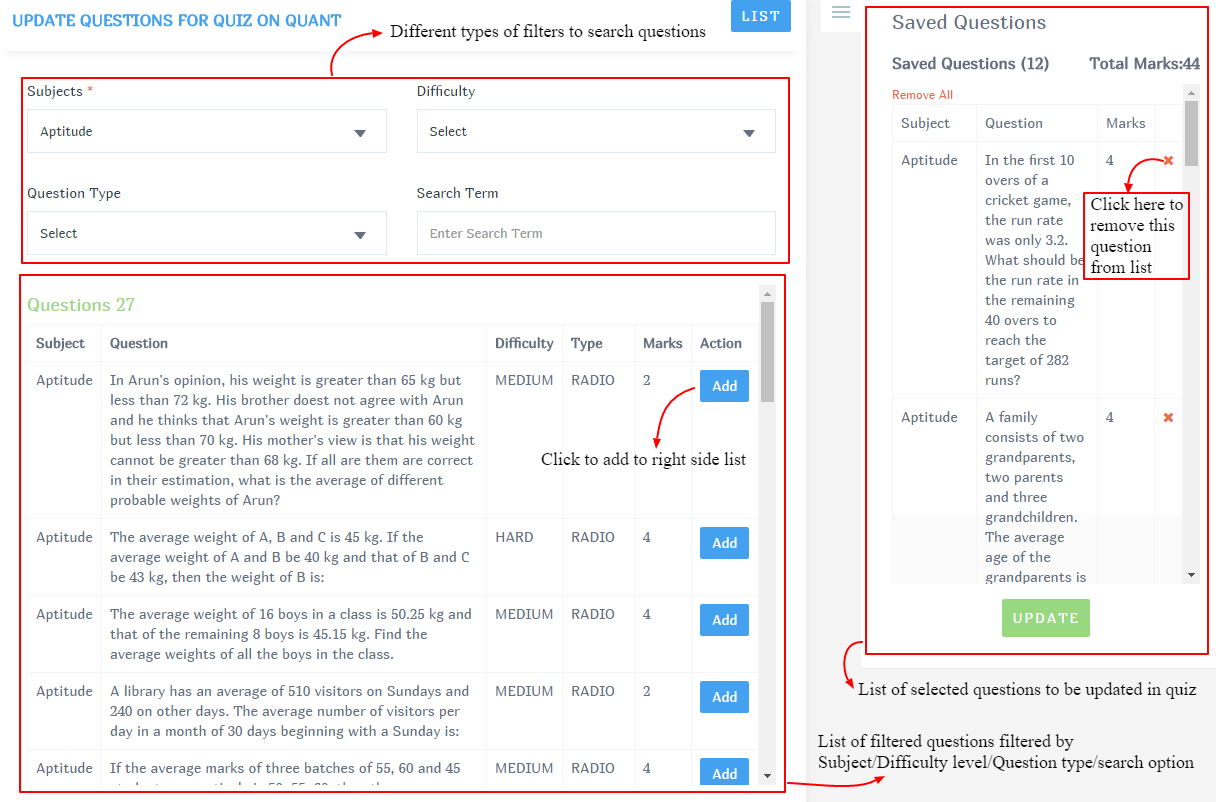
- While updating the questions to quiz, handy filters are given to pick your question from large dataset
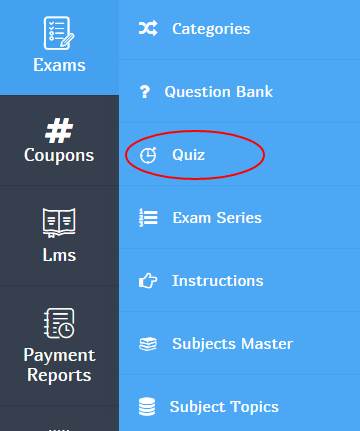
Access Quiz module
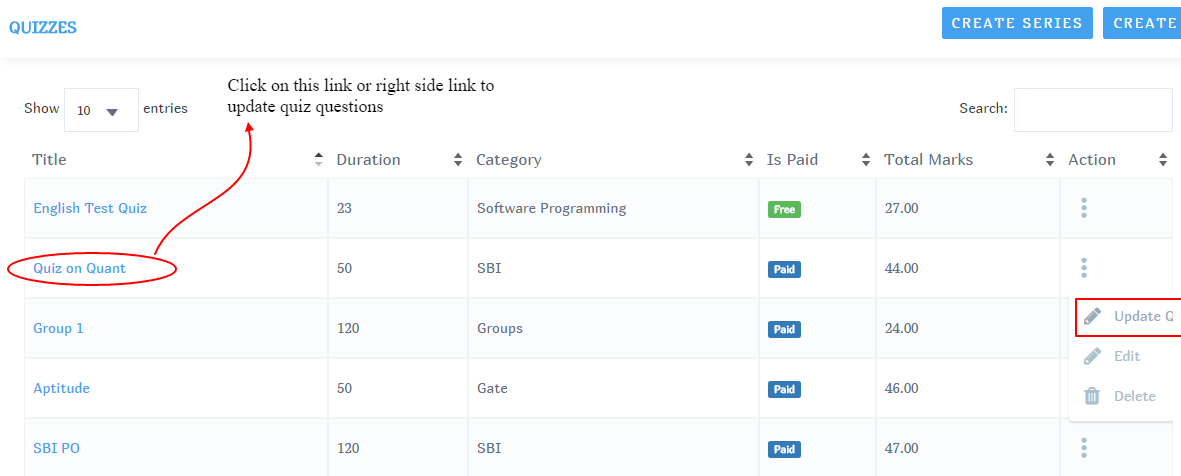
List quizzes
Create/Edit Quiz
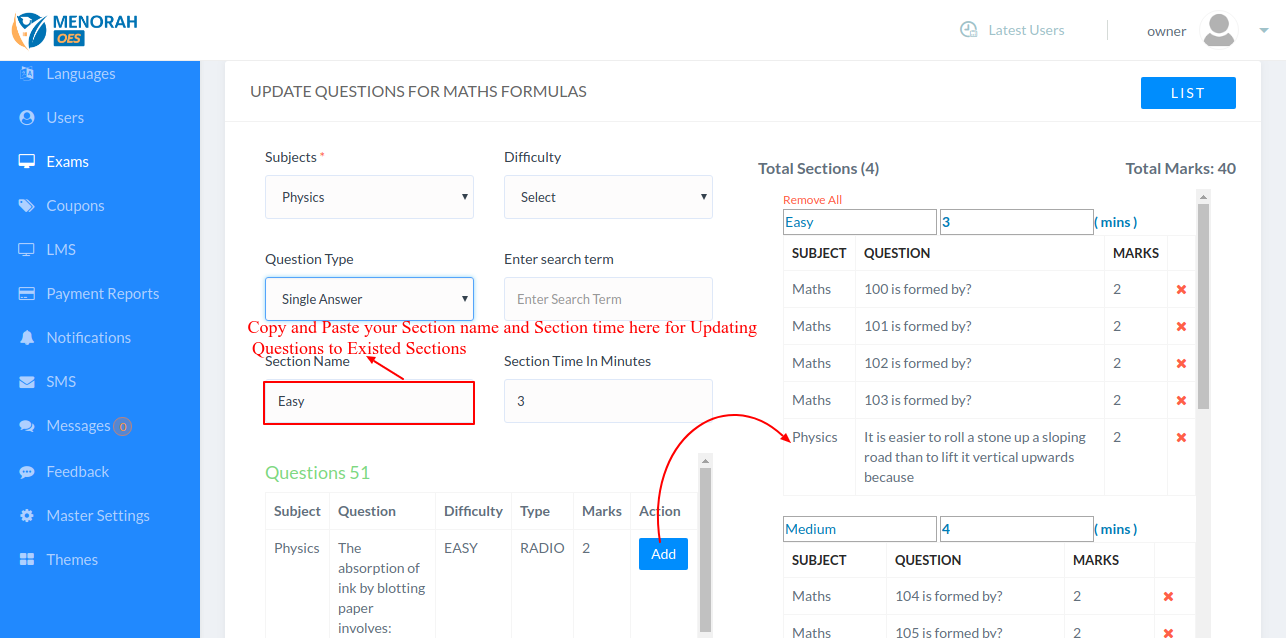
Update questions
Note: Maximum of 900 questions per quiz is suggested
Features
- In this module, you can club set of quizzes different together and give a name to it
- The exam series may be paid or free
- For paid series you can set the cost and validity in days
- The series may contain the paid or free quizzes
- In free series, if any paid quizzes available, the user need to buy that specific quiz from quiz module
- User friendly interface to add/update quizzes in exam series module
- Dynamically the no. of quizzes and no. of questions will be updated to specific series after creating it
Access Exam Series Module
List exam series
Create/Edit exam series
Update quizzes in exam series
Features
- This module will have all needed features to provide coupon codes
- This module can be enabled or disabled from admin panel
- Option to enable coupon codes for specific modules
- Maximum limit of using single coupon code per user
- Minimum bill amount to use the coupon
- Start and end dates to use the coupon code
- Discount can be given in percentage or value
- Maximum amount of discount to give in percentage type of discount
Access Coupons Module
Create/Edit coupon code
Enable/Disable Coupons module
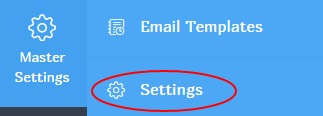
For this go to Master settings->Settings->Modules Management
Features
- LMS Categories are the name of similar type of LMS Series
- While creating the series, the category is selected
- By this category, the user can easy navigate to the required series
Access LMS Categories
Add/Edit Category
Features
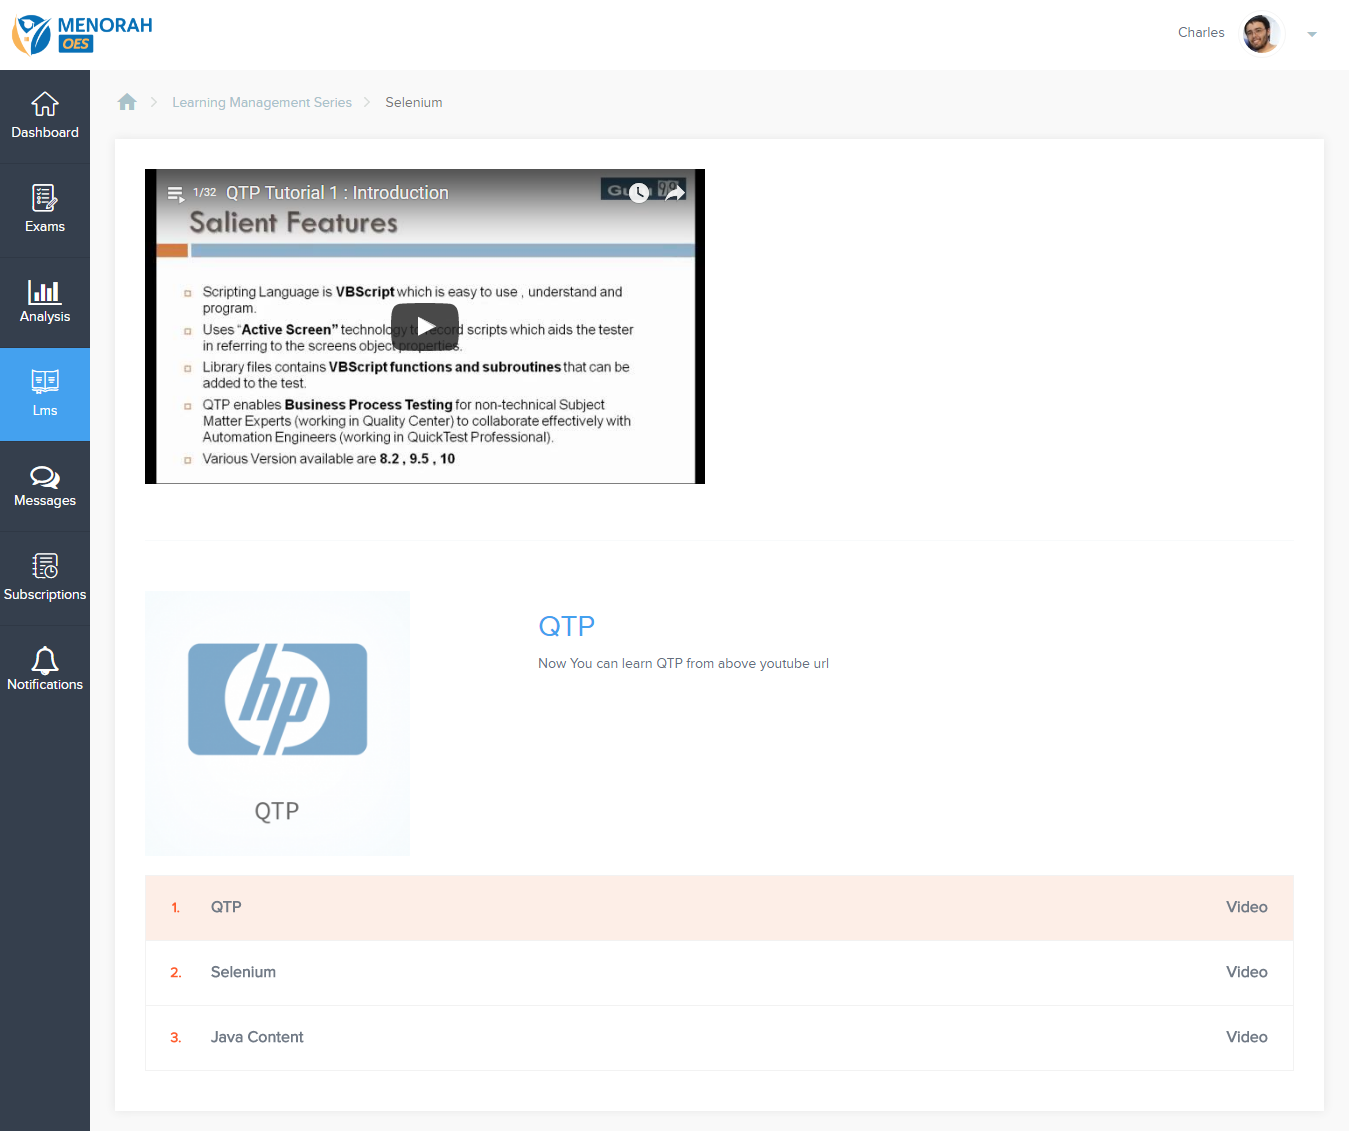
- This module contains a set of contents which can be used to create LMS Series
- Each content is associated to specific subject
- Total 7 types of contents are supported i.e.,
- File
- Video File
- Audio File
- Video URL
- Audio URL
- Iframe
- URL
- Easy to add edit the contents
Access LMS Contents
Add Edit Contents
LMS Content Types
Uploading File type of content
This options is used to upload any downloadable materials like text documents
Uploading Video File
In this you can upload mp4 videos.
These will be played at front end for the user
Uploading Audio File
In this you can upload mp3 files
Uploading Video URL type content
In this, you can give direct video URL's
Note: Direct youtube urls will not work. The URL should end with file type like .mp4 etc
Uploading Audio URL type content
In this, you can give direct audio URL's
Note: Direct youtube urls will not work. The URL should end with file type like .mp3 etc
Uploading URL type content
In this you can give any external resource URL link that will redirect the user to that page
Uploading Iframe type content
In this you can give the Iframe code or the src path
Suggest to give src path as below for better user interface with predefined height and width
Features
- These are the collection of different type of contents
- Each series is associated to specific category so that user can easily find particular series based on his requirement
- Seres are having an option to set the start date and end date to visible for end user
- Series may be free or paid
- For paid type of series, there will be extra fields to accept the validity of the series and the cost of series
Access LMS Series
List LMS Series
Add/Edit Series
Features
- Online Payment Reports
- Offline Payment Reports
- Detailed chart reports for online and offline payment
- Detailed chart reports for success, failed and pending payments
- Admin is having an option to Approve or Reject the offline payment by viewing the details
- Generate report to excel with all type of combinations
- Option to enable/disable payments module
- Option to enable/disable offline payments module
- Option to edit the information for offline payments
Access Payment Reports Module
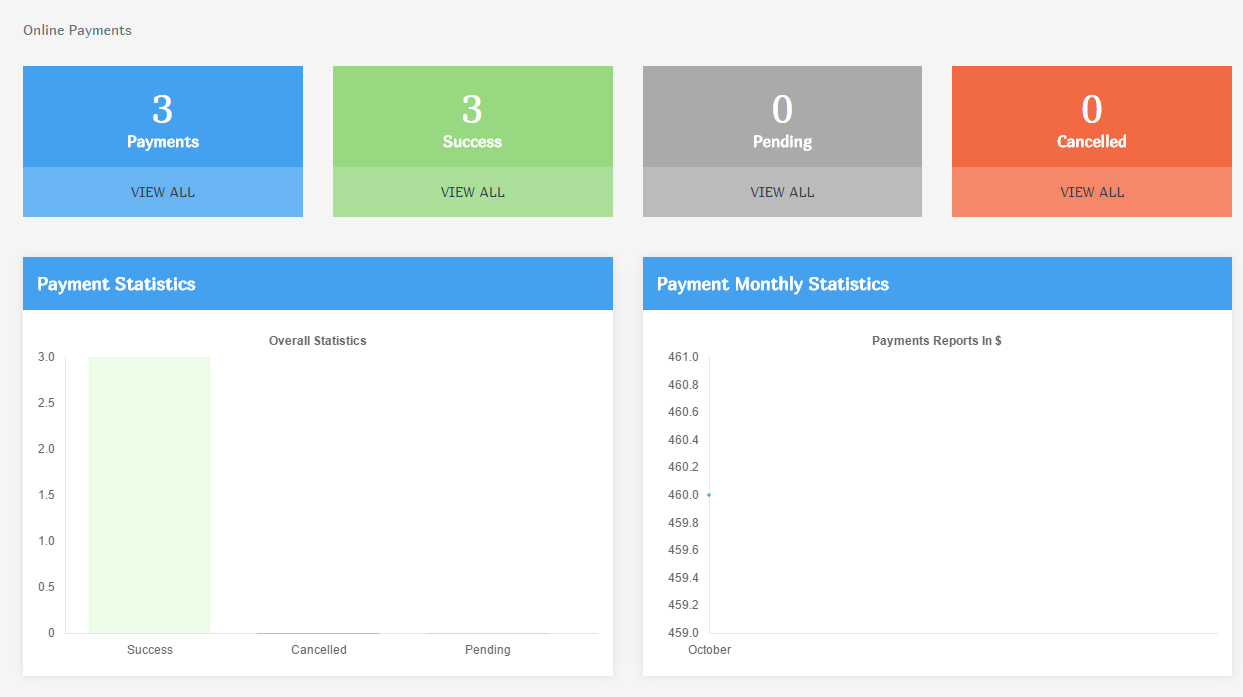
Online Payments Dashboard
Offline payments dashboard
Offline pending records
Payment Options Settings
Step 1:
Step 2:
Step 3:
Enable or disable Offline payment
Export Payment Records
Features
- Notifications can be created by admin and those will be displayed to user
- Notifications have the date range to display between specific dates
- Can give short and long descriptions to it
- Having an option to give external resource link
Access Notifications module
Add edit notification
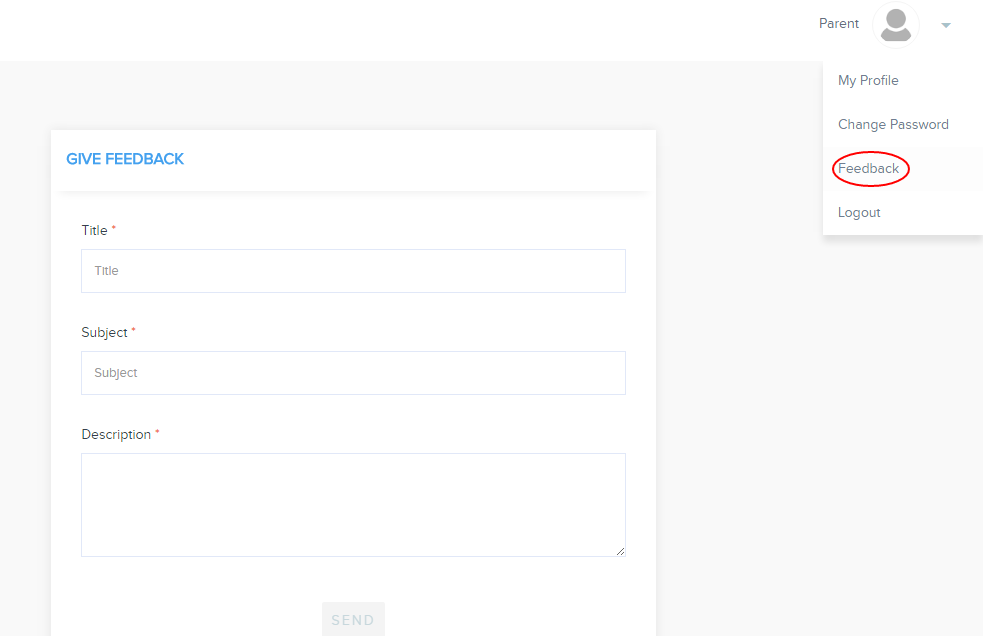
Features
- User can give feedback to the admin
- Admin can view the feedback
Accessing Feedback module
Feedbacks list
Feedback details
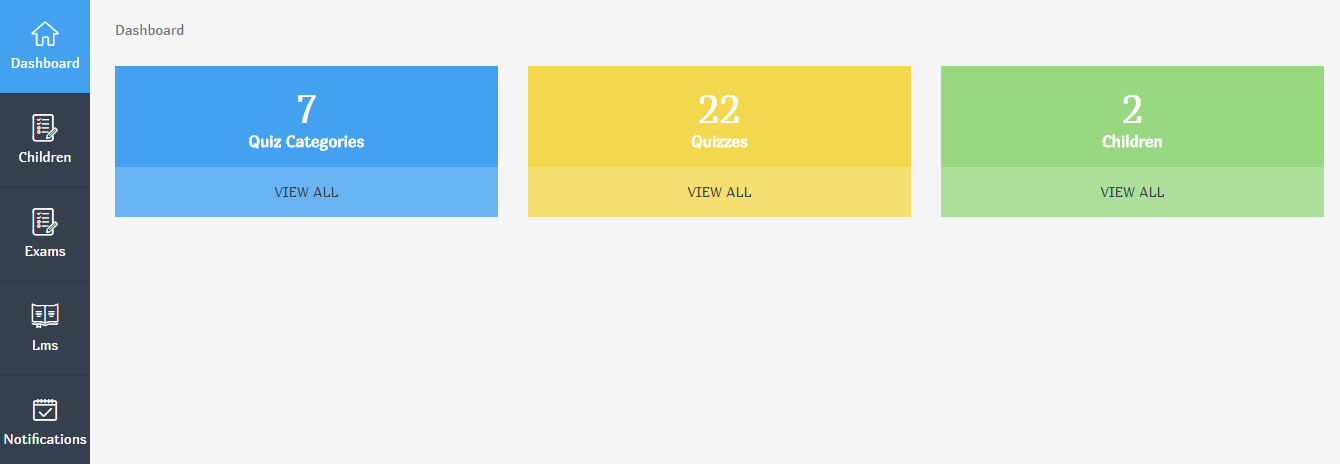
Features
- This module can be enabled or disabled from admin panel
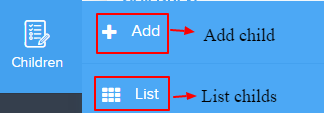
- Parent can add his children
- View the list of Exam categories, exam series and LMS Series
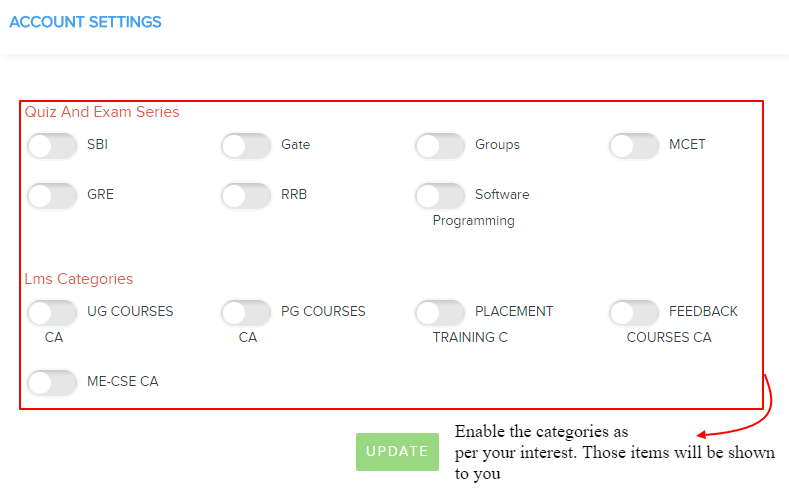
- User Preferences option is provided i.e, the parent can set his preferred categories in different modules
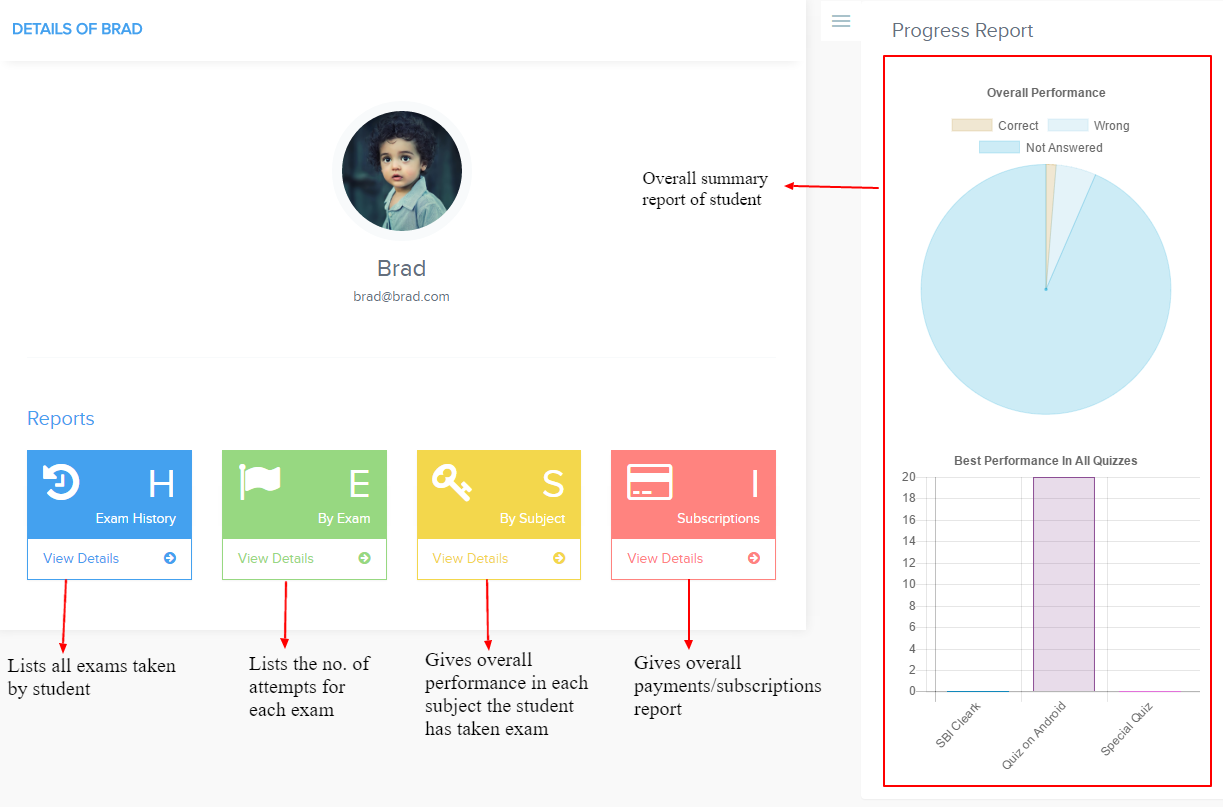
- Option to view the children detailed reports
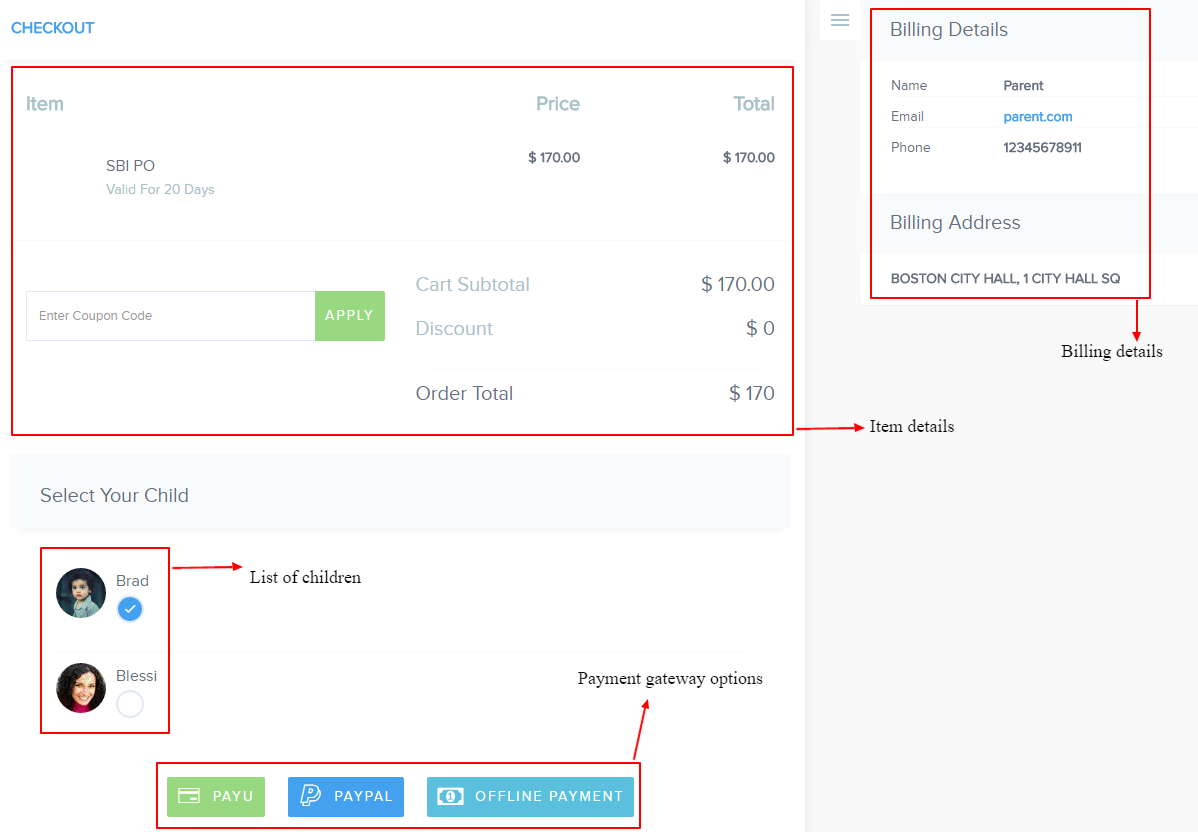
- Option to buy exam on behalf of his child
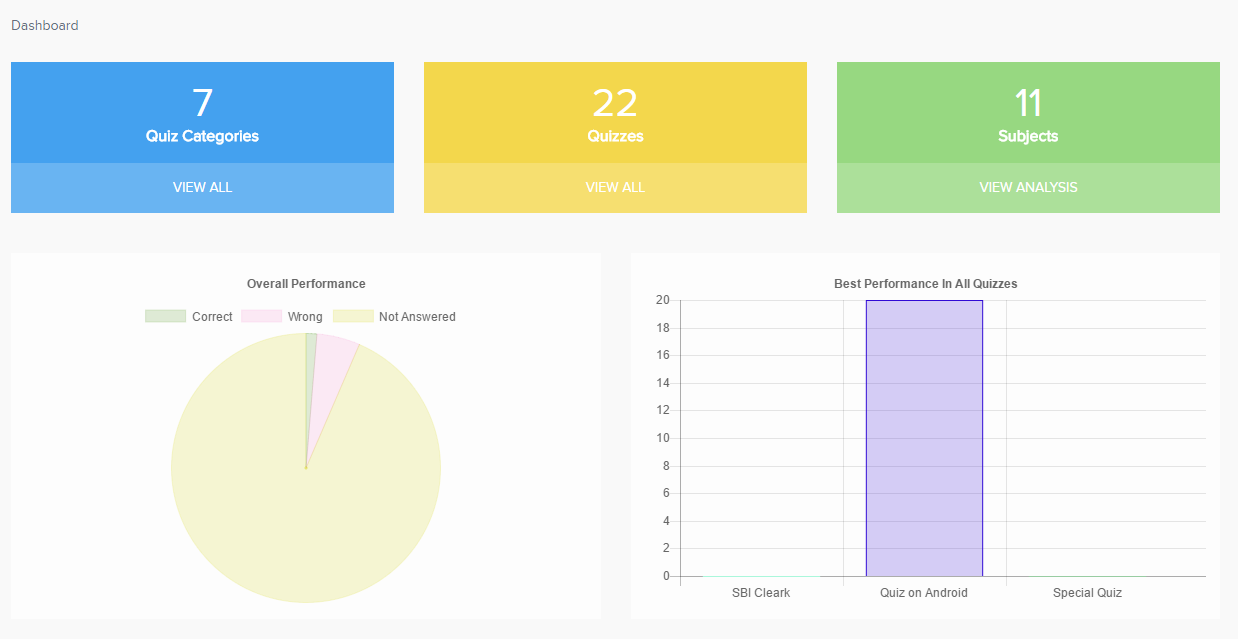
Parent Dashboard
Access Children module
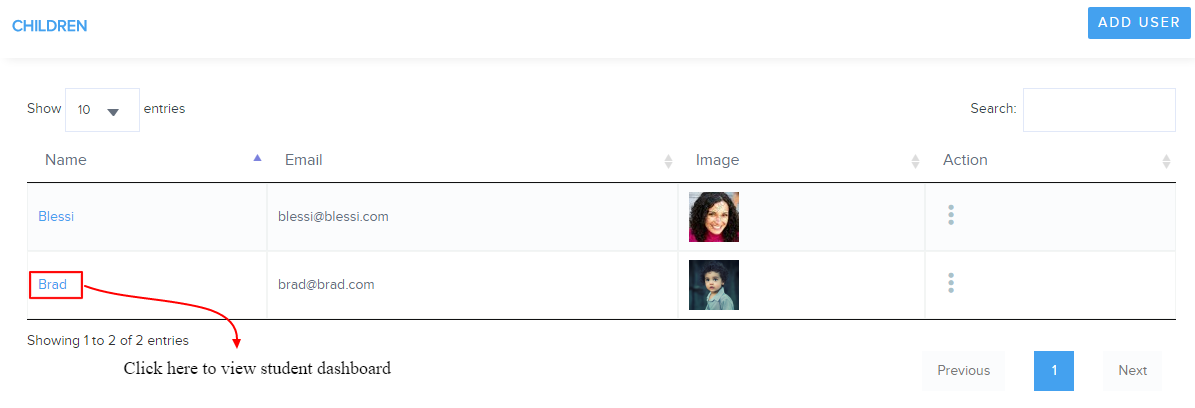
Children List
Children Dashboard
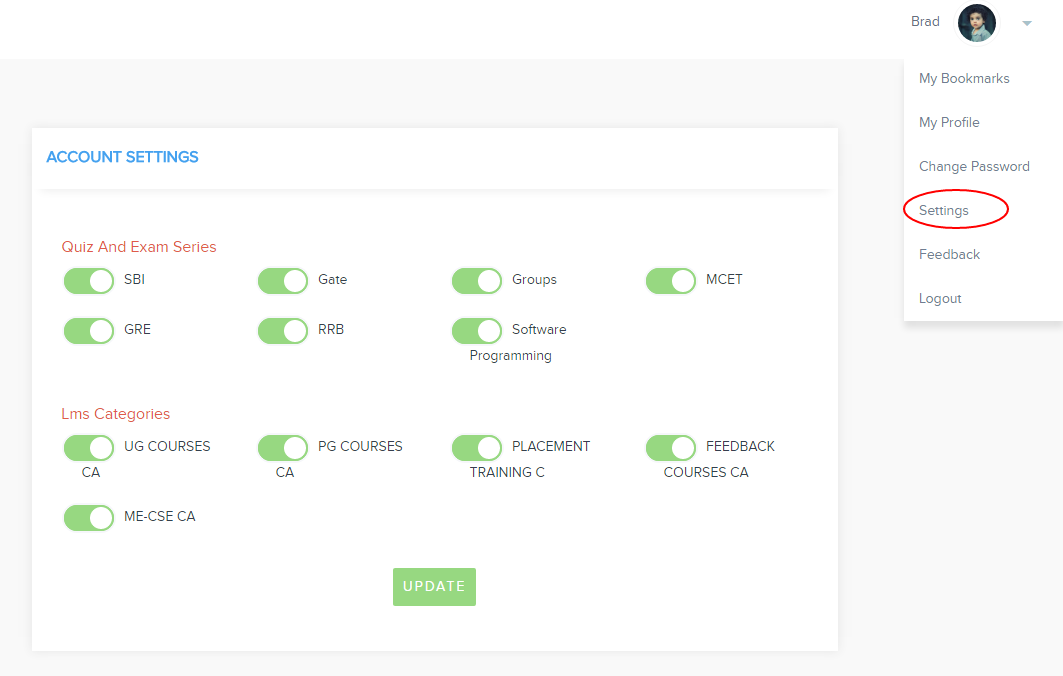
Parent Preferences
Buying a package for child
Send Feedback to admin
Features
- Student is having flexible options for settings
- Can take exams with many options
- Multiple payment gateways
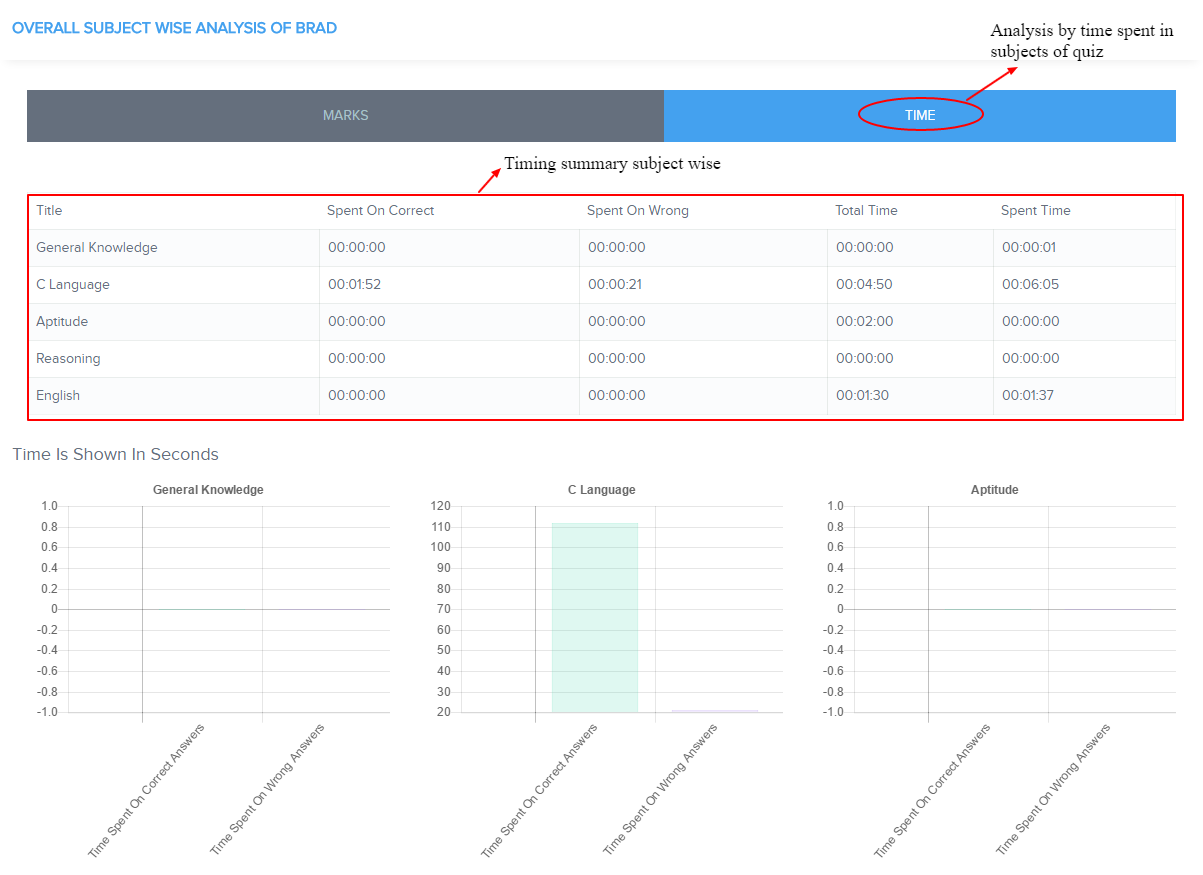
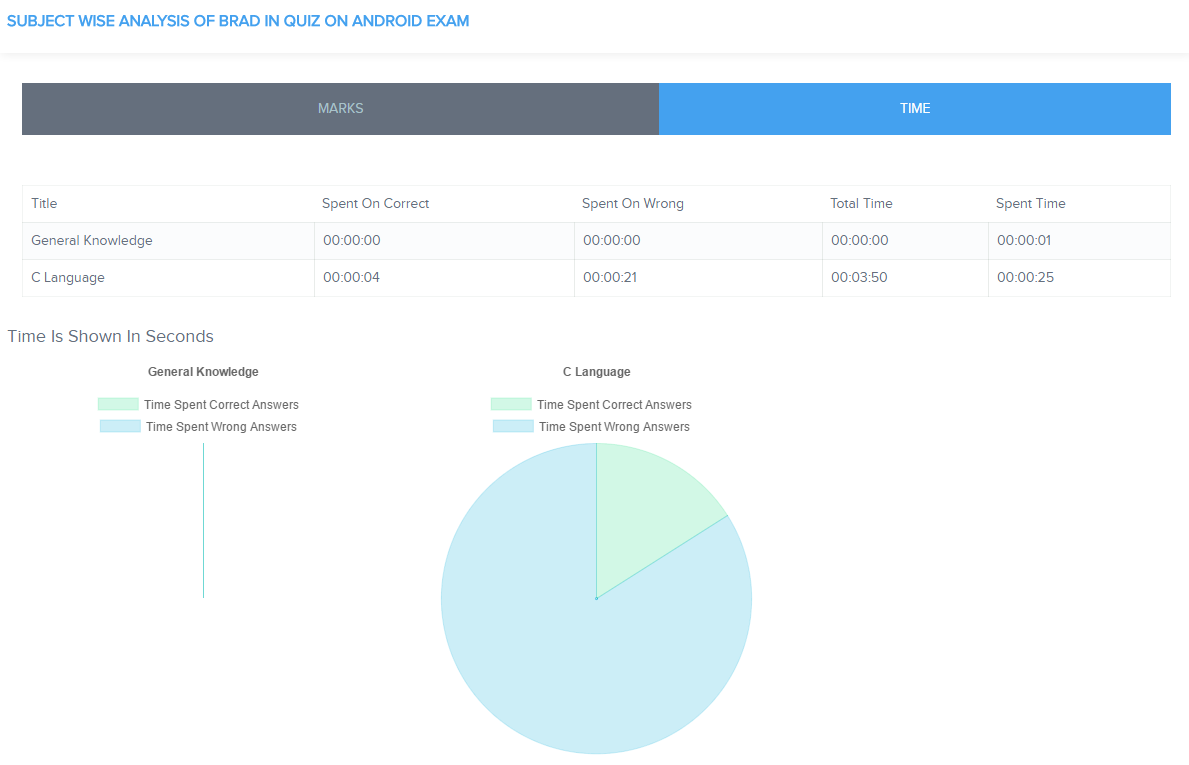
- Detailed time and marks analysis reports
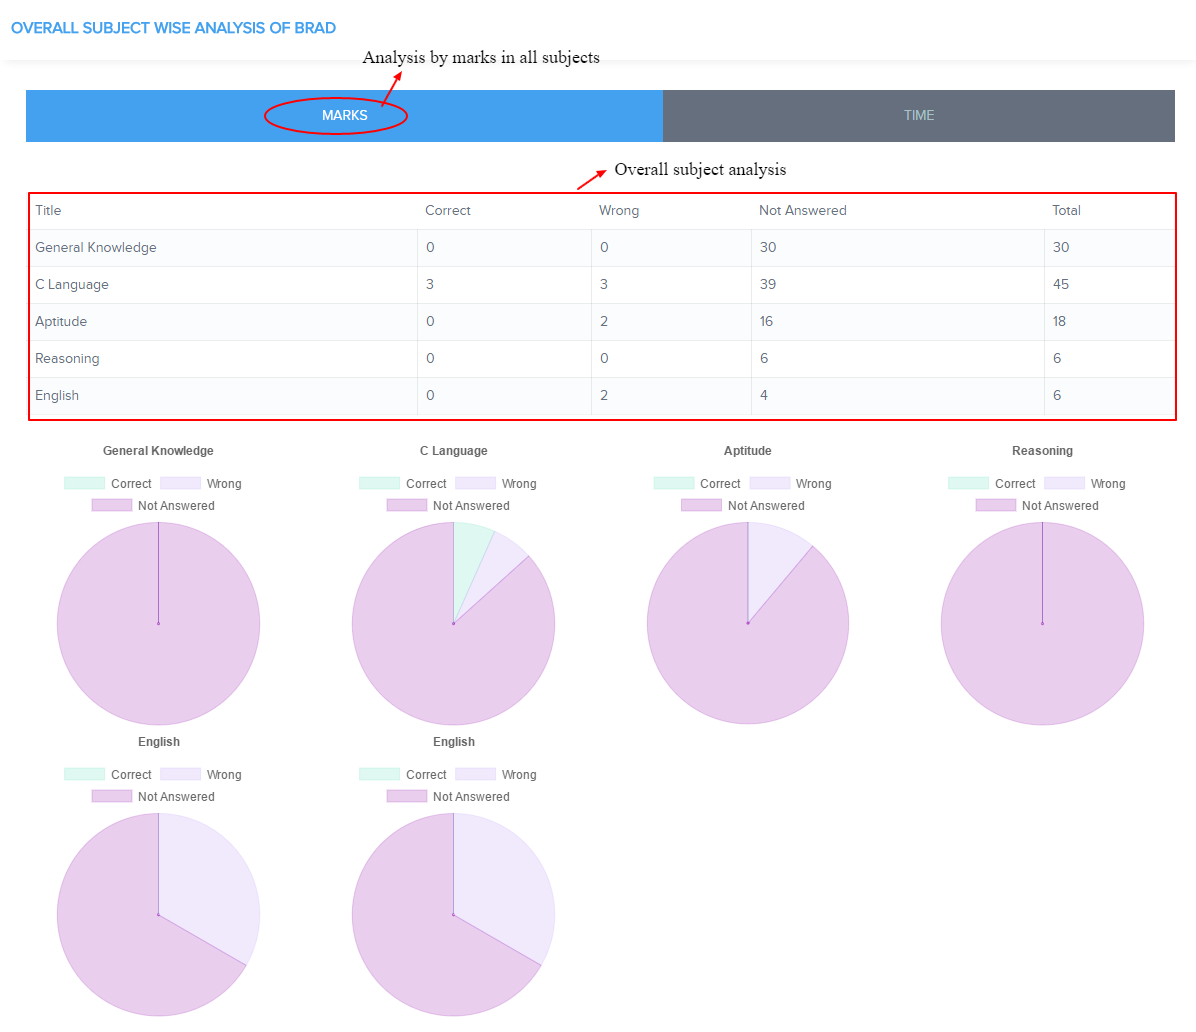
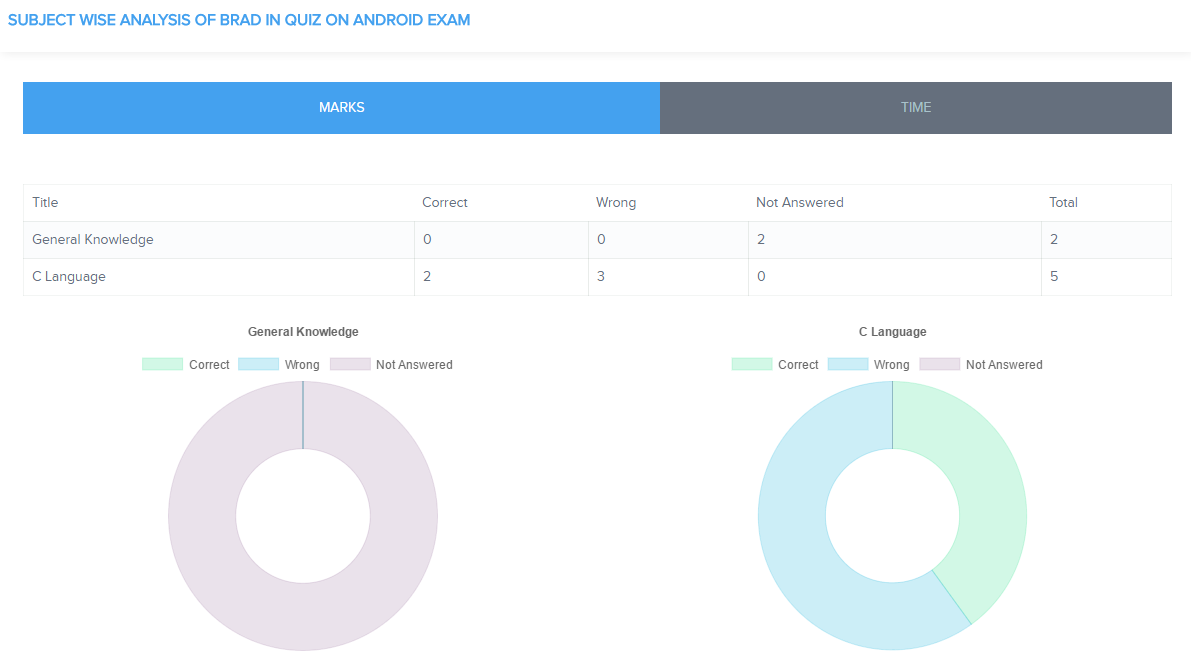
- Detailed subject wise analysis reports
- Free and paid LMS module
- Free and paid Exam series and quiz modules
Student dashboard
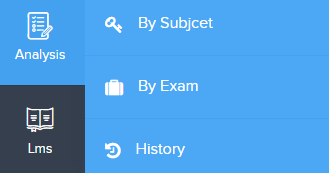
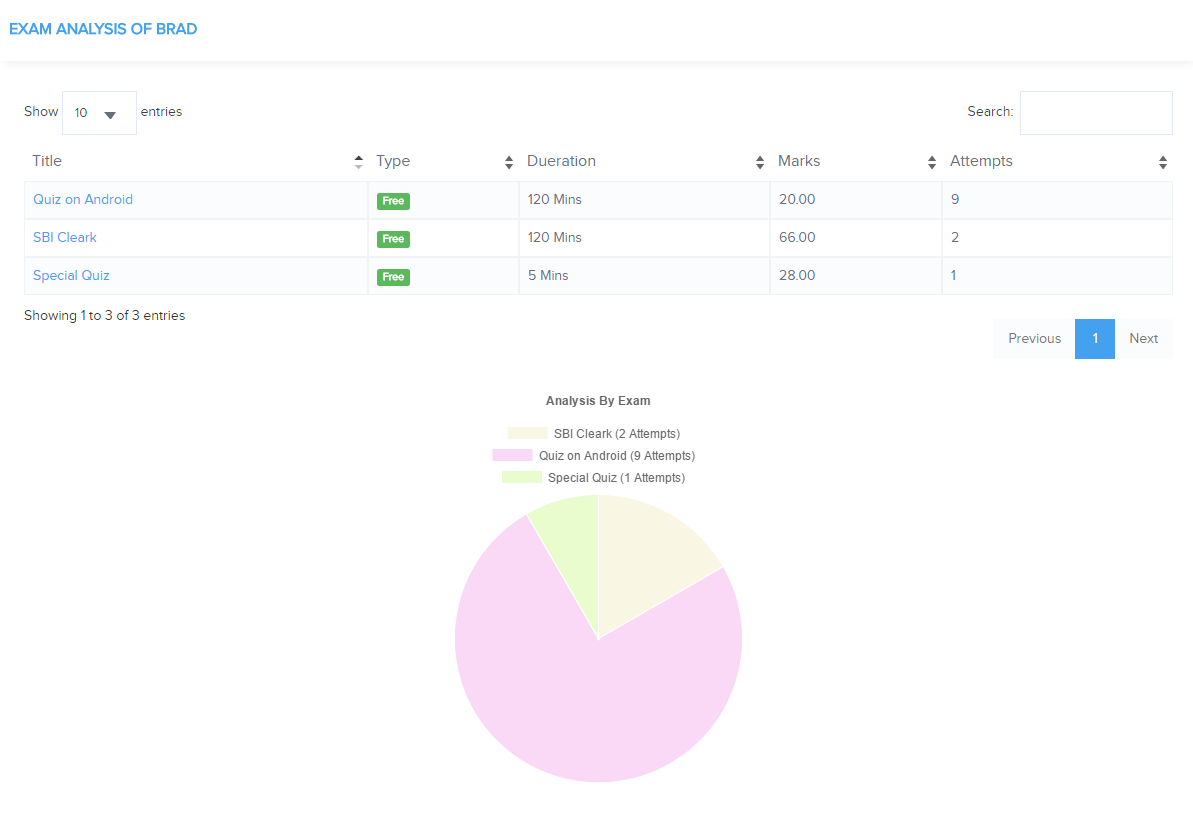
Analysis Reports
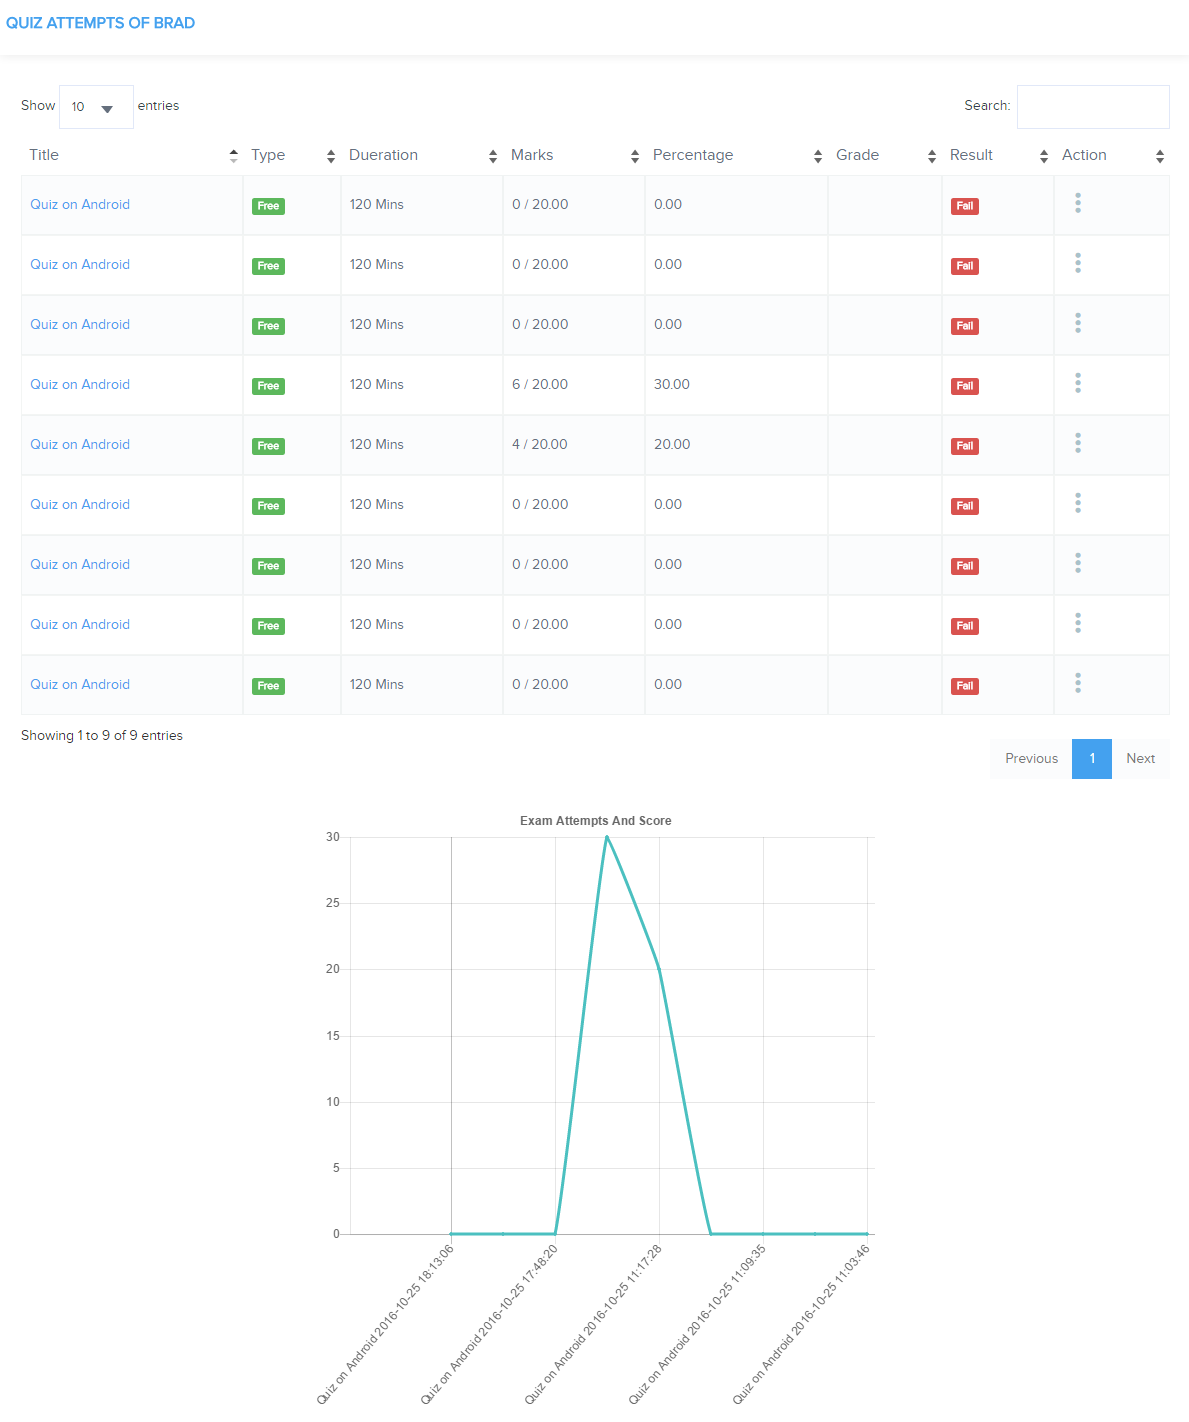
Quiz Attempts analysis
Analysis by exam
Single exam analysis
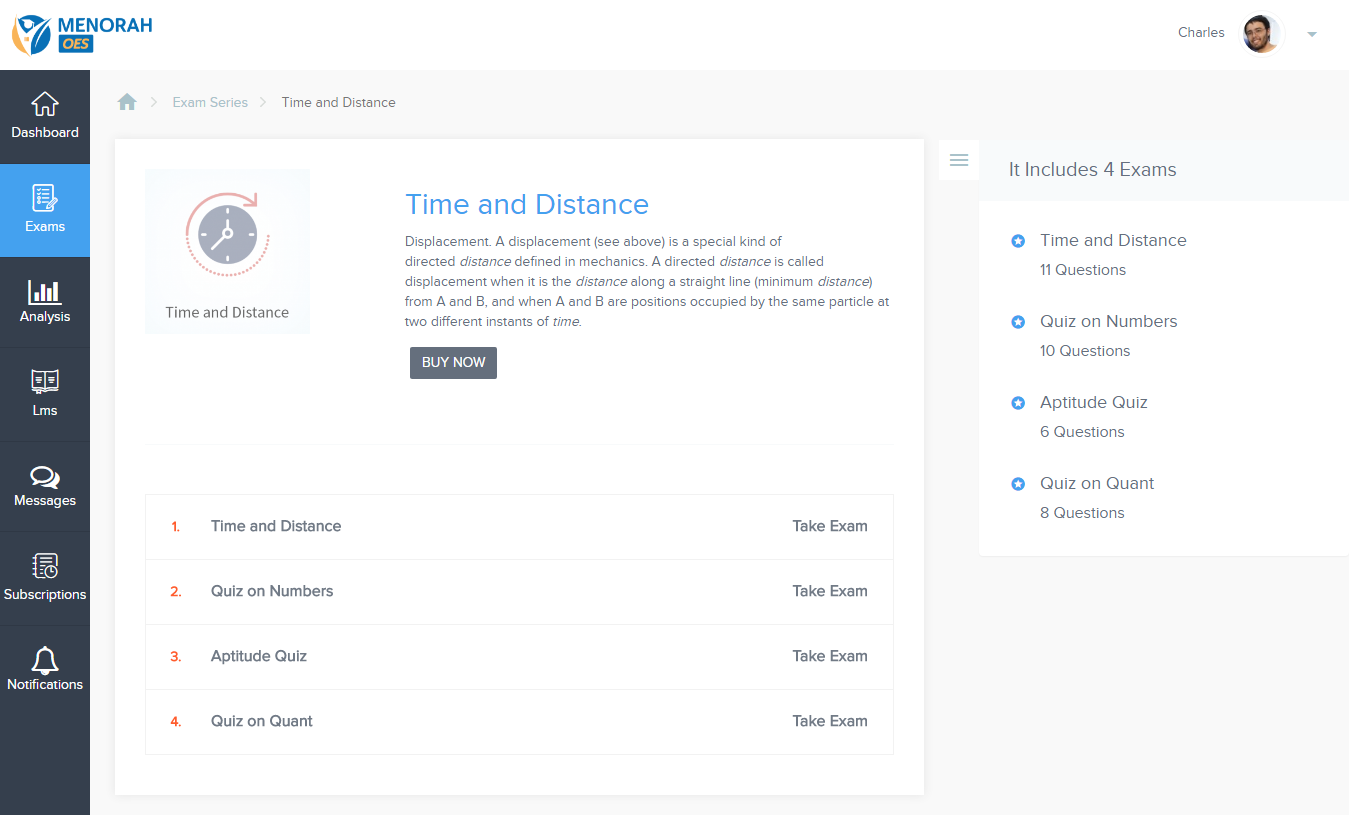
Exam series
LMS Series
Preference Settings
- Resume Builder
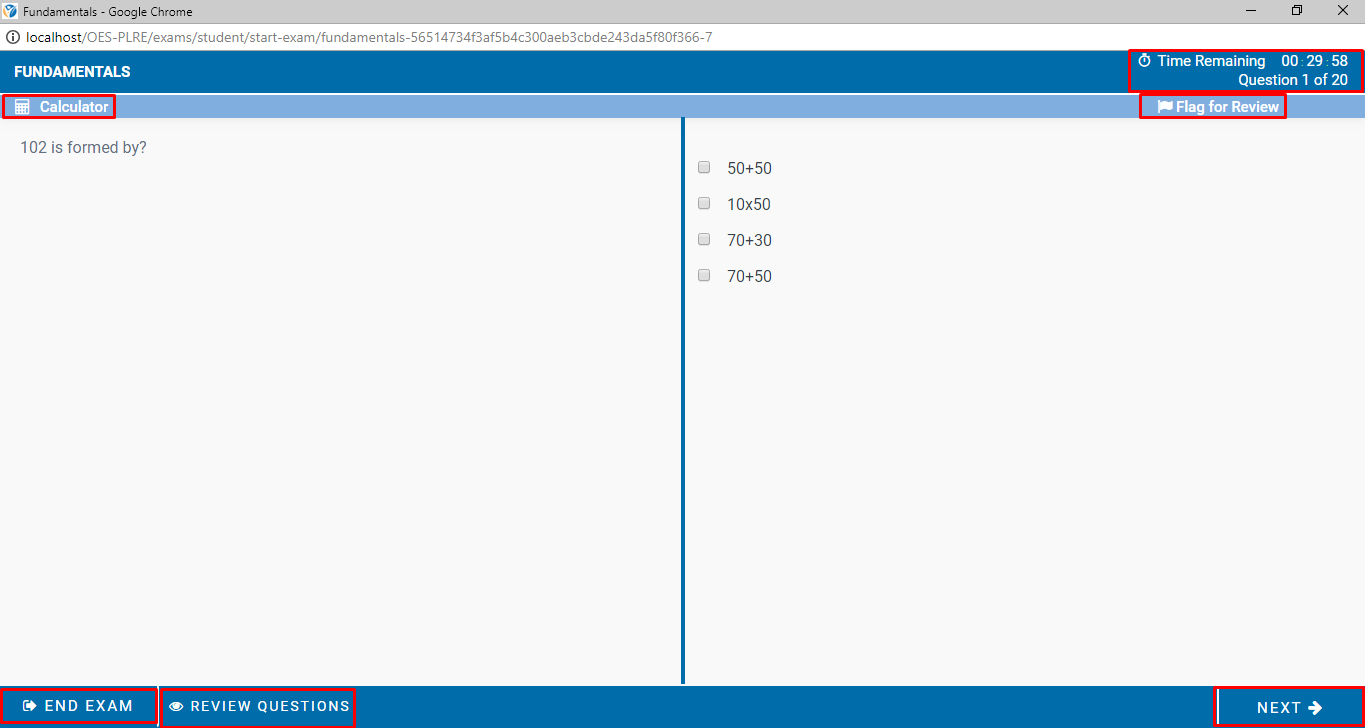
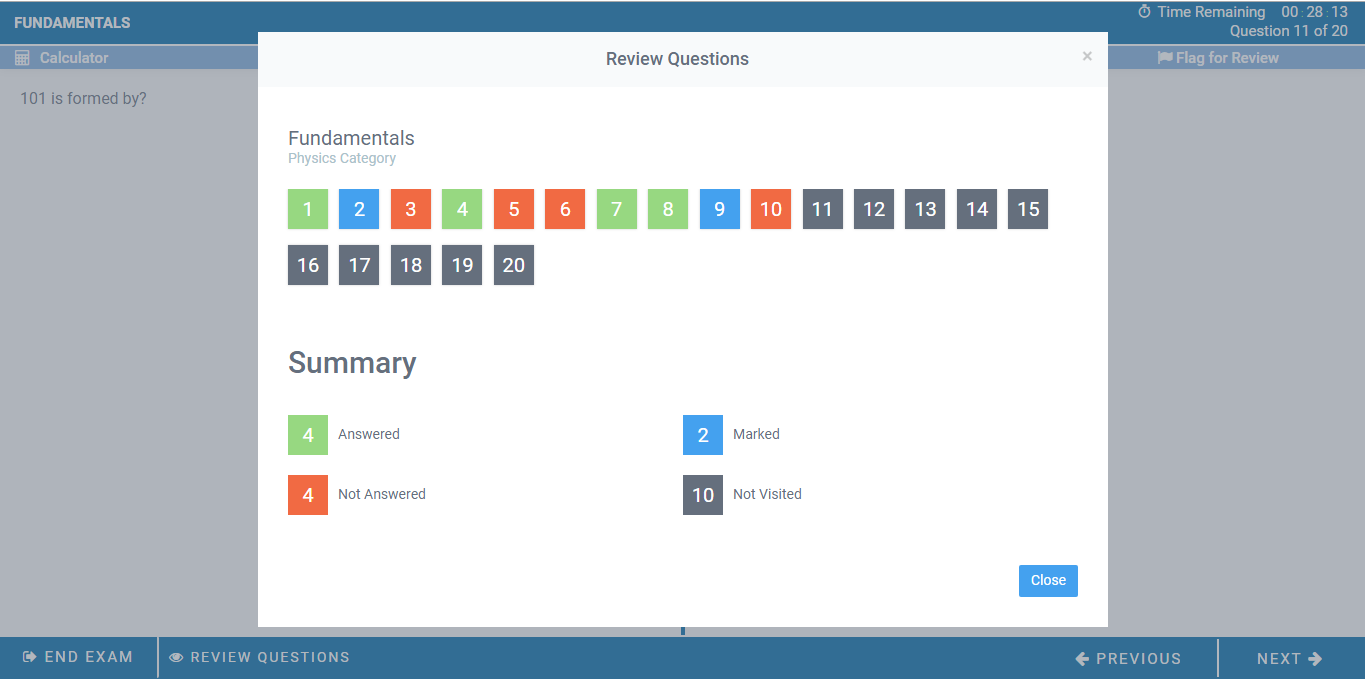
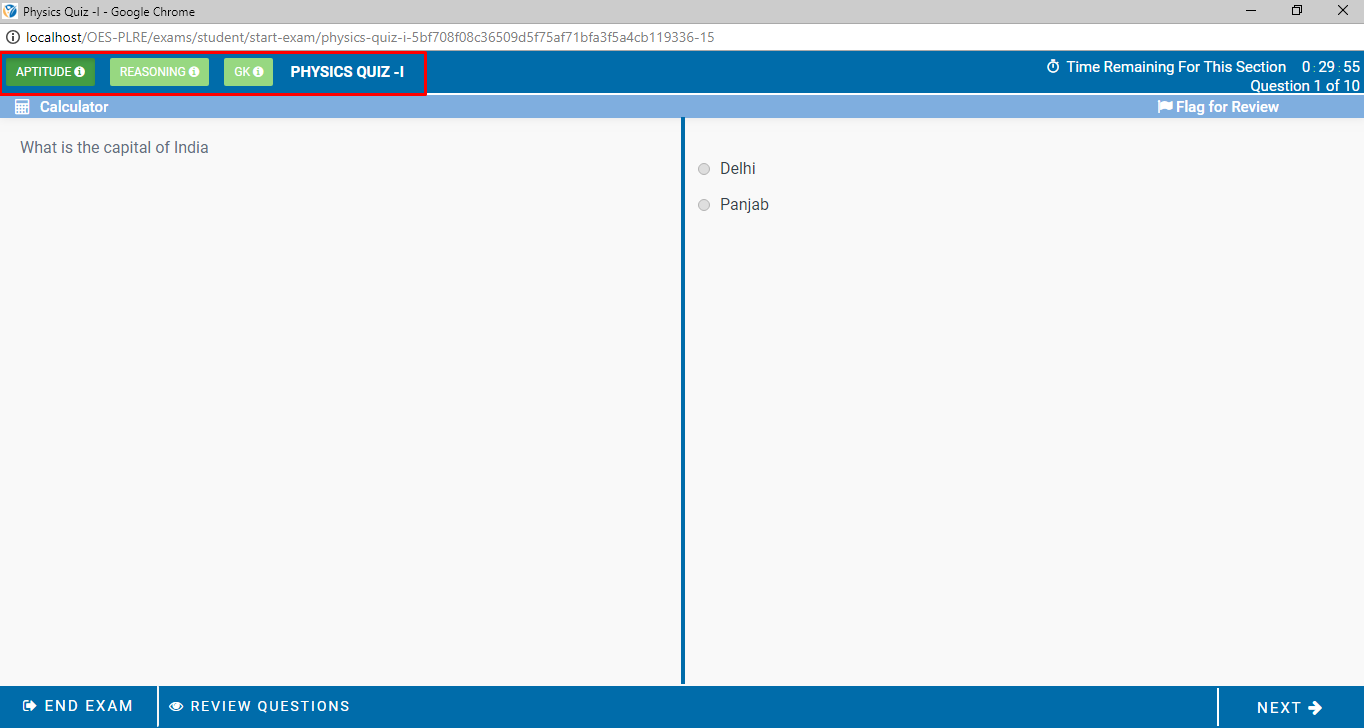
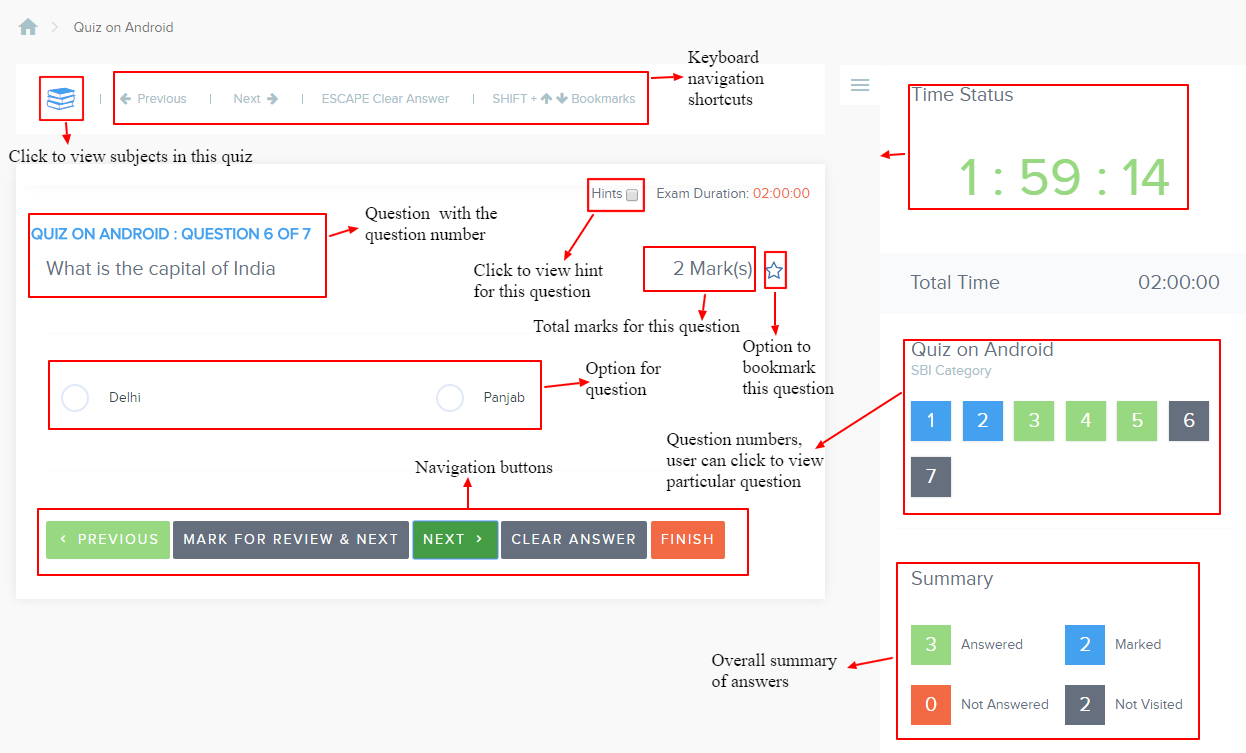
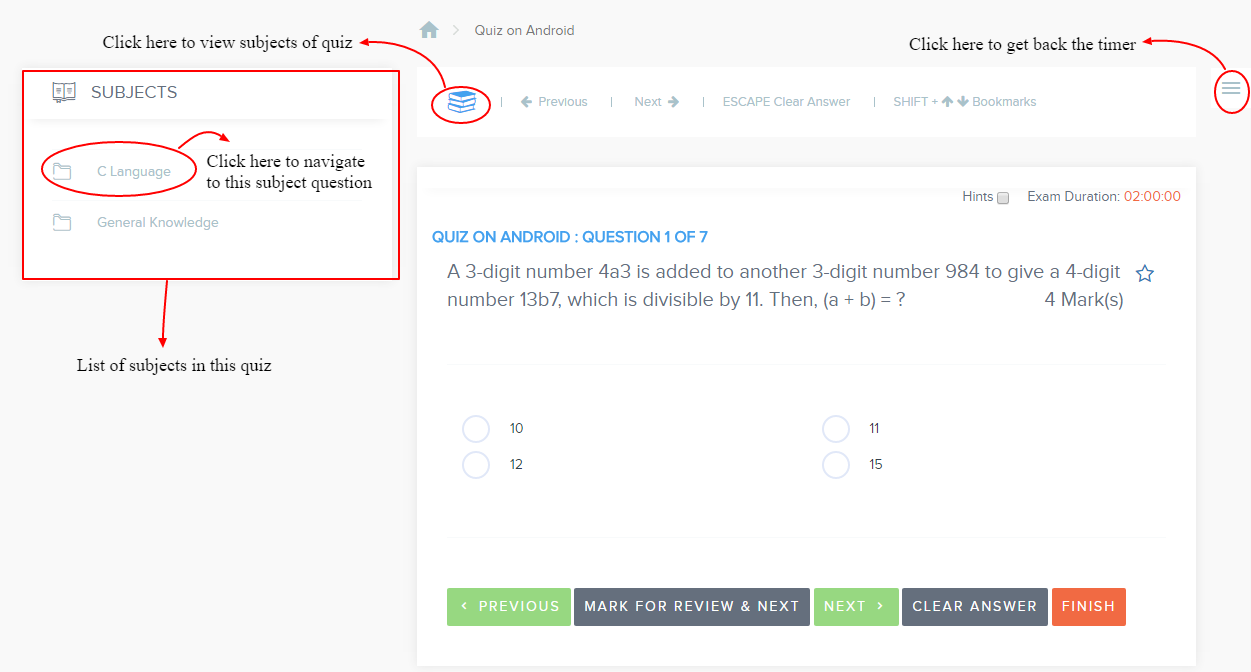
- New Exam Layout
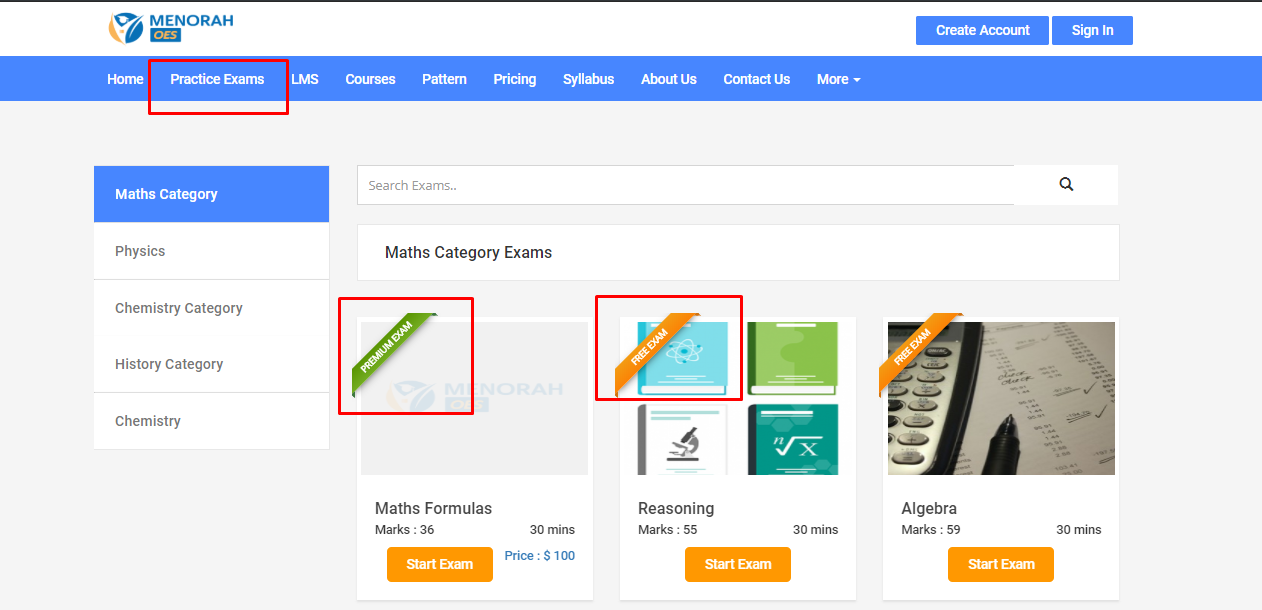
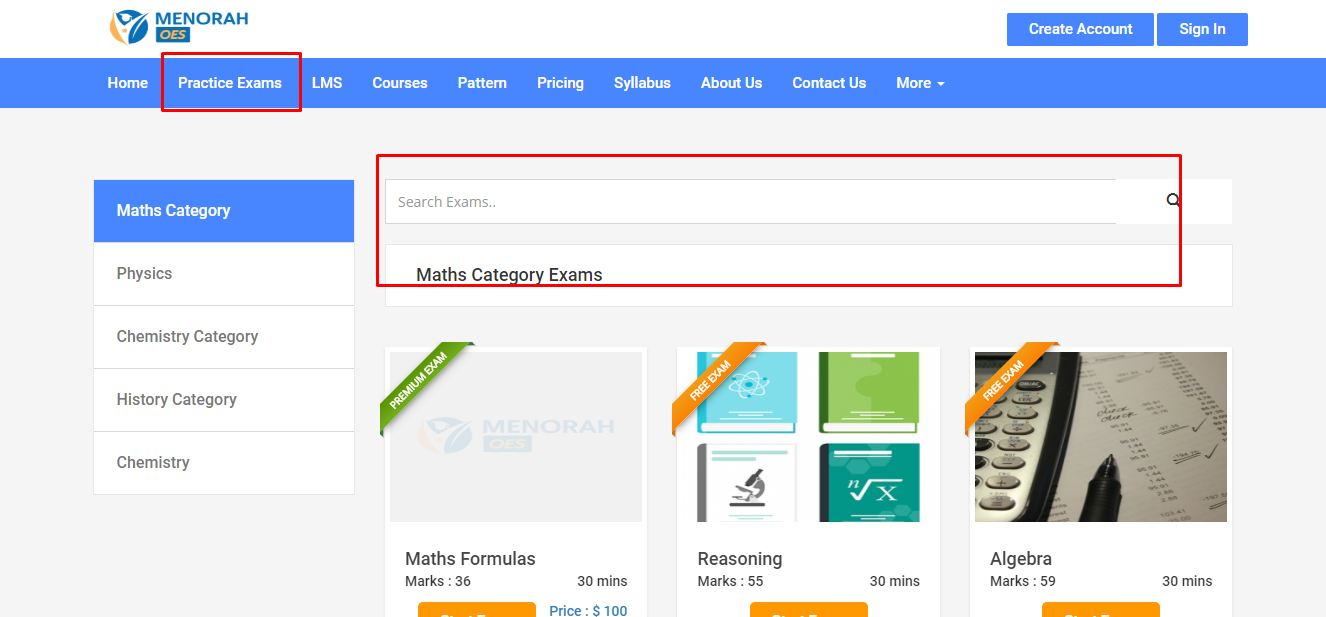
- Search feature added for Practice Exams, LMS front end
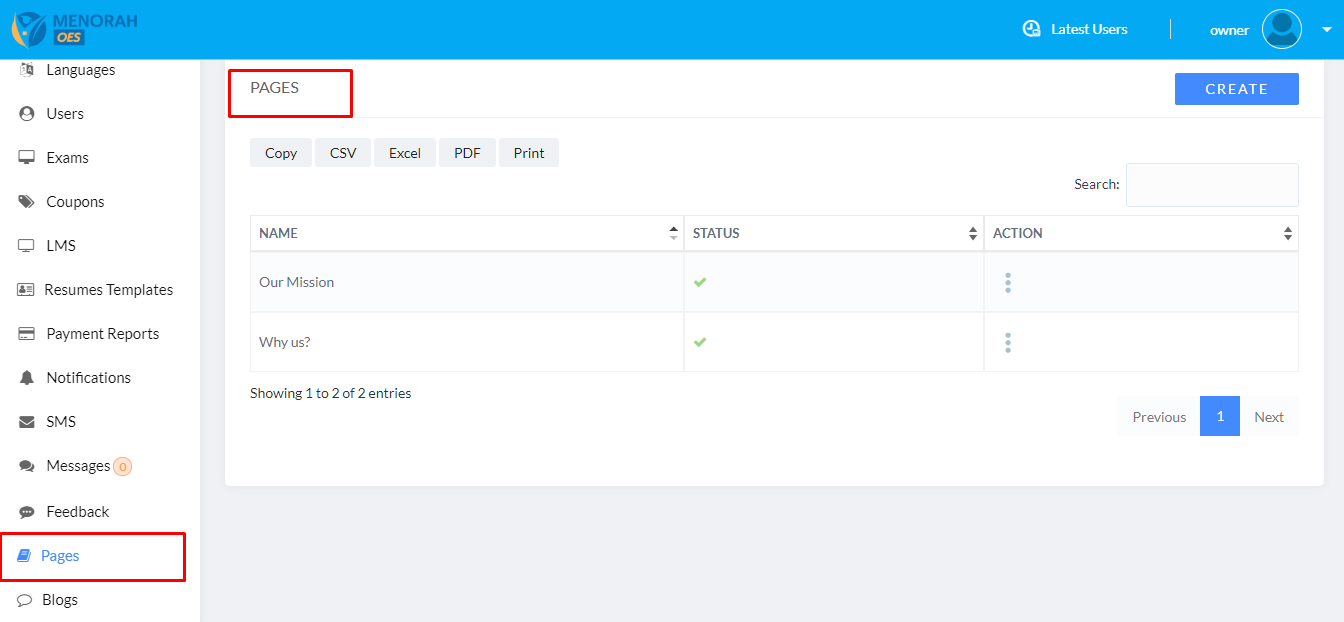
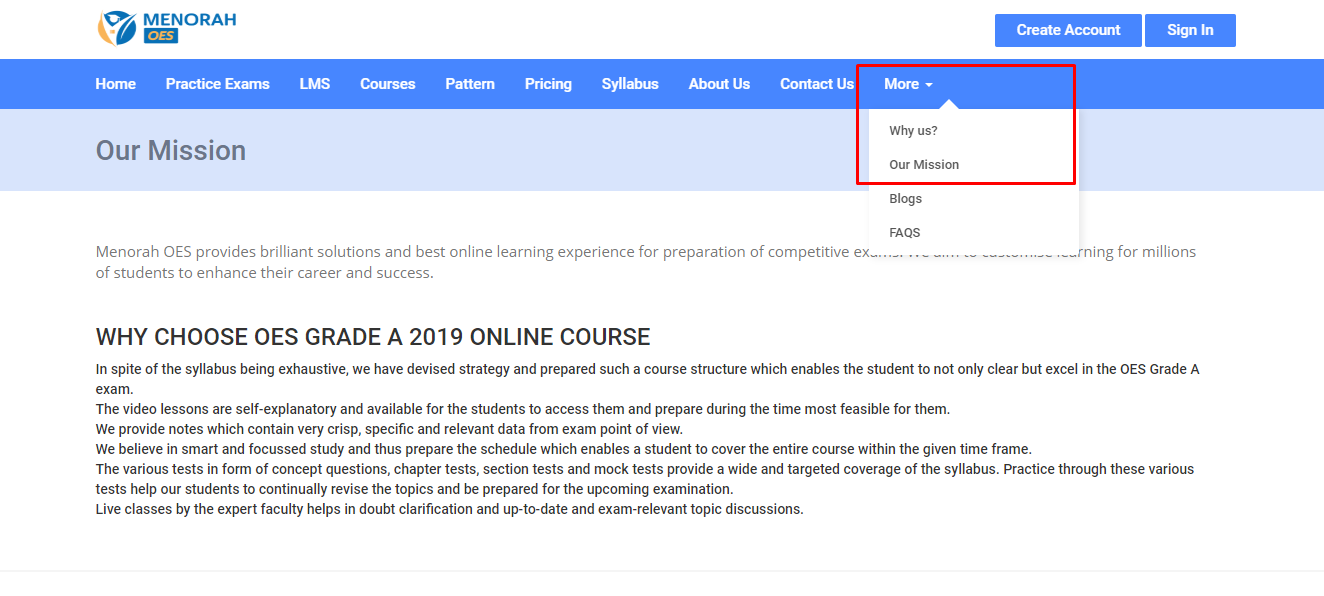
- Admin can add unlimited pages (front end CMS)
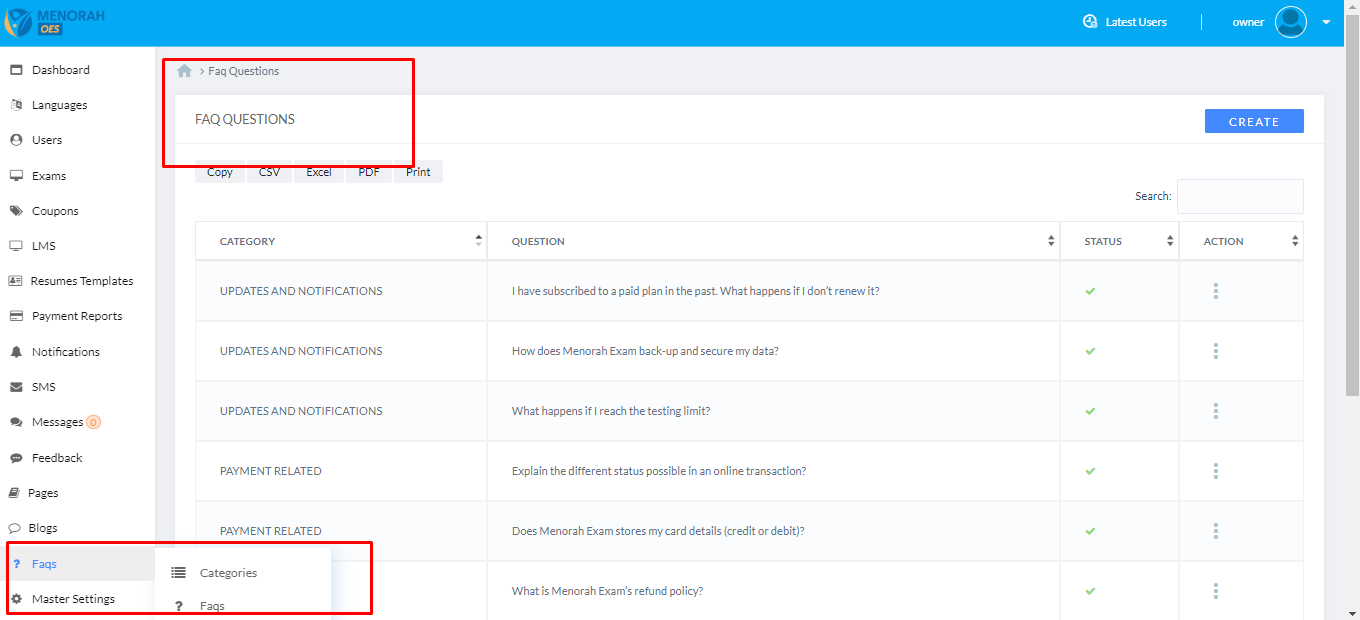
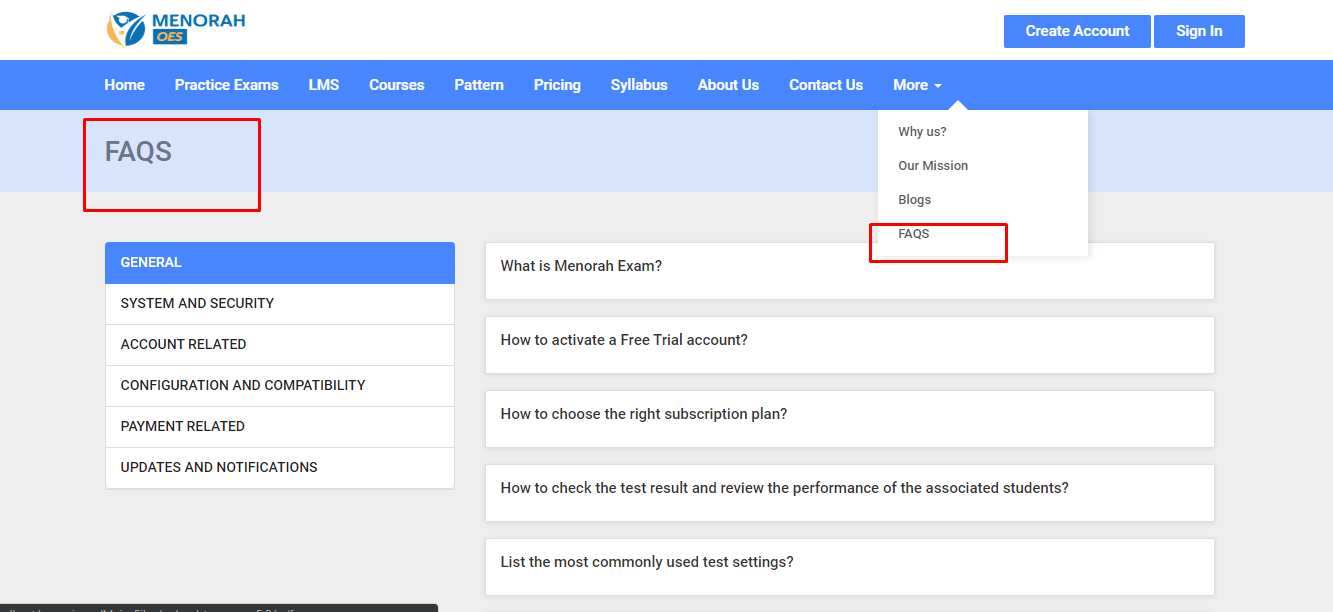
- Admin can add FAQs, which reflects in front end
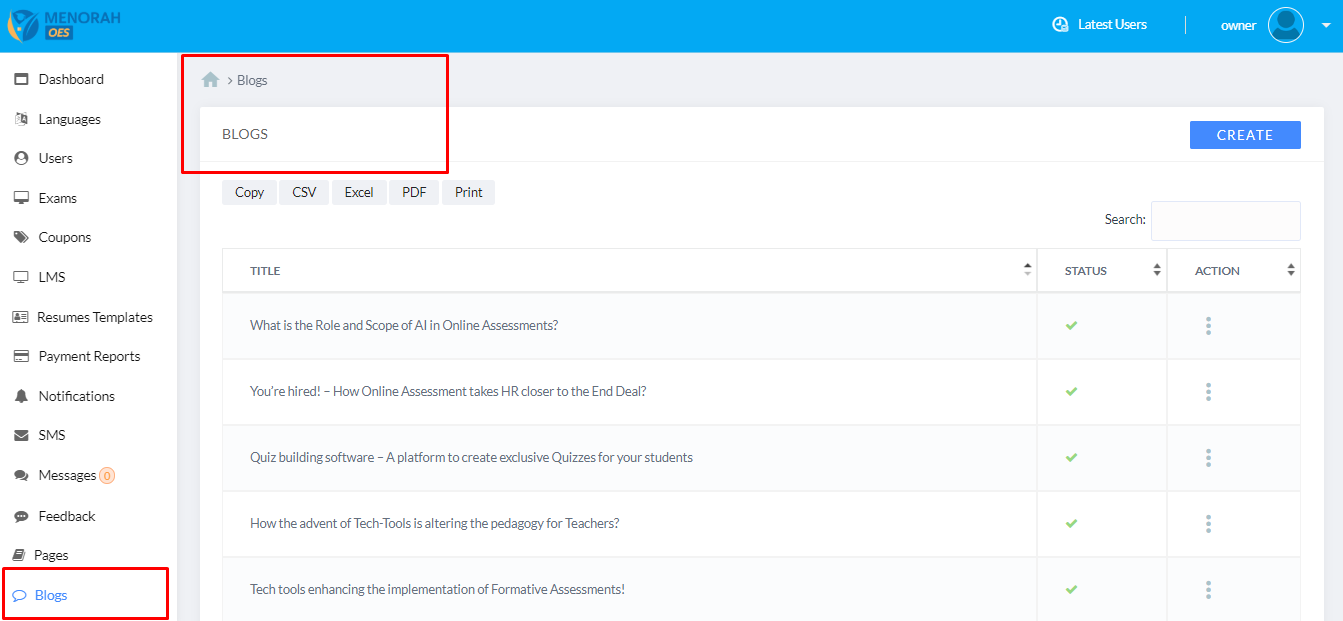
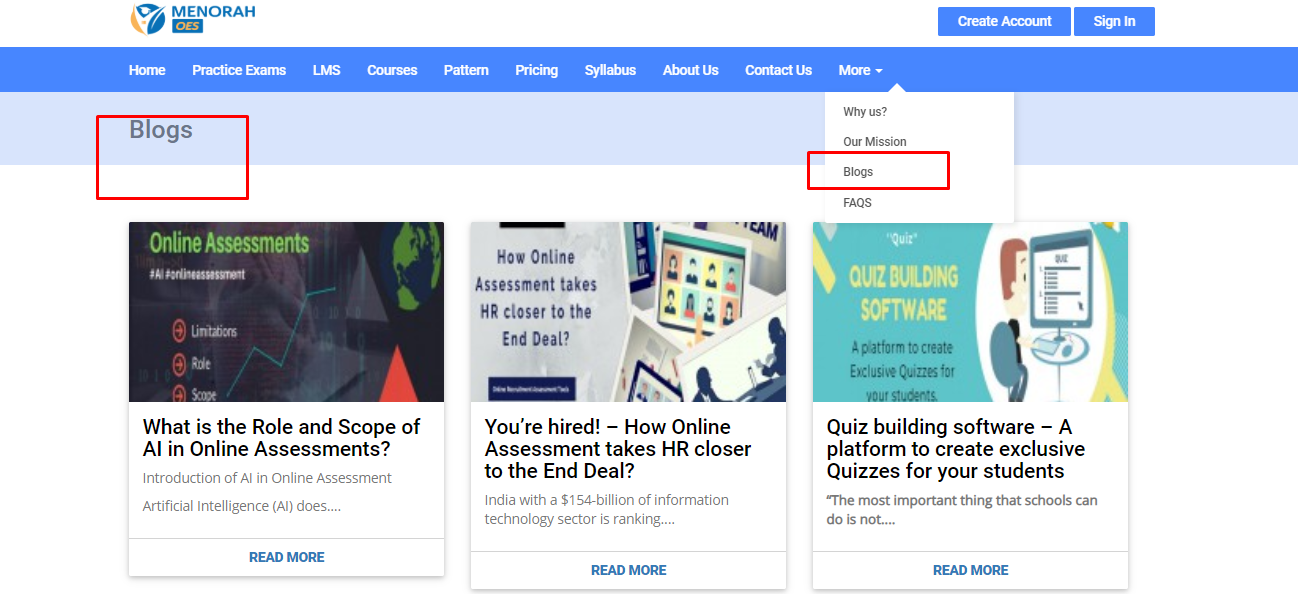
- Admin can add Blogs, which reflects in front end
- All quizzes free and paid can appear on the home page with/without registration
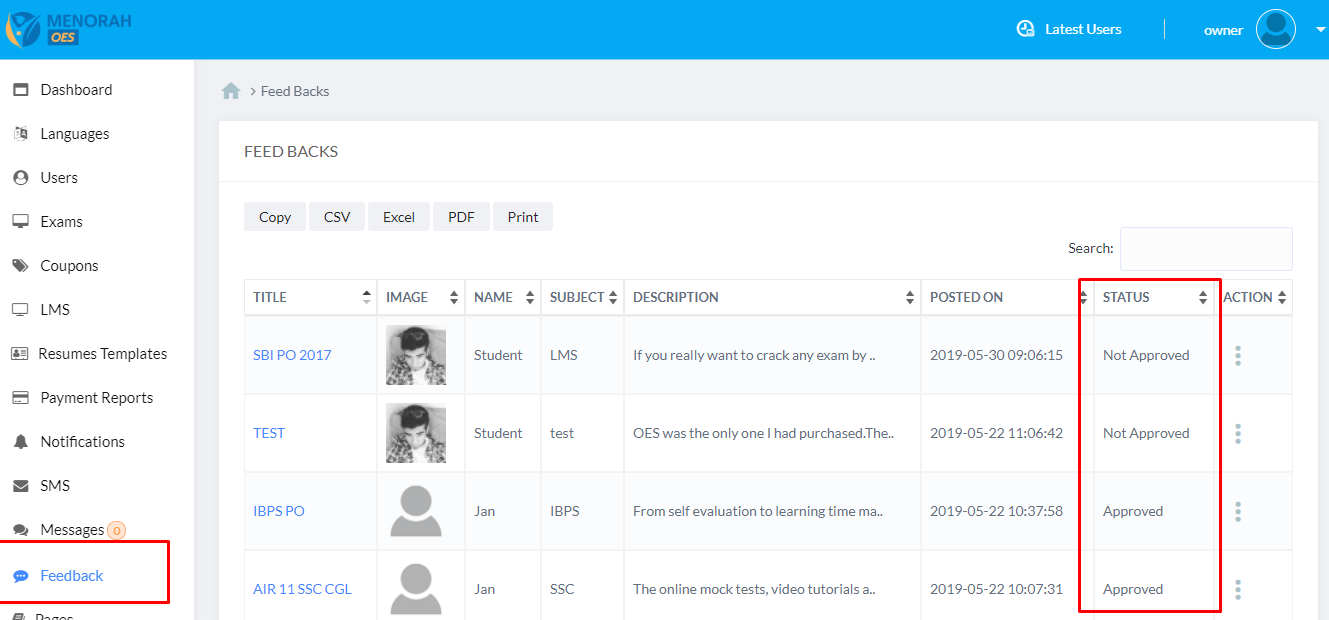
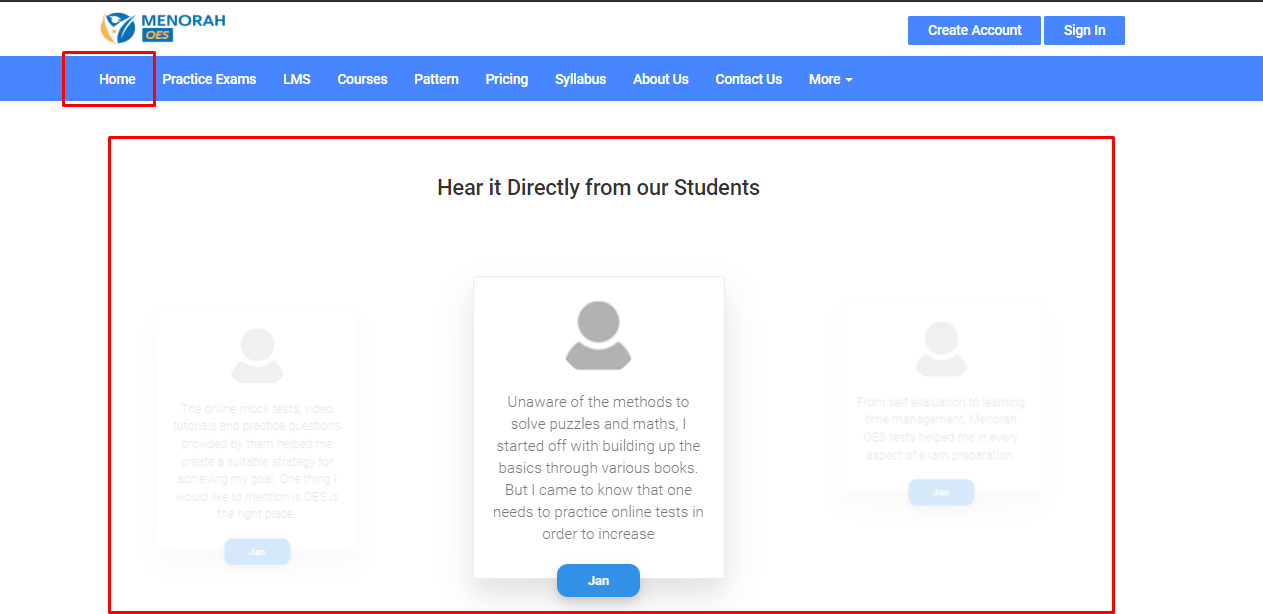
- Student feedback about system or exams based. Only admin approved Testimonies will be displayed in front end
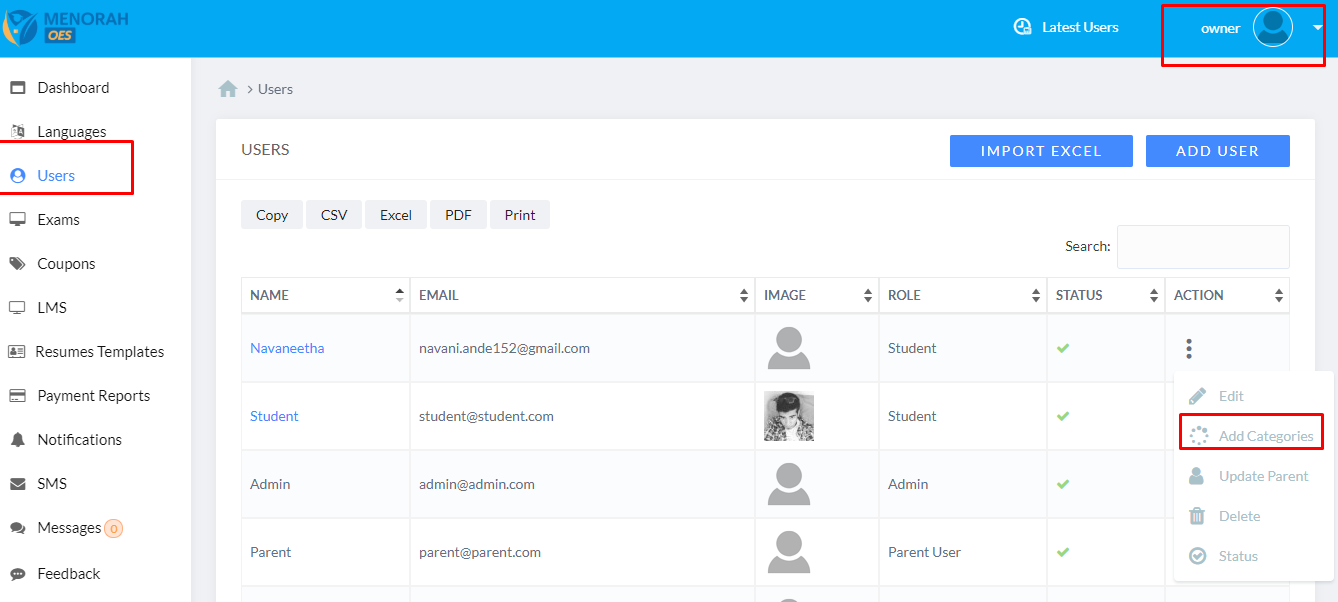
- The Administrator can assign the categories to the students
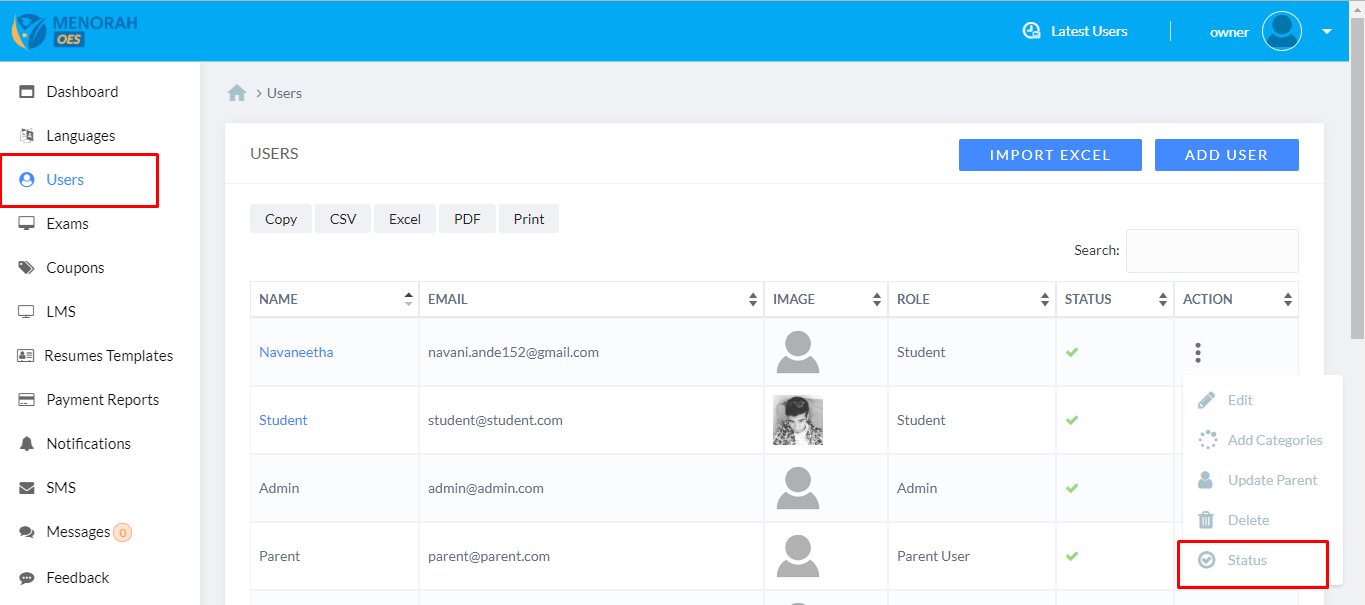
- Admin can Enable/Disable User Account
- Email Activation link for registered users

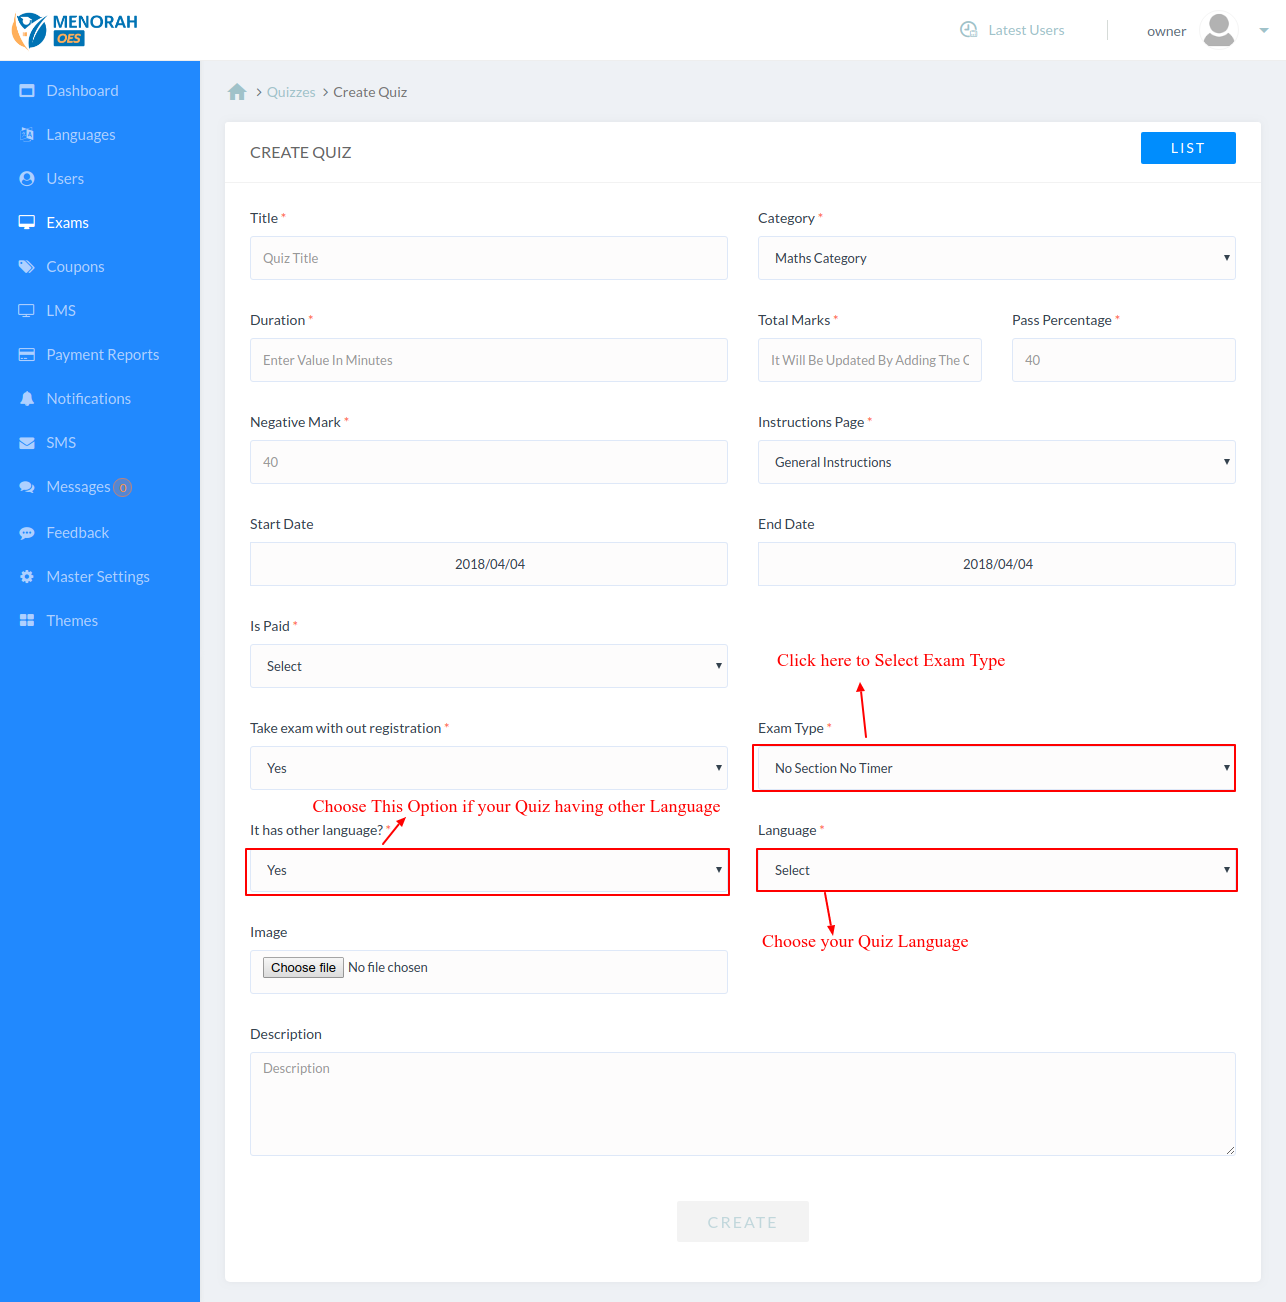
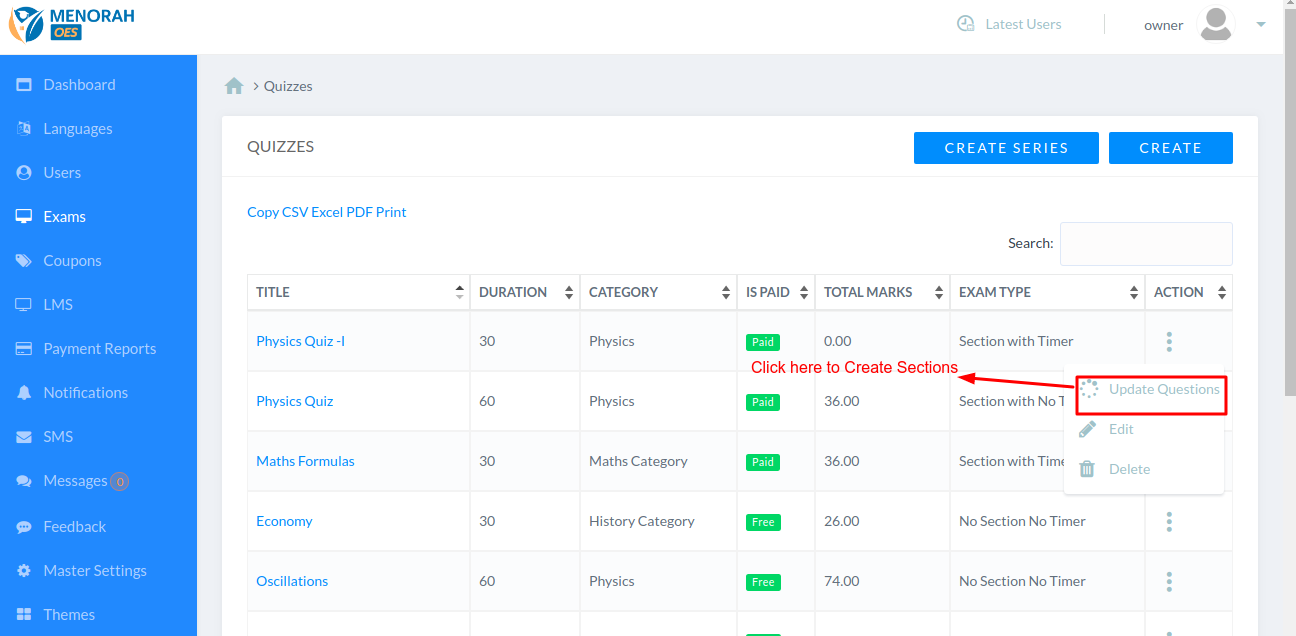
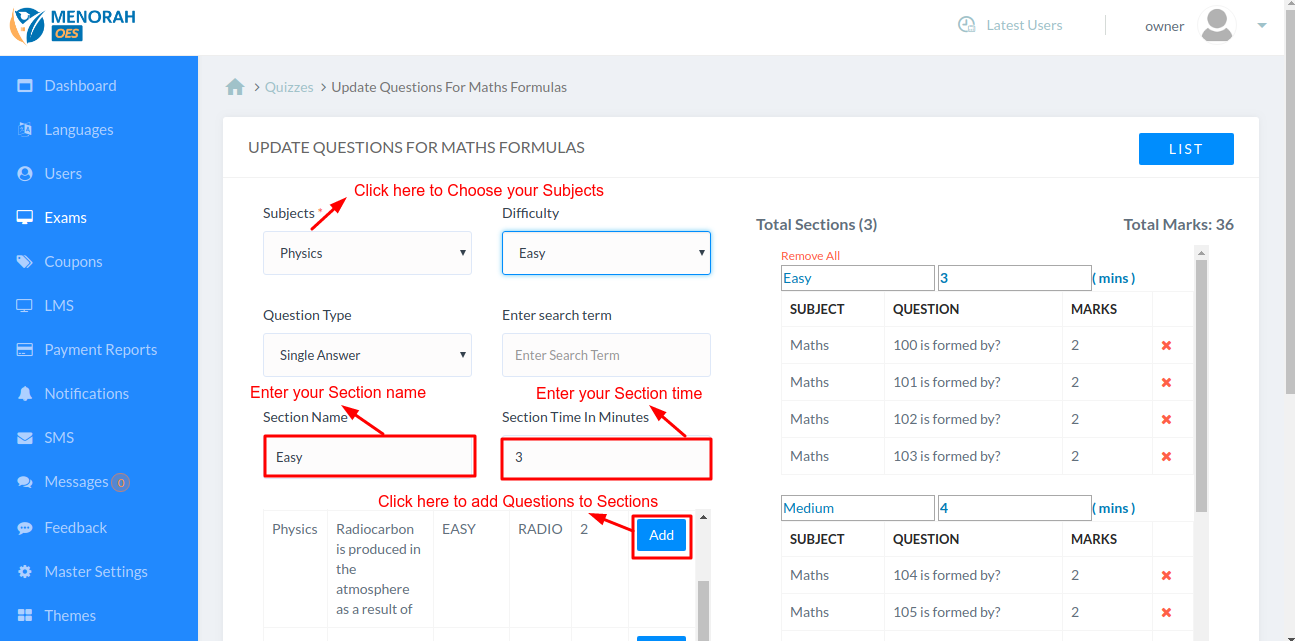
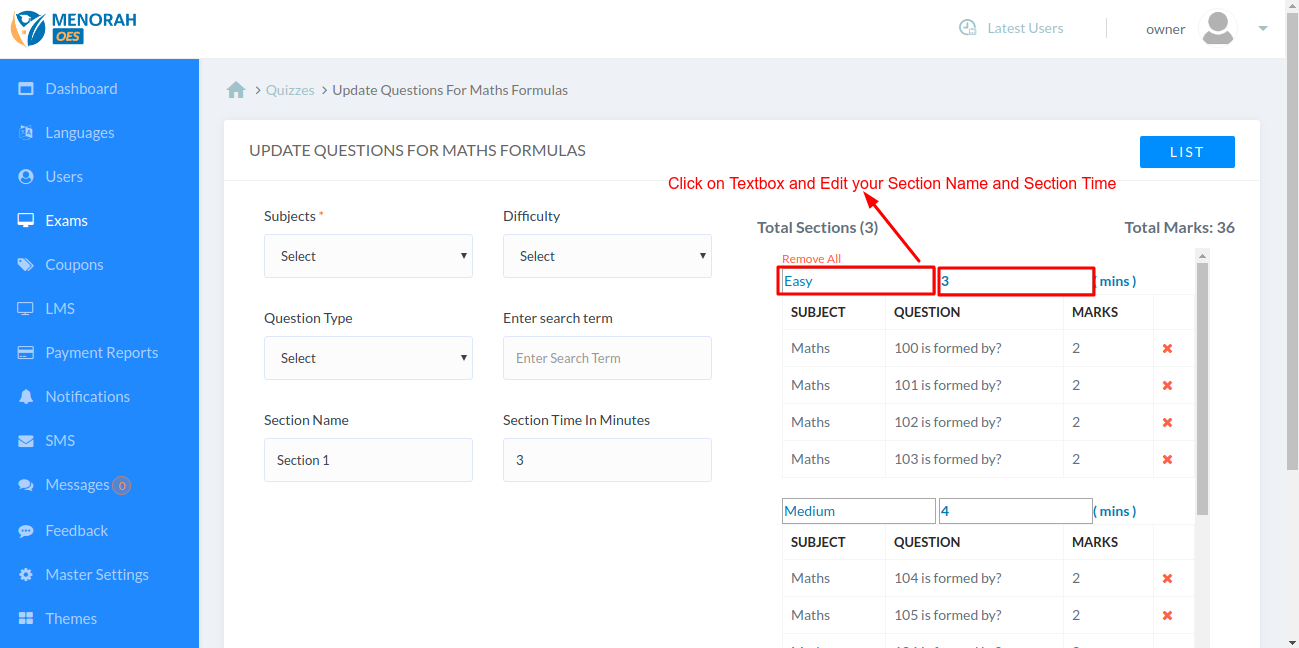






















Facebook App Setup
Overview:
This document provides instructions on how to properly setup a Facebook application so that users can login/register via Facebook on your site.
Creating a new app
To allow users to login to your site with their Facebook account you need to create a Facebook app. To create a new Facebook app please do the following:
Note: After clicking this button you may be presented with a security check
Select "Set Up" for "Facebook Login"
Select "Web option”
Set your "Site URL"
Skip all others step of the process.
Settings Tab ➔Basic
Settings Tab ➔Advanced
App Restrictions - You can restrict your app to specific age range and countries if your site references alcohol or an adult nature site.
Products Tab
Client OAuth Settings
You just need to enter your site's login, register and account's social tab URIs into the Valid OAuth redirects URIs field.
You can just leave the Deauthorize Callback URL blank then click on save changes.
App Review Tab
Once you have done all these steps you can go to the App Review tab to make the app live. The app does not need to be submitted for approval as the app will only be requesting the standard data from users. To make the app live all you need to do is click the switch button from No to Yes:
App Setup Complete
Once you have done all that, the app is now complete. You should now add the App ID and App Secret into the Site Settings→ Social Logins if you have not already done so.
Google + App Setup
Overview:
This document provides instructions on how to properly setup a Google+ application so that users can login/register via Google on your site.
Enabling API
To allow users to login to your site with their Google+ account you need to create a Google+ project and enable Google+ API. To enable API and create new Google+ project please do the following:
Go to Social APIs - Google+ API
Enable Google + API
Creating new project and adding credentials
Enter the project details in the pop-up that appears and click the “create” button
Go to Credentials sidebar and add credentials OAuth Client ID
Which API are you using - Google+ API
Where you will be calling the API from - Web Browser
Create client ID
Credentials
After the client ID is created you will see some information appear on the page
Copy and paste the Client ID and Client Secret into the Google+ tab on the Settings>Site Settings > Social Login page to connect your site to your App.